Wednesday, September 29, 2010

Creamy Tomato-Basil Soup

My husband and I are fanatics of creamy tomato-basil soup. We have probably tried it wherever it's offered, Panera Bread, Cosi, Nordstrom Cafe and La Madeleine - to name a few - and we both have our favorites. Mine is Nordstrom Cafe's version hands down. It's just the right amount of creaminess and doesn't have an overbearing tartness that affects some of the other soups. I don't know how they do it, but I suspect there is no shortage of salt, butter and cream in the mix. So after I went tomato picking at a local pick-your-own farm last weekend and came home with 12 beautiful, ripe tomatoes, I figured it would be a good time to try my hand at making this favorite at home.
I had seen a recipe in the Williams-Sonoma catalog that came in last week's mail so I went on their website and sought it out. In the process I came across a different recipe on there for a Cream of Tomato Soup with Pancetta. I used this recipe as a base but made some changes, basically because for one, I didn't like the idea of throwing raw tomatoes into the soup. So I roasted mine first. Secondly, the WS recipe seemed to be a little wimpy on the flavors so I kicked up the amount of garlic and crushed red pepper and added in some basil and white wine as well. You can access the original recipe here and see mine below with the changes. We really liked this soup. It had a nice, hearty consistency and a great overall flavor. I served it with, no surprise here, a grilled cheese. But not just any grilled cheese, this was a gourmet panini version stuffed with fresh buffalo mozzarella, bacon and tomato. The buffalo mozzeralla is so buttery and gooey when it's warm and made a great base for grilled cheese. Now that fall is here, I can't think of a better way to say goodbye to summer and hello to cooler temperatures with this "last of the tomato harvest" treat. Enjoy!

Creamy Tomato-Basil Soup

Photobucket
12-14 tomatoes, halved, seeds squeezed out
2 Tbs. olive oil, plus more for drizzling over tomatoes
3 slices of bacon, chopped
4 garlic cloves, chopped
1/2 onion, chopped
1/2 tsp. sugar
1 tsp. red pepper flakes
1/2 cup white wine
2 cups water
1/4 cup Arborio rice
1/4 cup heavy cream
a handful of shredded fresh basil leaves
Salt and freshly ground pepper, to taste

Directions:
Preheat oven to 350. Place your halved tomatoes on a foil-lined baking pan and drizzle lightly with olive oil. Season lightly with salt and pepper and set in the oven to roast until softened, about 30 minutes.
While your tomatoes roast, saute the bacon, garlic and onions in the olive oil until softened and the bacon has browned slightly.
Add your rice and toss with juices and grease from onions and bacon. Saute another 3 to 5 minutes and then add your 1/2 cup of white wine. Allow the mixture to thicken slightly and then add the roasted tomatoes (you can remove the tomato skins before adding them if you'd like - they should remove quite easily after being roasted) along with any juices that released while cooking them, the sugar, and red pepper flakes. Pour in your two cups of water and bring to a simmer. Cook until the rice is tender, about 20 minutes.
Finally, using an immersion blender, puree your soup. Alternatively, you can place it in small batches into a blender and puree. Just don't put too much hot soup in at one time because it will expand and blow the top off your blender if you are not careful.
Once it is pureed, stir in your shredded basil. Ladle hot soup into bowls and serve with some crusty bread or hot sandwiches.

Thursday, September 23, 2010

Toffee Bar Brownie Torte

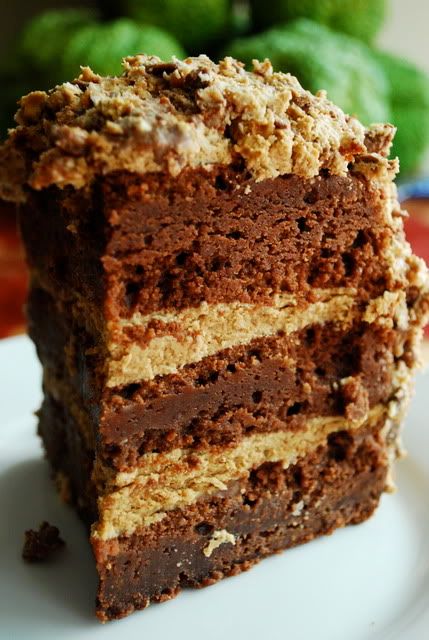
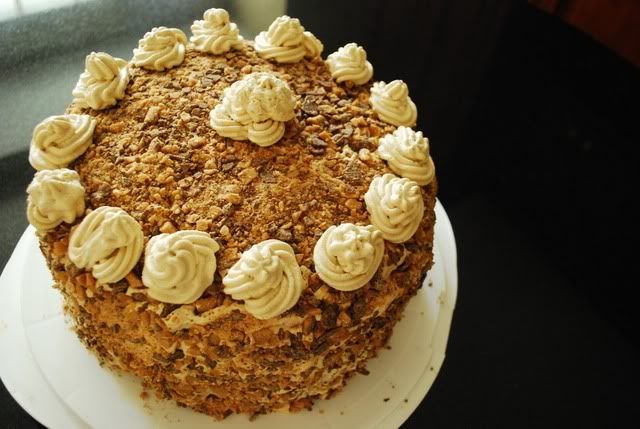
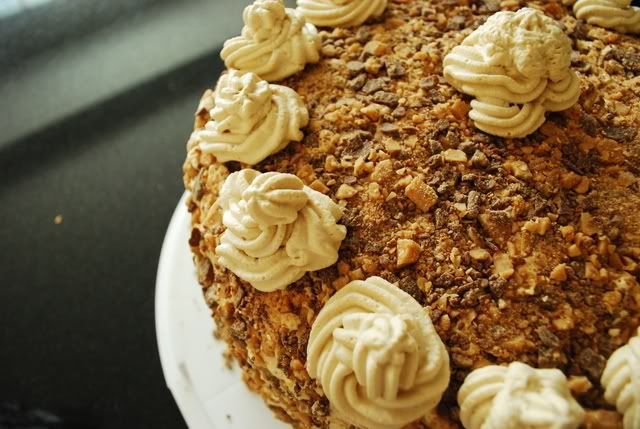
Well, you say it's your birthday? It's my birthday too!! And...that's why I requested this absolutely decadent and sinful cake I spotted on Annie's Eats . My 32nd birthday (yahoo blah blah blah) was this past Sunday and as usual my mom offered to make me a cake. I'm not really a big cake eater. It has to be really spectacular for me to take in so many empty calories. I love brownies and when I saw this cake, it just looked like one huge glorified brownie. And that's exactly what it is and that is in no way, shape or form anything to shake your head at! This cake is serious.
Photobucket
Seriously chocolatey, seriously rich and seriously heavy! I swear the daggone thing weighed 25 lbs! It just looked like the perfect indulgence for a birthday cake so I forwarded the recipe to my mother and she gladly accepted the challenge. She did an awesome job and turned out an excellent cake. So excellent that when I shared it with my co-workers I got a request from someone for one. So I took a shot at this cake myself and made it for my coworker friend. As Annie points out on her blog, despite the long list of ingredients this cake comes together pretty easily. It's not inexpensive to make though - the chocolate, marscapone and espresso alone cost anywhere from $25.
Photobucket
It's so worth it though. The chocolate and coffee flavors play together beautifully and are offset by the salty, sweet crunch of the toffee bits. All you need is a thin sliver to be totally satisfied so this cake will either be something you share with LOTS of friends, or something that you enjoy for a whole week, or more! Oh and by the way, it tastes even better with a scoop of vanilla ice cream. Yes I am speaking from firsthand experience. And yes I know what this cake is costing me in jean sizes thank you very much. Enjoy!

Toffee Bar Brownie Torte
Source: copied from Annie's Eats who cites The Pastry Queen by Rebecca Rather
Photobucket

For the brownies:
2 cups (4 sticks) unsalted butter
16 oz. bittersweet chocolate, coarsely chopped
3 cups sugar
8 large eggs
2 tbsp. vanilla extract
2½ cups all-purpose flour
½ tsp. salt

For the frosting:
3 cups chilled heavy whipping cream
1/3 cup confectioners’ sugar
1 tsp. vanilla extract
2 tbsp. instant espresso powder dissolved in 2 tsp. boiling water, chilled

For the filling:
16 oz. mascarpone cheese
2 tbsp. instant espresso powder dissolved in 2 tsp. boiling water
½ cup confectioners’ sugar
2 tsp. vanilla extract
Pinch of salt
1 cup reserved frosting (above)
For garnish:
2 cups chopped toffee bits or finely chopped toffee bars

Directions:
To make the brownie layers, preheat the oven to 350˚ F. Grease and flour the edges of three 9-inch round cake pans and line the bottoms with parchment paper. Combine the butter and chocolate in a large heatproof bowl set over a few inches of simmering water. Continue heating until the butter and chocolate are melted and smooth, stirring occasionally with a spatula. Remove the bowl from the heat and set aside. Transfer the chocolate mixture to a large mixing bowl. (If your heatproof bowl is very large, transfer to a new bowl is not necessary.) Whisk in the sugar, eggs and vanilla extract until the mixture is smooth and glossy, about 1 minute. Stir in the flour and salt, and mix just until the dry ingredients are incorporated.

Divide the batter evenly between the prepared baking pans. Gently smooth the batter in the pans. Bake 20-25 minutes, until the brownies are just firm to the touch. Transfer to a wire rack and let cool in the pans 30 minutes. Then run a knife around the edge of each pan and invert the brownies onto the rack to cool completely.

To make the frosting, add the chilled heavy cream to the bowl of an electric mixer fitted with the whisk attachment. Whip on medium-high speed until medium-soft peaks form. Blend in the sugar, vanilla and espresso mixture, whipping just until combine. Continue to whip until stiff peaks form. Reserve and refrigerate 1 cup of the frosting for use in the filling. Set aside the rest of the frosting.

To make the filling, in the bowl of an electric mixer fitted with the paddle attachment, combine the mascarpone, espresso liquid, sugar, vanilla and salt. Beat on medium speed until well blended and fluffy, about 2 minutes. Gently fold in the reserved 1 cup of frosting with a spatula.

To assemble the torte, lay 1 of the brownie rounds to a large serving platter. Spread half of the filling mixture evenly over the top. Layer with another brownie round, and the remainder of the filling. Top with the final brownie layer. Cover the top and sides of the cake with the frosting. Garnish with the toffee bits to cover the top and sides of the cake. Use any remaining frosting to pipe decorative swirls around the top edge of the cake, if desired. Refrigerate until ready to serve.

Monday, September 20, 2010

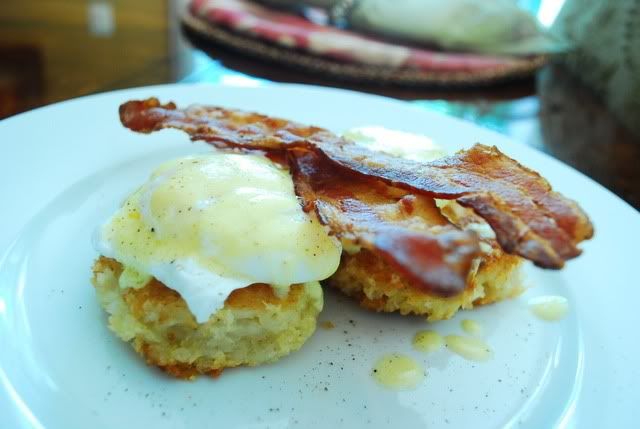
Eggs Benedict on Risotto Cakes

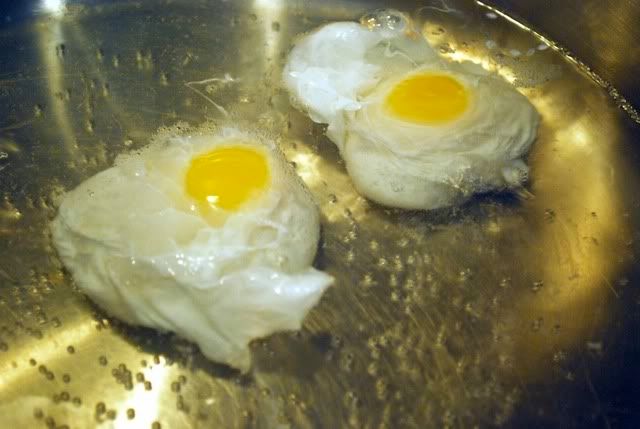
Ok before we discuss how delicious eggs benedict are served over hot, crispy risotto cakes, it needs to be said that I've discovered the secret, my friends. The secret to making THE PERFECT poached egg. After a bit of research, and much trial and error, I've found the best method for poaching an egg here.
My first attempt at poaching was a bit of a mess. I had bought one of those poaching pans that you put above steaming water. Well, that was a complete disaster. My eggs stuck to the pan, my yolks hardened and it was just a failure. Then I tried just dropping my egg into a pan of boiling water. While this worked better than the poaching pan, it wasn't foolproof. The eggs stuck a bit and didn't coagulate and stay together. This final method seemed nearly foolproof! I think the swirl and the addition of the vinegar really seal the deal here.
Photobucket
So for the recipe below follow the link above when it comes to poaching your eggs.
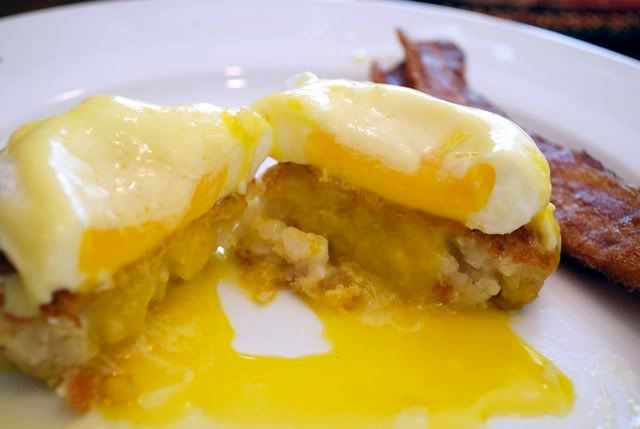
The rest is up to me! I had made some traditional risotto a few nights before for dinner and this past Saturday while contemplating the usual pancakes or omelettes for breakfast, I noticed my leftover risotto. Suddenly it hit me. Why not make eggs Benedict-style and serve them over some crunchy, gooey risotto cakes instead of over boring English muffins? I had served eggs Benedict-style on top of croquettes made out of leftover mashed potatoes before and it was delicious. It seemed like a similar enough substition so I figured what the hell? I love it when I go with my instincts. This was so delicious!
Photobucket
I may make risotto in the future just so I can have leftovers to serve with poached eggs. So if you happen to come by some leftover risotto then don't pass up the opportunity to give this a try. It's a bit of work so early in the morning, but well worth it. Just pour yourself an extra mimosa and slap on your comfy house slippers. Brunch is served. Enjoy!

Eggs Benedict on Risotto Cakes
Photobucket

For the Risotto Cakes:
2 cups leftover risotto of any variety
1 egg
1 cup panko bread crumbs
olive oil and vegetable oil (have plenty on hand)

For the Hollandaise:
1 stick of butter, cubed
2 egg yolks
juice of half a lemon
salt and pepper

For the Poached Eggs:
4 eggs
1 tb white distilled vinegar

Prepare a large skillet for frying up the risotto cakes by coating the bottom with half olive oil and half vegetable oil. Turn the heat to medium while you make your risotto patties. In 1/2 cup increments scoop out your prepared leftover risotto. Form into small patties, dip in your beaten egg and then coat with panko bread crumbs. Once your oil is hot, place your rice paddies in the hot oil. Turn heat on pan down to medium low heat. Allow the patties to brown on one side for about 3 to 4 minutes before flipping to brown on the other side. Once evenly browned, removed with a slotted spoon to a plate lined with paper towels. Once your patties are fried up, set aside and cover to keep warm.

For the Hollandaise, set up a double boiler. Once the water is simmering below, add in your two egg yolks and your cubed butter. With a whisk, constantly whisk the yolks and butter together so as to temper the yolks while you melt the butter. Once the butter and yolks are combined, whisk in your lemon juice. Finally season with salt and pepper, turn heat to low and keep sauce warm while you poach your eggs. If your sauce starts to coagulate, I just whisk in a splash of boiling water to bring it back to a saucy consistency.

Finally you're ready to poach your eggs. Follow this method here, making sure to swirl the simmering water into a whirlpool and drop your eggs one by one into the center. It helps keep the egg together in the jacuzzi and they poach up to perfect squidginess after three to four minutes.

Once the eggs are done, you're ready to assemble your Benedict. Place two risotto patties on a plate. Top each patty with a poached egg and then drizzle generously with Hollandaise sauce. Serve with bacon and a lightly dressed green salad and enjoy!

Sunday, September 12, 2010

Homemade Fettuccine with Preserved Lemons, Roasted Garlic and Shrimp

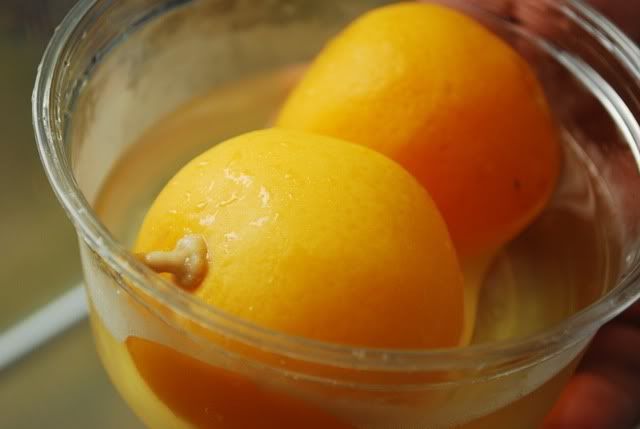
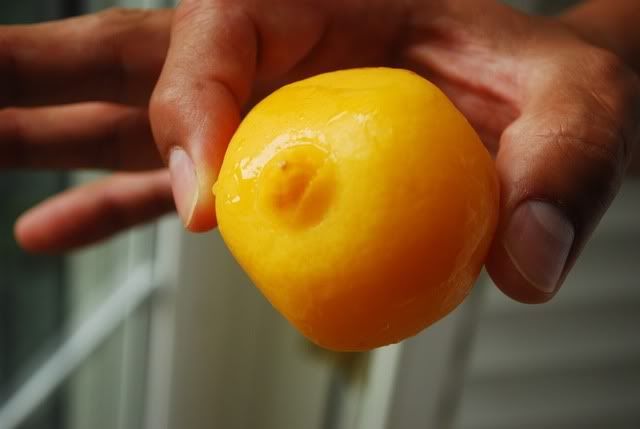
I was watching Barefoot Contessa on The Food Network, as I so often am, and Ina had a guest on her show who was making Chicken Tagine. One of the ingredients was preserved lemons and I have to say I was intrigued by this concept. Lemons that have been cured, basically, in a salt-water solution making the whole fruit edible, from every last pithy bit of peel to each drop of pulpy pectin. I had to experiment with them for myself.
Photobucket
Fortunately, I was shopping in one of my favorite markets, Whole Foods , when I came across already prepared preserved lemons. They seem quite easy enough to make on your own but when I found them already made I figured what the heck! Less fuss and muss and I can test out this ingredient for myself and not go through a lot of trouble.
I didn't want to make the chicken tagine because, well basically it's a lot of food for two people and if we didn't like it I was afraid we'd have leftovers that would never leave. I did some internet searching on preserved lemons and found some recipes with pasta and preserved lemons.
Photobucket
I kind of fashioned my own creation, with inspiration from this web site's recipe for Pasta with Preserved Lemons and Roasted Garlic and came up with what you have below. I'm so glad that I did because this was an exceptionally flavorful dish. Very unique, but in a good way, and (in my opinion) very fancy. I mean it sounds like something that would be on the menu of a superb, chic little Italian restaurant on the upper West Side or something.
And because it was a rainy September Sunday, I decided to go ahead and make my own pasta from scratch. I whipped up the dough and got out my hand-crank pasta roller and set to work. I ended up with some beautiful fettuccine, albeit of various lengths (that just makes it more authentically hand-made, of course!). It cooked up tender and perfect and absorbed just the right amount of the lemony, vibrant sauce. Here's a pic of my lovely pasta ribbons drying on my make-shift pasta drying rack - shhh don't tell, it's my clothes drying rack:
Photobucket
So if you find some preserved lemons in your local market, give this pasta dish a try and let me know what you think. Or if you're feeling really industrious, make your own preserved lemons along with your pasta. You'll be your own little cottage industry right in your own kitchen! Enjoy!

Homemade Fettuccine with Preserved Lemon, Roasted Garlic and Shrimp
Photobucket
1 lb homemade fettuccine, or 1 lb store-bough pasta
1 whole bulb of garlic
1 lb shrimp, peeled and deveined
4 cloves garlic, minced
2 tb butter
1/4 cup olive oil plus 2 tb
1 preserved lemon, diced (the whole thing, pulp, skin and all - seeds removed though!)
1 1/2 cups of the cooking water from the pasta
1/2 cup basil leaves, chiffonaded

First, put your garlic to roast in the oven. Preheat the oven to 425 degrees. Cut off the top half of the garlic clove, exposing the cloves. Rub with your two tablespoons of olive oil and then season lightly with salt and pepper. Place in a ramekin and then pour water into the dish so it measures up to about half of the clove of garlic. Cover with foil and roast in the oven for 1 hour. Remove and let the clove cool. Once it is cool, squeeze the pulp from the bulb and mash it together with a little olive oil. Set aside for later use.
Prepare your homemade fettuccine according to whichever recipe you prefer. I use 4 eggs and 1 pound of flour. Mix them together and then add a bit of olive oil to soften the dough. I then form it into a ball and then divide it into four equal parts to then place through my pasta roller. Once you've rolled out all your pasta sheets and then your fettuccine ribbons, hang the pasta to dry for a bit on a drying rack. Boil until al dente - about 8 to 10 minutes. Reserve 1 1/2 cups of the cooking water for your sauce and then drain your pasta.
In a large skillet, melt your butter and the 1/4 cup olive oil together. Add in the minced garlic and let soften over medium heat. Add in your shrimp and your diced preserved lemon. Cook until the shrimp are opaque and pink. Add in your roasted garlic and cook for another minute. Finally, add in your reserved pasta water to form a sauce. If it's running, let it come to a slight simmer to thicken a bit and then remove from the heat. Toss with your pasta, top with your shredded basil and serve with grated parmesan or romano cheese.

Saturday, September 4, 2010

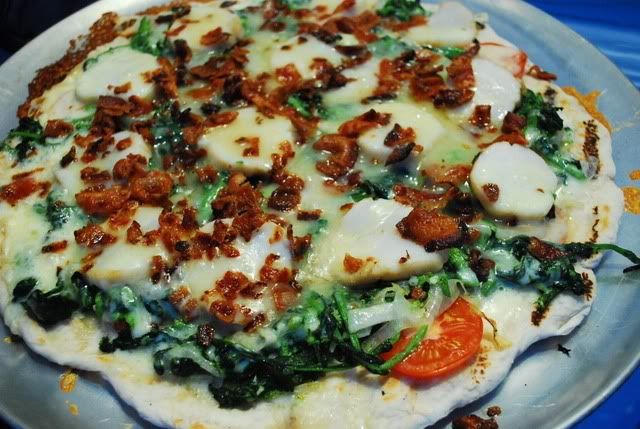
Broccoli Rabe, Bacon and Scallop Pizza

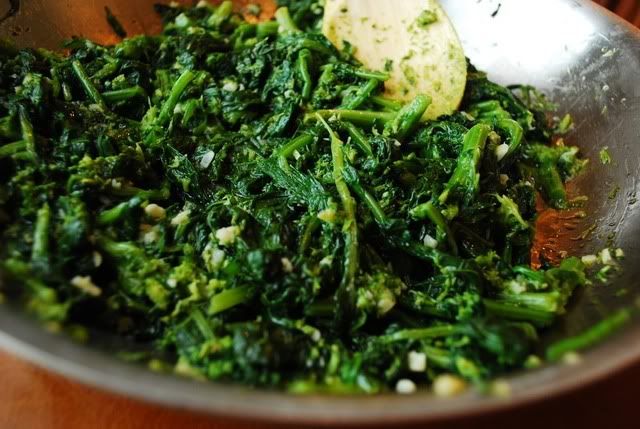
"Oh baby!" Those were the exact words of my mother when she bit into this pizza. Do yourself a favor and go make this pizza now. It's so delicious. The flavors go together so well - tender scallops, garlicky broccoli rabe, sweet tomatoes, sauteed onions, crisp, salty bacon and gooey fontina cheese. I mean how can you go wrong? The inspiration for this pizza came from some leftover scallops. I had a craving for broccoli rabe and fortunately the grocery store was brimming with lush, full bouquets of this bitter, leafy green.
Photobucket
I thought about how I could combine all these flavors in a unique way. This pizza came to mind and I'm so glad it did. It was delicious! I'll definitely be putting this pizza in a monthly rotation of meals. It's great for summer, fall, winter and spring too!
It's a bit labor intensive - I mean we're not just slapping marinara, cheese and pepperoni on some dough here. You have to do a lot of prep work to get the toppings ready, but believe me it's worth all the work. It is so yummy with a nice, cold glass of Pinot Grigio. Grill it or bake it, whatever you prefer. Just make it. You'll be glad you did! Enjoy!

Broccoli Rabe, Bacon and Scallop Pizza
Photobucket
1 bunch of broccoli rabe
4 cloves garlic, minced
1/4 cup olive oil plus two tablespoons
8 slices of bacon, cooked and crumbled
2 cups fontina cheese, shredded
4 large scallops cooked
5 Campari tomatoes, sliced
1/2 vidalia onion
1 raw pizza dough

First, prepare your broccoli rabe. Trim the stalks from the broccoli rabe so that you just have the leafy tops. Rinse and drain and set aside. Fill a large pot with 1 inch of water and set to boil on the stove. Once boiling, throw in the broccoli rabe and reduce to a simmer and cook for 10 minutes. Once done, drain the broccoli rabe and set aside.
In a small skillet, place your 1/4 cup olive oil along with your minced garlic. Saute until the garlic is softened and then add your cooked broccoli rabe. Saute for two more minutes and then remove from the pan and set aside.
Photobucket
In the same pan, heat two tablespoons of olive oil. Slice your onion thinly and then add to the pan. Saute until softened, about 15 minutes. Remove from heat.
Grill or bake your pizza dough according to directions. I buy the raw balls of dough at my grocery store and then grill it on a rimmed baking sheet or pizza pan on the hot grill. I stretch the dough out in the pan while it sits over a hot grill. As the dough starts to cook it takes on the shape of the pan. I close the lid, let it cook up on one side and then flip the dough onto the grill coals to parbake it on the other side. I remove the cooked pizza crust from the grill, return it to the baking sheet or pizza pan and start adding your toppings.
Drizzle the crust with olive oil and then ararnge your sliced tomatoes evenly over the crust. Next distribute your broccoli rabe and sauteed onions evenly over the dough. Next, slice your cooked scallops into discs and arrange evenly over the pizza. Finally top with your fontina cheese and then sprinkle over your crumbled bacon. Bake on 350 until the cheese is melted - or you can return it to the hot grill to melt the cheese.
Serve warm with grated cheese and crushed red pepper.

Friday, September 3, 2010

Fig and Prosciutto Flatbread

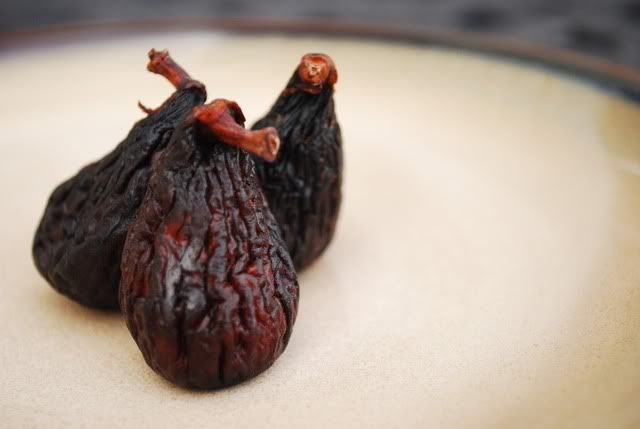
Figs seem to be very "en vogue" lately. They are popping up on blogs everywhere. Fig jam, fig tortes, fig cookies - the possibilities and blog entries are endless. I'm sure you've seen many versions of a fig and prosciutto pizza or flatbread before, but this is my take on the classic pairing. For one, I'm not a big fan of fresh figs. The slimy consistency of the center, along with the texture of the outside just doesn't sit well for me. I don't know if I just haven't had good fresh figs, or if I just really don't like them. To me, dried figs have more flavor, a nice, chewy texture and a no-fail ripe, sweet taste that I can depend on.
Photobucket
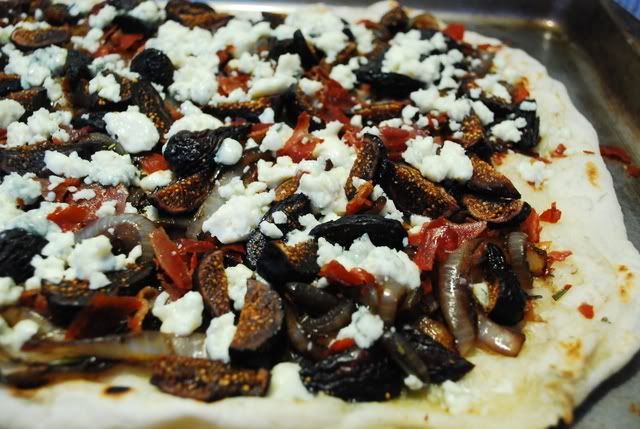
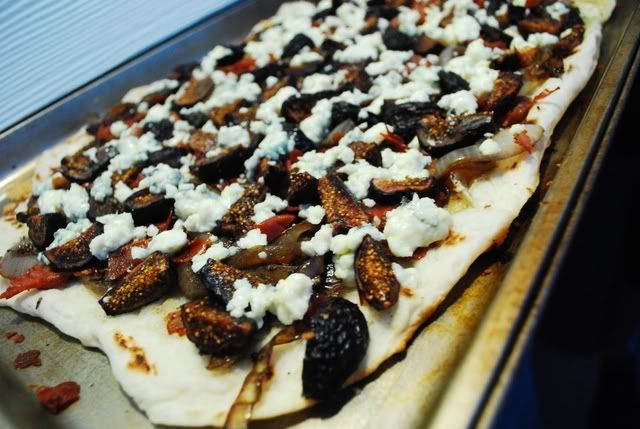
Fresh figs are more of a gamble. So for my pizza I combine dried figs, caramelized onions with balsamic and fresh rosemary, crisp prosciutto, crumbled gorgonzola and garlic oil. I've made this pizza for a few different crowds and, I don't mean to brag...but I've been told by several of them that it's THE BEST pizza they've EVER tasted. (Yes I know how obnoxious that statement sounds.)
Photobucket
Oh and I call it flatbread because its square. To me, flatbread is square, pizza is round. And flatbread sounds...hmmm sexier. Like something from a gourmet restaurant perhaps? I know, can I get anymore pretentious with this pizza or what? Anyway, hope you enjoy my version of this figgy favorite!

Fig and Prosciutto Flatbread
Photobucket

1 portion pizza dough, grilled or baked (I buy the pre-made bags of raw dough at my grocery store)
1/2 large sweet onion, sliced
2 tablespoons balsamic vinegar
1 tablespoon rosemary
dash of salt
1/4 cup olive oil plus 2 tablespoons
3 cloves garlic, minced
5 thin slices of prosciutto
1 bag dried black mission figs, chopped (usually 6-8 oz bag)
1 cup crumbled gorgonzola cheese

Preheat oven to 350. Lay your prosciutto out in a single layer onto a baking sheet. Crisp in the oven for 15-20 minutes. Remove and set aside.
Grill or bake your pizza dough according to directions. I buy the raw balls of dough at my grocery store and then grill it on a rimmed baking sheet on the hot grill. I stretch the dough out in the pan while it sits over a hot grill. As the dough starts to cook it takes on the square shape of the pan. I close the lid, let it cook up on one side and then flip the dough onto the grill coals to parbake it on the other side. I remove the cooked pizza crust from the grill, return it to the my baking sheet and set it aside.
Meanwhile, I start preparing my other toppings. In a small skillet, I heat two tablespoons of olive oil. Add your sliced onions and cook over medium heat until slightly softened. Add your balsamic vinegar and rosemary and cook until the vinegar has thickened slightly. Season lightly with salt and once the onions are caramelized and cooked down. Remove the onions from the skillet to a plate and set aside.
Rinse and wipe out your skillet. Add your remaining 1/4 cup of olive and your minced garlic. Cook over low heat until the garlic is softened. You'll use this garlic oil as the sauce.
Now you're ready to assemble your pizza. First brush the crust with half of your garlic oil. Top evenly with your caramelized balsamic onions, then chopped figs, then crumble your prosciutto onto the pizza. Finally top with your crumbled gorgonzola. Return the pizza to a hot grill or put back into your preheated 350 degree oven and cook until the gorgonzola has melted.
Serve hot.