Tuesday, December 29, 2009

It's A....

GIRL!!!! We are so excited - tickled pink to be exact. I seriously can not wait to see this beautiful little baby girl we have created. And to start shopping! I already almost bought her this sweet little red taffeta gown with a faux white fur collar for NEXT Christmas. The obsession has started people! But I resisted. Well, that's not entirely true. They didn't have her "size" - or well, the size she should be come next Christmas. Oh well. I'm sure there will be plenty more to choose from when the time comes.
It's going to be a fabulous new year! I don't really know how 2010 can be topped. We are going to dinner out and then getting home early to snuggle by the fire and watch the ball drop. Hopefully I can keep my pregnant butt up till midnight! But if not, then that's ok too. Enjoy and a happy, healthy New Year to everyone!

Sunday, December 27, 2009

Homemade Crab Ravioli

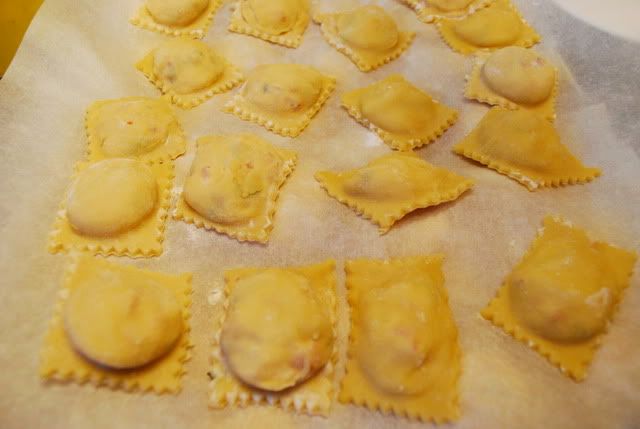
Oh homemade crab ravioli, why haven't we met sooner?? This was one of those dishes that just blew my family away. My mom ate two servings of ravioli! I've never seen her eat so much pasta in my life - she's one of those health conscious, figure-watchers blah blah blah. We were all powerless against it! It made an elegant and delicious pasta course for our traditional Italian Christmas dinner.
Photobucket
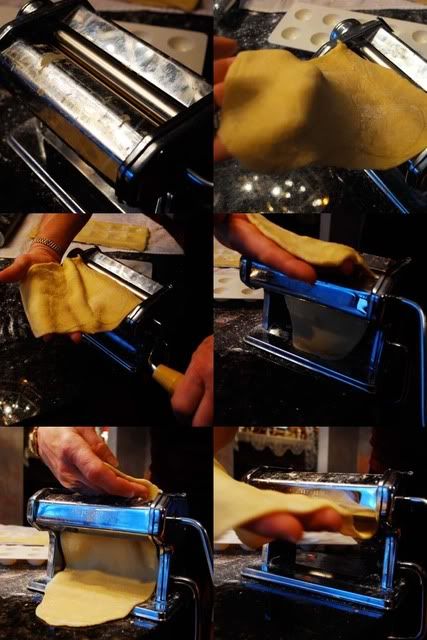
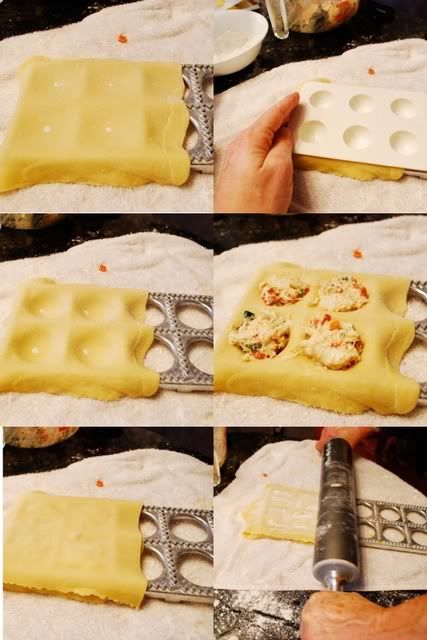
Not only was the pasta light and tender, but the filling was delicious. I used lump crab meat, ricotta cheese, fresh basil and diced red pepper. I made a vodka tomato sauce to cover these little morsels. I'm not going to lie - it was a lot of work to make the fresh pasta dough. I had a hand crank pasta sheet roller and spent nearly two hours rolling out dough, stuffing the ravioli and pressing them to form a tight seal. One thing I can say that made the process much quicker and smoother was a ravioli form. You can find them at Williams-Sonoma or online from any site that sells kitchen equipment. It makes all the ravioli the same size and helps you determine how much filling to put in each one.
These tasty ravioli are well worth the effort though for a special family meal. They won't soon be forgotten! I found the recipe here.
The instructions are pretty straight-forward. I doubled the filling and pasta recipe and came out with nearly 72 ravioli - I think this was due to the fact that I rolled the dough as thin as I could without it breaking. Good luck and here are some step-by-step photos that will hopefully help you in the process should you decide to make some of your own. Enjoy!
Photobucket
Photobucket
Photobucket
(And one tip - these ravioli really are done once they float to the top. It won't take long, so you'll be surprised when they float up within two minutes and if you're like me, you'll wonder if they are really done. Take my word, yes they are. They cook up perfectly aldente.)
Photobucket

Wednesday, December 23, 2009

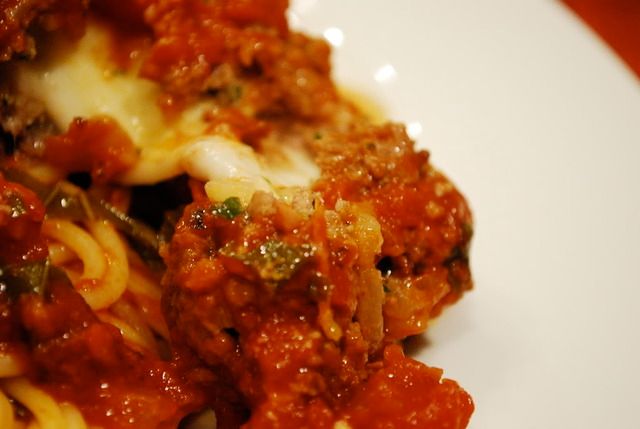
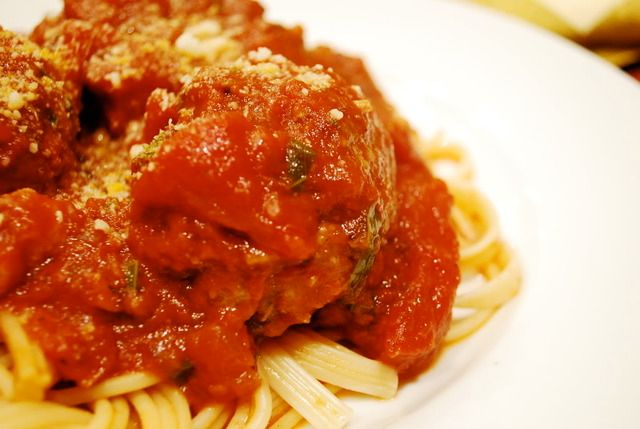
Williams-Sonoma's Homemade Meatballs with Spaghetti

They get me every time. Every month the beautiful Williams-Sonoma catalog arrives and is chock full of sparkling merchandise and mouth-watering recipes. I equate its arrival to the Big Sears Toy Book of my childhood - funny how interests change? Although, when I was little I would eye up those play kitchens (which I never got, so deprived!) and the Easy Bake oven (which I also never got, again so deprived!) every single year until I was like 12. So I guess things don't change that much.
Either way, I always end up saving the catalogs because they mesmerize me with the featured recipes. On top of the great photography, I've never been disappointed by any of the recipes I've tried. I must say that Williams-Sonoma is a quite trustworthy source for no-fail recipes that range from weeknight dinners to fancy entertaining dishes. This recipe for homemade meatballs was no exception. My husband actually spotted it first - yes, I've even got him in the habit of perusing the W&S catalog for good-looking recipes - and insisted that I make them soon.
Photobucket
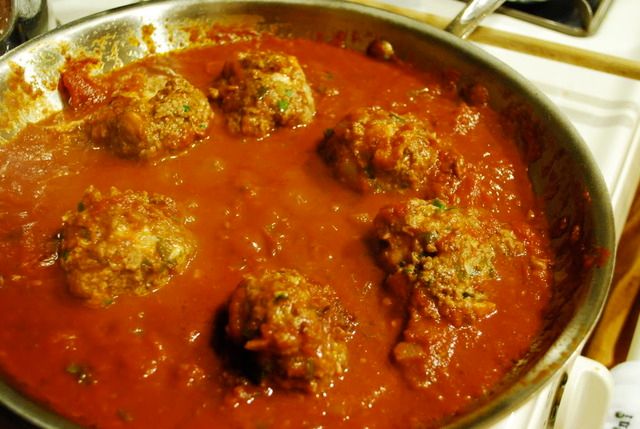
Last week was cold and dreary, the perfect time for a hearty, homey meal like spaghetti and meatballs. I made the meatballs exactly as the recipe stated, except for the size. It denotes that the recipe makes 10 meatballs. Those would have to be some HUGE meatballs. I was able to make 20 good-size meatballs out of the beef mixture. Needless to say, I froze 14 of them for future use. These were moist and tender, and the cheese cube in the center was the decadent finish.
Photobucket
In a word - superb. I made my own homemade marinara and used store-bought spaghetti to complement the meatballs. So don't throw out this month's W&S catalog. Flip through and get sucked in...you know you won't be able to resist it!

Homemade Meatballs with Spaghetti
source: Williams & Sonoma
Photobucket
3 Tbs. olive oil
1 yellow onion, finely diced
Kosher salt and freshly ground pepper, to taste
3 garlic cloves, minced
2 cups torn pieces crustless white bread (1/2-inch pieces)
1/2 cup buttermilk
2 lb. ground beef
1/4 cup chopped fresh flat-leaf parsley
1 tsp. finely chopped fresh thyme
5 oz. mozzarella cheese, cut into 1-inch cubes

7 cups tomato sauce
1 1/2 lb. spaghetti, cooked and drained
Grated Parmigiano-Reggiano cheese for serving
Directions:
In a large sauté/simmer pan over medium heat, warm 1 Tbs. of the olive oil. Add the onion and salt and cook, stirring occasionally, until soft, about 10 minutes. Add the garlic and cook, stirring constantly, for 1 minute. Let cool.

In a bowl, combine the bread and buttermilk. Add the ground beef, onion mixture, parsley, thyme, 2 1⁄2 tsp. salt and 1/2 tsp. pepper and mix with your hands until cohesive. Form the mixture into 10 meatballs. Stuff a cheese cube into the center of each one, then reroll the meatball.

In the same pan over medium-high heat, warm the remaining 2 Tbs. olive oil. Working in 2 batches, brown the meatballs, about 8 minutes per batch. Transfer to a plate. Reduce the heat to medium, pour the tomato sauce into the pan and add the meatballs. Simmer, turning the meatballs once, until they are cooked through, 25 to 30 minutes.

Divide the spaghetti among individual bowls and top with the sauce and meatballs. Pass the cheese alongside. Serves 5 to 6.

Sunday, December 20, 2009

Another snowy weekend

Maryland, and most of the Mid-Atlantic, got hit by a huge snowstorm over the weekend. We have over a foot of snow out our front door! We spent the day inside yesterday, just staying warm and watching the snow fall. I fixed us a lazy, snowy morning breakfast of slow-scrambled eggs, homemade buttermilk biscuits and bacon. Yum!
Photobucket
Today the sun finally came out and the great shovel began! Well, my husband shoveled while I walked around and took some pics of the snow with my new zoom lens. How beautiful! While snow can be a pain in the butt in terms of navigating it and shoveling it and all that, it does create a pretty picture. And what's better than a white Christmas?? We haven't had one of those in years. So happy snow day!
Photobucket
Photobucket
Photobucket
Photobucket
Photobucket

Saturday, December 19, 2009

Christmas Cookies

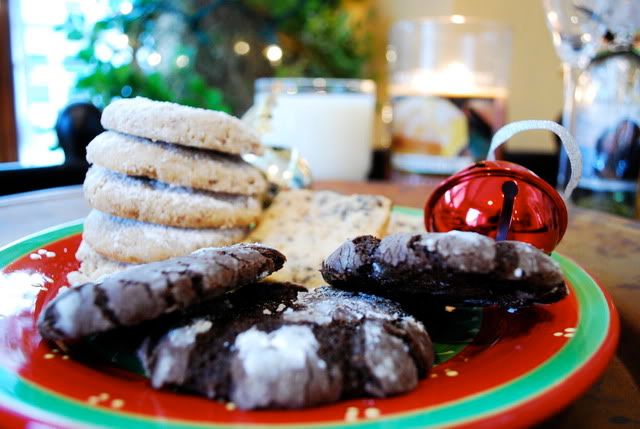
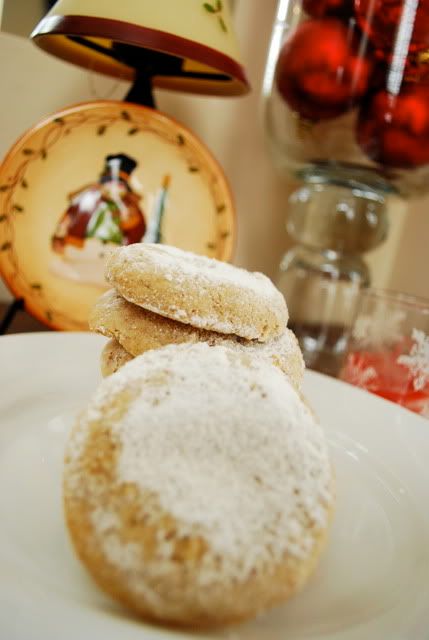
I have had the past week off from work and spent one of those days baking Christmas cookies. I picked a wide assortment, mainly from one of my old Rachael Ray magazines and from one of my favorite blogs. Below I present the first three I have baked. Next up - fig and pistachio biscotti from Proud Italian Cook!!
Photobucket
Meanwhile, here are some sweets to make your Christmas a bit more merry. Enjoy! Oh and beware of the Pecan Caramel Surprises. Two tips I can offer - wait until they cool to remove them from the baking sheet, otherwise they crumble miserably. Second - be careful when biting into them later, they are very chewy and could easily pull out fillings. So unless you want to be singing "All I want for Christmas is my two front teeth" then chew cautiously!

Pecan Caramel Surprise
Rachael Ray Magazine, Dec 08
Click here for the recipe
Photobucket


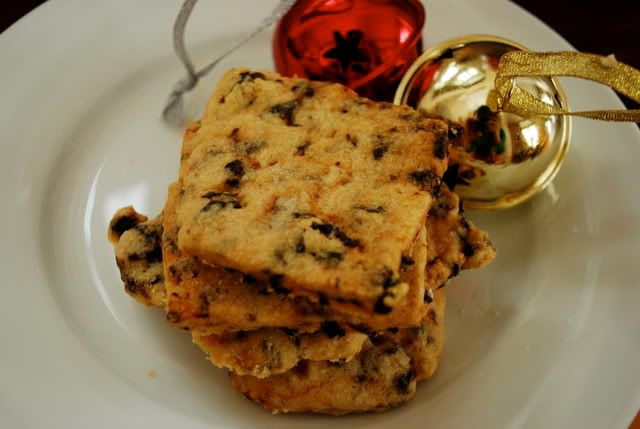
Cherry Shortbread Cookies
Rachael Ray Magazine, Dec 08
Click here for the recipe
Photobucket


Dark Chocolate-Ginger Crinkles
Rachael Ray Magazine, Dec 08
Click here for the recipe
Photobucket

Tuesday, December 15, 2009

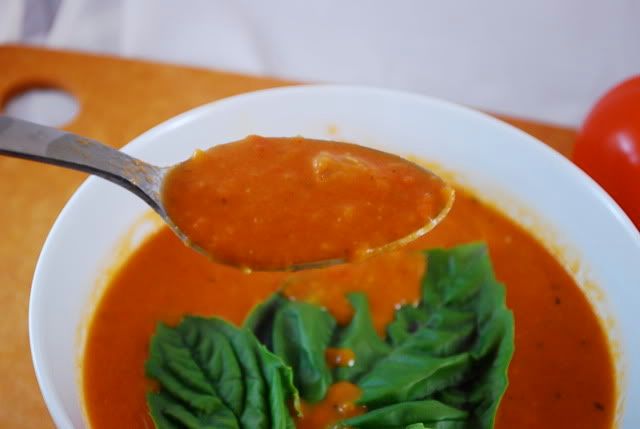
Roasted Tomato Soup with Shrimp and Leek Panini

I've been on a major soup and sandwich kick lately. I think because the winter weather has set in and it's just so comforting. And soup can be packed with veggies and vitamins, making it an easy, good-for-you dinner. I saw this soup on Cooking for Real with Sunny Anderson on The Food Network . I loved that she made a roasted tomato soup but incorporated red peppers, garlic and onions. It also looked like a simple soup to make, as she just roasted all the vegetables first and then pureed them with the stock.
Photobucket
The one problem I had with this recipe was putting the hot soup in a blender afterwards to puree it. What a hot mess - literally!! My blender went all Linda Blair in the Exorcist on me and started spouting hot soup like a fire hose! The pressure from the heat of the soup builds up in the blender and you need to use all your strength to keep that lid on - otherwise hello new paint job on your kitchen ceiling. Ugh. So to avoid exploding soup, I think the next time I make this (if I don't get that immersion blender from good ole' St. Nick this Christmas) then I'll probably wait till the roasted vegetables cool and then puree them in a food processor or blender, separate of the rest of the soup. Then I would whisk the pureed vegetables into the warm stock and go from there. I think you'd get the same result without the risk of third-degree burns from projectile soup shooting out of the top of your blender. Or perhaps I'm the only one who has had a problem with blending hot soup....it's very possible. Oh well, from one kitchen calamity comes future success, or let's hope at least.
I made simple grilled paninis to go with the soup. I picked up some shrimp from the market and combined them with sauteed buttery leeks and garlic and tons of mozzarella cheese for a DELICIOUS panini. What a great combo!! I didn't want the typical grilled cheese and I had a leek leftover in my fridge from the potato soup below and voila - shrimp and leek paninis. My husband and I really liked these sandwiches. Enjoy!

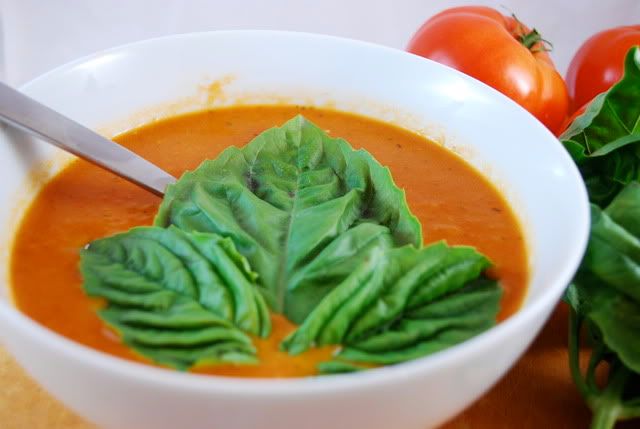
Roasted Tomato Soup
Sunny Andersen, Food Network.com
Photobucket
* 8 Roma tomatoes, halved and seeded
* 2 red peppers, quartered and seeded
* 1 medium onion, quartered
* 8 cloves garlic 2 teaspoons chopped fresh thyme leaves
* 4 tablespoons olive oil, divided
* 2 tablespoons balsamic vinegar
* Kosher salt and freshly ground black pepper
* 1 (6-ounce) can tomato paste
* 6 cups vegetable stock
* 1/4 cup loosely packed chiffonade basil leaves

Directions

Special Equipment: Blender or immersion blender

Preheat the oven to 400 degrees F.

On a sheet pan, gently toss together the tomatoes, peppers, onion, garlic, thyme, 2 tablespoons olive oil, vinegar, and salt and pepper to taste. Arrange the tomatoes and red peppers, skin side up, and bake until lightly charred, 45 to 50 minutes. In a soup pot, warm the remaining 2 tablespoons of the olive oil over medium-high heat. Stir in the tomato paste and mix well. Add the tomato and pepper mixture, including the juices, and combine. Stir in the stock, cover, and bring to a boil. Reduce the heat to low and simmer for 20 minutes. Transfer the soup to a blender* (or use an immersion blender) and pulse in small batches that reach only about a third to halfway up the side of the jar. Be careful to start slow then increase the speed to blitz the ingredients until smooth. Use a separate bowl to hold the blended soup and then return it all to the pot.

Heat the soup to warm through, then ladle into serving bowls and garnish with basil.

*When blending hot liquids: Remove liquid from the heat and allow to cool for at least 5 minutes. Transfer liquid to a blender or food processor and fill it no more than halfway. If using a blender, release one corner of the lid. This prevents the vacuum effect that creates heat explosions. Place a towel over the top of the machine, pulse a few times then process on high speed until smooth.

Shrimp and Leek Paninis
Photobucket

1 leek, chopped
3 cloves garlic, minced
5 tablespoons butter
8 shrimp, shelled and deveined
salt and pepper
1 cup of mozzarella cheese or Italian blend cheese, shredded
4 slices of sourdough bread

In a saute pan, melt 3 tablespoons of butter and throw in your leeks and garlic. Cook until the two vegetables are softened and then add your shrimp. Season with salt and pepper and toss until the shrimp turn pink. Once the shrimp are cooked, remove from the pan to a plate. I like to cut the shrimp in half lengthwise so they aren't bulky in my sandwich. If you prefer to chop them, then you can do that too. Either way, make sure you have four shrimp per sandwich.
Preheat your grill pan. Slather one side of each piece of bread with the remaining two tablespoons of butter. Assemble your sandwiches. Butter side down, place your first piece of bread on the grill pan. Sprinkle it with about 1/4 cup of cheese and then place your sliced shrimp down on top. Smother with half of the leek mixture and then top with another 1/4 cup of cheese. Then place top bread on, butter side up. Repeat for other sandwich with the remaining ingredients. Place top on grill pan and griddle until crisp and cheese is melted. Remove and serve!

Thursday, December 10, 2009

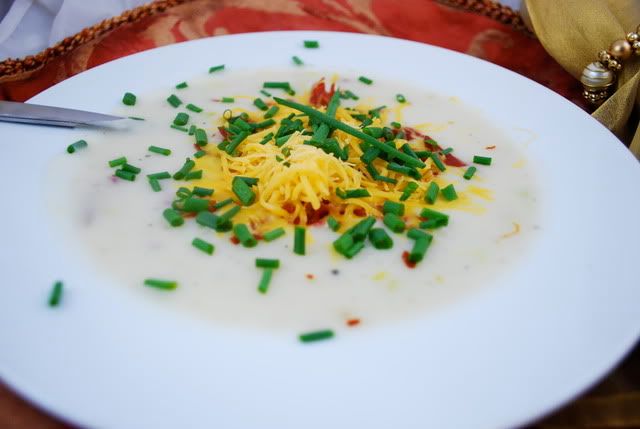
Creamy Potato Leek Soup

For dinner on Sunday night, I made mashed potatoes to go with the rest of our meal. We had about 4 cups of leftover mashed potatoes so I concocted this potato leek soup out of the remaining potatoes. It was delicious! And very thick and creamy. This is the perfect stick to your ribs soup for a cold winters night. Enjoy!

Creamy Potato Leek Soup
Photobucket
2 tablespoons butter
2 tablespoons olive oil
2 leeks, diced and rinsed thoroughly
1/2 cup half and half or heavy cream
4 cups chicken stock
3-4 cups mashed potatoes, however you prepare them (I put butter, cream and garlic powder in mine. If you don't put garlic powder in your potatoes, then you may want to add a teaspoon or so to the soup to flavor it. I used red-skinned potatoes and left the skin on.)
3 tb cornstarch, if needed to thicken up the soup (I mixed it with a little water to make a paste before adding it to the soup)
freshly ground pepper
salt to season
pat of butter (about 2 tablespoons)


For topping:
1 package of prosciutto, crisped up in the oven (put it on a baking sheet and cook for 10 to 15 minutes at 350 degrees)
shredded cheddar cheese
chopped chives

In a soup pot, melt your butter into your olive oil and then add the chopped and cleaned leeks. Saute until softened, about 10 minutes, then add your cream and stock. Allow it to come to a simmer and then whisk in your mashed potatoes. If your soup is too thick, you can add more stock or water. If your soup is too thin, you can thicken it up with a little cornstarch and water, which is what I did because I wanted a thicker consistency. Season well with salt and pepper. Add in your last pat of butter (hey no one said this was low-cal!) and serve. Top your soup with crispy prosciutto, shredded cheddar and chopped chives.
Photobucket

Wednesday, December 9, 2009

The Name Game

We'll be playing the name game soon as I'm almost at 20 weeks and I got a real kick out of this list to live by! Good thing none of our name choices are on EITHER of these lists. But to be honest, I have considered Willow - and Allora - both because I like them and because I did love that Val Kilmer movie. Sigh. Oh well! Anyway, this is all in good fun, so don't take this too seriously. Just for a laugh!

Check out more fun baby stuff at iwanttobeababy.com.
BEST
hans: best movie villain ever, there’s nothing cooler
ignatious: get iggy with it
mayo: way better than miracle whip.
typhys: the one, the only…typhys!!
happy: it’s so cute when you say, “happy, stop crying.”
hysteria: oh the tantrums she will throw
mumps: it’s one swell name
hero: who wouldn’t love a baby named after a sandwich?
bum: they all borrow money growing up, so why not?
mary: she’ll be walking on clouds
naught: sometimes you feel like a naught, sometimes you don’t
bill: hopefully no one will ever run out on him
jezebel: all the bad boys will love you
emerson: proves that you’re well read without having to show your book collection
nemo: always against the current
henry: good candy bar and it’s fonzi’s real name
gwendolyn: so bad…it’s good tyranny: she’ll never have to worry about other kids stealing her toys
pharaoh: spoil him rotten or else
madison: a born shopper, will have credit card number memorized by age 6
maximus: born with a big sword
miles: new york marathon, here i come
pirate: don’t forget to put lime juice in his formula
ace: future world poker champion
homer: prefers donuts to teething rings
cannon: a true son of a gun
speck: unless he has pointy ears, then name him Spock
harper: no one will question why they’re bizarre
june: she’ll be a good mom, likely to marry a ward
andromeda: the astrologer in you says, “yes”, the bad speller in you says, “no”
dante: if he has a widow’s peak, you can call it dante’s peak
aloha: it’s much better than, say, pineapple pete
bart: make sure his rattle doubles as a slingshot
elvis: load up on peanut butter and banana baby food
rusty: after a bath, dry thoroughly
abra: i wanna reach out and grab ya

WORST
abacus: will always be in the shadow of his cousin calculator
theodora: even “baby names for dummies” excludes this one
aerilyn: is your baby an alien?
nixon: most likely to go by nickname…crook
opal: pretentious cheap gem
ripley: believe it or not. not
cameron: makes you think of Kirk. then you gag.
acne: name his other siblings pus and zit
parker: perfect…for a valet
satchel: bag and tote are better alternatives
kohinoor: american equivalent…pointdexter
brooklyn: will always feel inferior to manhanatties
armani: he’ll never be able to start his own designer label
dandelion: dandelions spread easy. nuff said
sidney: do you really want to name your kid after an ohio city?
shiloh: people named neil will always call your name
innocent: it won’t seem so cute when she’s fourteen and pregnant
mason: why not “plumber” or “roofer”?
warwick: stop the war! give peace a chance
reed: rhymes with greed
indigo: you wouldn’t name your kid “purple” would you?
willow: never name your kid after a val kilmer movie
angel: unless she/he has wings…don’t do it
heaven: her husbands joke will be…life with heaven is hell
infinity: how many mpgs does she get?
gertrude: she’ll grow into it. if she lives to be ninety
jordan: do you really think they’ll “be like mike”?
chastity: see innocent
justice: prison id #54452
jersey: otherwise known as “armpit”
suri: we would make a joke. but tom would have us killed
clementine: eternal sunshine of the thoughtless name
charbonet: your parents really meant chardonay paris: name your children after saints…not sluts

Wednesday, December 2, 2009

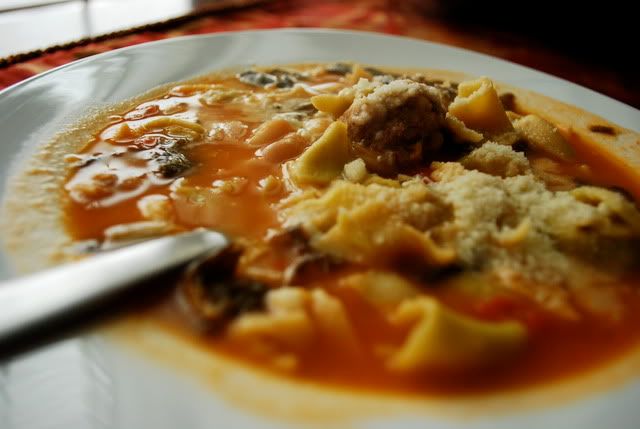
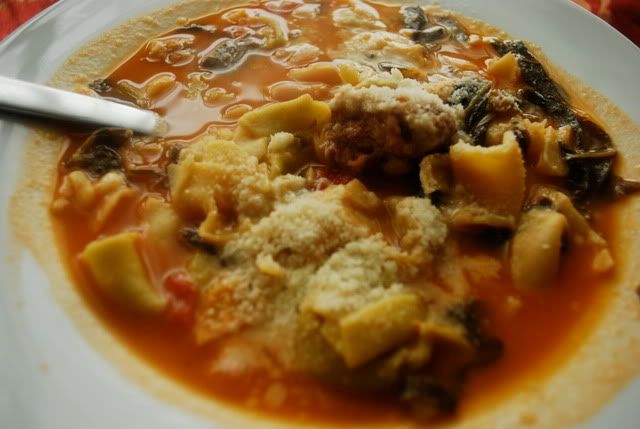
Italian Wedding Soup

What can be better on a beautiful snowy afternoon than hot, homemade soup?? Pretty much nothing.
Photobucket
Well, except decorating your tree and sipping hot cocoa afterwards, which fortunately we were also able to enjoy. What a perfect marriage of food and festive activities! Speaking of marriage, let's talk wedding soup (brilliant segway I know haha - I should do television news writing!).
Photobucket
Anyway,I was always curious why they called this "Wedding" soup since I had never actually had this at any of my relatives Italian weddings. So I googled it and lo and behold - an answer. Apparently the name of the soup in Italian, Minestra Maritata, has been misconstrued in English. Surprise - we butchered a foreign language yet again! Oh well. Anyway, it really means "Well-married Minestrone". Say what? Yeah, that doesn't really make much sense at first (now you can see why we came up with our own interpretation), but there really is a simple explanation. The soup was named so because of the great flavor pairing of greens and meat in a soup. They were made for each other - or as Neaopolitans say, "maritata". So there you have it! A little food history for you to swallow with this delicious soup.
Photobucket
This may not be the traditional version of this classic soup, but it's the version I grew up with. It includes tortellini, mini meatballs, and a mix of greens (spinach, swiss chard, or whatever you prefer). I made a huge batch of this and froze half of it. Having never frozen soup before I wasn't sure how this would work. Surprisingly, it freezes pretty well. And makes for a easy weeknight meal on a busy night. I served mine with some buttery garlic bread. If you're looking for a comforting, hearty soup that is truly a meal in a bowl then look no further! Enjoy! And here's a pic of our tree! Hope everyone is enjoying the Christmas season so far. Merry merry!!
Photobucket

Italian Wedding Soup
Photobucket

For the Meatballs (makes about 20 meatballs)
1/2 pound ground beef
3 to 4 Italian sausage links (depending on size), casings removed
1 egg
small handful of bread crumbs to bind
small handful of grated romano (or parm) cheese to season
chopped fresh oregano or a teaspoon of dried
1 clove garlic, minced
salt and pepper

For the Soup
2 carrots, shredded
1/2 onion, diced
3 garlic cloves, minced
3 tablespoons olive oil
1 tablespoon tomato paste
salt and pepper
4 cups chicken stock
6 cups water (You can use ALL stock if you want, I just only had 4 cups on hand so I had to go with water for the rest. Up to you! I found it just as flavorful with out - less salty this way)
1 pound of cheese tortellini
1 can of diced tomatoes with the juice
1 can of cannelini beans, rinsed and drained
1 pound of greens (I buy the bag of swiss chard and other greens that come pre-cut and washed at Trader Joe's)
plenty of grated parmesan or romano cheese for serving

First - make your meatballs. Combine the ground beef and sausage with your egg, breadcrumbs, cheese, oregano, garlic and season with salt and pepper. Once meat is well mixed, begin forming meatballs - about the size of a large tablespoon each. I made mine about the size of a golfball - which is bigger than normal, but I was just being lazy. If you have more patience than me, then truly they should be about the size of a marble so they can fit on your spoon.
Lay the meatballs in a nonstick pan or on a nonstick baking sheet and bake at 350 for 20-25 minutes, depending on size, until they start to brown. You can also brown them in a pan if you prefer, but I just think it's easier to bake them. Less mess. If you make the meatballs small enough - ie marble size, you can just throw them in your boiling stock/water and let them cook that way. Since mine were bigger and I wanted to make sure they cooked the whole way through, I browned them first in the oven and then dumped them in the hot tub where they could finish cooking.

While your meatballs brown, you can start cooking the vegetables in the bottom of a large stockpot. Throw your shredded carrots, onion and garlic into the pot with your olive oil. Once they start to sweat, add your tomato paste. Season with salt and pepper and then pour in your stock and water. Bring the soup to a boil and add your tortellini and meatballs. Once tortellini has cooked to aldente, add in your tomatoes, beans and greens. Once the greens have wilted down, your soup is ready to serve.

Ladle into bowls and top with a generous spoonful of grated cheese.

Friday, November 27, 2009

Pumpkin Pie Ice Cream and Happy Thanksgiving!

Happy Belated Thanksgiving!! I hope everyone had an enjoyable day full of good friends, family and food. We have a lot to be thankful for. Speaking of which, here's a pic our little turkey, whose been roasting for 16 weeks now!!
Photobucket
And just because it's too cute to pass up, I'm sneaking in a pic of our little nephew in his very festive turkey day shirt.
Photobucket
Ok now on to the task at hand!
In addition to the traditional pumpkin pies we baked this season, I wanted to try something a little different. Despite everyone saying they couldn't find pumpkin puree, I never had a problem! In fact, I bought so much I had to find ways to use it. This Pumpkin Pie Ice Cream was the perfect fit. I love both ice cream and pumpkin pie so what could be better than the combo?? This tastes exactly like pumpkin pie - except cold and without the crust. It might be fun to serve this in a twill cookie cup or in a cone to give you that "crusty" taste with it. I just ate it straight and it was just delicious and refreshing. While this recipe calls for tons of half and half and heavy cream, I didn't find this ice cream to be too rich. I prefer an ice milk consistency - think Breyers - and I feel like this ice cream had that, while still packing a creamy, flavorful punch. Enjoy!

Pumpkin Pie Ice Cream
Source: The Food Network website
Photobucket
4 cups half and half
2 cups heavy whipping cream
2 vanilla beans
1 1/2 cups white sugar
1/2 cup light brown sugar
7.5 oz canned pumpkin
1 tsp. nutmeg
1 tsp. ground cinnamon
1/2 tsp. ground ginger
1/4 tsp. ground cloves
Directions
Combine all dairy into a saucepan along with the sugar. Split and scrape the vanilla beans into the dairy and sugar mixture. Bring to 170 degrees F. to dissolve sugar then let cool at room temperature. Chill in the refrigerator overnight. While dairy is heating, grate nutmeg into pumpkin and add the other spices. Mix in a bowl to combine and chill overnight in the refrigerator. The next day, take pumpkin and dairy mixture out. Filter dairy mixture to remove large vanilla bean pieces. Add some of the dairy mixture to the pumpkin and mix well to loosen it up. Then mix both the dairy and pumpkin together. Freeze in your ice cream freezer according to the manufacturer's instructions. Let the ice cream harden for at least two hours unless serving all immediately.

Sunday, November 22, 2009

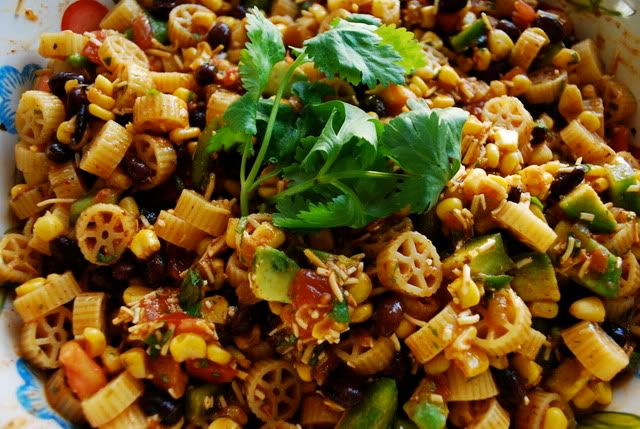
Wagon Wheel Taco Pasta Salad

This recipe from Cara's Cravings blog has been around the food blogosphere a few times. I finally got to give it a try when we went over to a friend's house for a football party. It was the perfect party food! No mayonnaise and nothing in it that can spoil. It can sit out on a buffet and keep just fine.
Photobucket
I did make one addition - I diced up half of a green pepper and added that. I also found it a little dry, so I think next time I would double the dressing recipe to give it a saucier consistency. Overall though, a great go-to recipe for any party or picnic. Enjoy!

Wagon Wheel Taco Pasta Salad
Source: Cara's Cravings
Photobucket
1lb wagon wheel pasta
1 can black beans, drained and rinsed
1 10oz package frozen corn (I don't even bother thawing it, because I always make this at least a few hours before serving, so it plenty of time to defrost)
2 medium tomatoes, seeded and diced
8oz shredded Mexican-blend cheese
1 1/2 cups salsa
1/2 cup olive oil
3-4 tbsp lime juice
1 tbsp cumin
1-2 tsp chili powder
2 garlic cloves, minced
freshly ground salt & pepper
1/2 cup chopped fresh cilantro
1 avocado, diced

Cook the pasta al dente according to package directions. Drain and rinse with cold water.

In a large bowl, combine the black beans, corn, tomatoes, salsa, and cheese. Add the cooled pasta and mix well.

In another bowl, whisk together the olive oil, lime juice, garlic, cumin and chili powder. Pour over the pasta salad, add the cilantro, and mix well. Season to taste with salt & pepper.

Just before serving, stir in the diced avocado.

Thursday, November 19, 2009

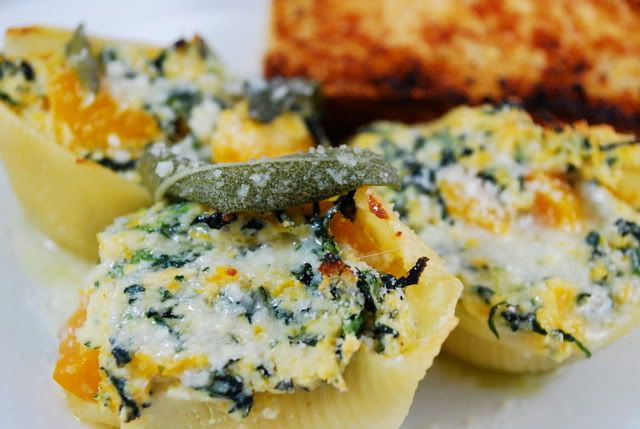
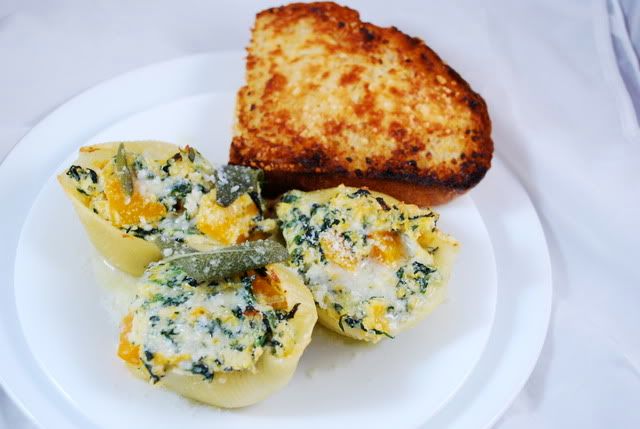
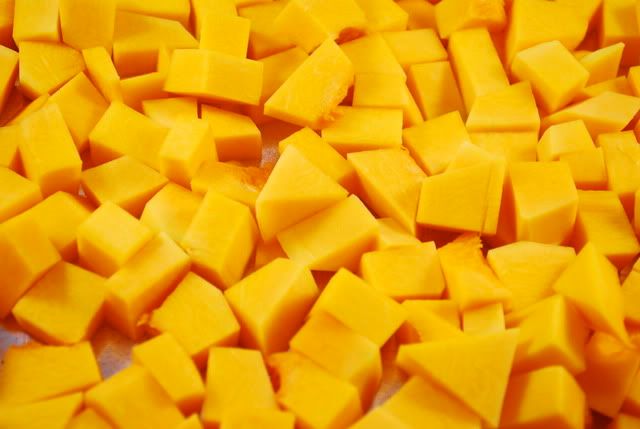
Butternut Squash Stuffed Shells

I saw these on Proud Italian Cook blog. I really love her blog. Beautiful pictures, inspired recipes and good downhome Italian cooking, which is my favorite.
Photobucket
She had this recipe for the butternut squash stuffed shells (click the link above for the recipe) and then one for butternut squash lasagna.
Photobucket
I decided to try the stuffed shells first. These were so delicious and fairly easy to make as well. The main reason I chose the shells was because I figured they'd be pretty easy to divvy up for lunches the next day, if there were leftovers, which there were. So I made these for a family dinner and my mom packed up the leftovers for me and my husband. Little did I know she packed them at the bottom of the box so when we got in late that night from her house, I forgot to remove them and put them in the fridge overnight.
Photobucket
So needless to say, when I discovered them the next night at the bottom of the box, they had to go straight in the trash. I was devastated because they would have made the perfect lunch for the next two days. And it never feels good to throw away food. Oh well. We did enjoy them while they lasted.
Photobucket
The one thing I would do differently next time, well actually two things, I would eliminate the lemon zest. I honestly don't know why I even included it this time around. I'm not a fan of lemon zest to begin with, but Proud Italian Cook really sold me on how it would enhance the dish so I figured what the heck. Unfortunately, as usual, it was too strong of a flavor for me and my husband didn't like the zestiness at all. The other thing I would change was the sauce.
Photobucket
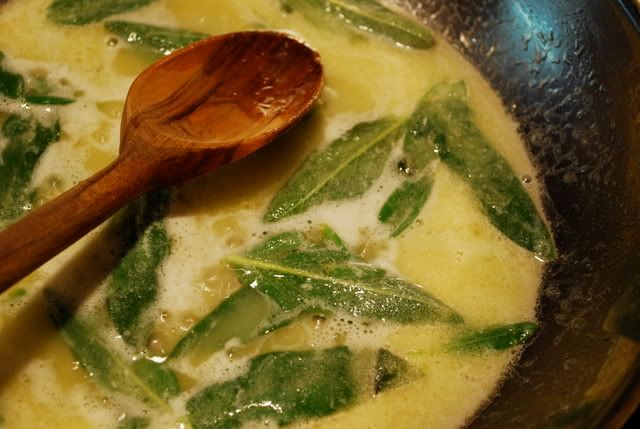
I made a sage brown butter sauce, but I think a nice, creamy bechamel would have served these shells better. I added a bit of chicken stock and lemon juice to my brown butter sauce and it was pretty tasty, but all that butter does make you feel a little weighed down. Nonetheless, this was a great fall dish and perfect for a crowd. Check out her recipe and enjoy!

Wednesday, November 18, 2009

Pumpkin Coconut Bread That Couldda Been a Contendah

This recipe reminds me of that famous Marlon Brando line from On The Waterfront , "I coulda been somebody. I coulda been a contender!". Just picture this cute little loaf in a leather jacket sitting on a motorcycle.
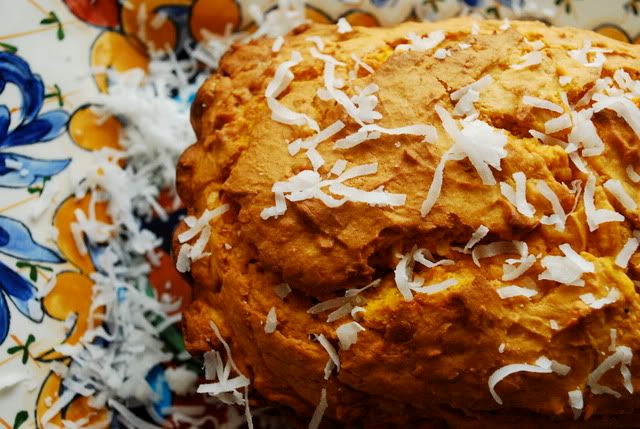
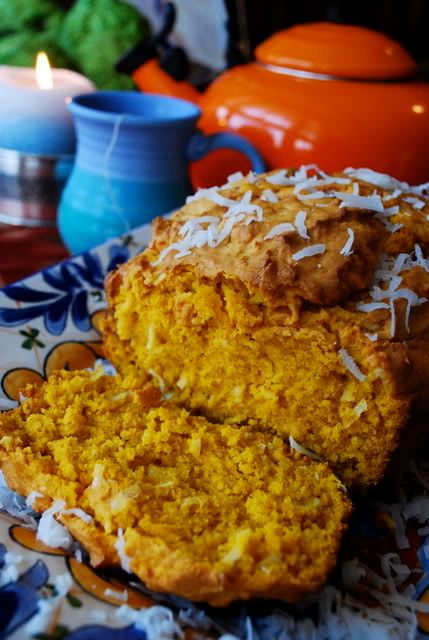
Why do I say this? Well, because this recipe had a lot of potential but it just quite didn't make the grade. The bread was moist and the coconut flavor was there, but I found it to be way to subtle. I had to think really hard to taste coconut, and that's even after I poured in an extra cup of shredded coconut into the batter! I think it could have benefitted from some more coconut and maybe even a dash of coconut extract or maybe Malibu coconut rum if you're feeling crazy?
Photobucket
On top of that, this bread recipe didn't call for any spices. Not a speck of spice in site! For a pumpkin bread, I found this really odd. Unfortunately, I didn't really think about how odd until after it was baked and I tasted how bland it was. The bread could have been a hundred times better with a few teaspoons of nutmeg, cinnamon and pumpkin pie spice. Nothing brought out the great pumpkin flavor. So overall, I would say this bread could have been so much better.

Pumpkin Coconut Bread
Coconut and Lime Blog
Photobucket

Click to Go to Original Recipe

Friday, November 13, 2009

Chicken Dukkah

For some reason this recipe name makes me want to say... dookey. Dookey dookey dookey! Someone dropped a dookey. Ok it's over. I've got it out of my system. Now on to the serious nature of this delicious recipe.
Photobucket
I saw this on Smitten Kitchen blog, who had seen it on Ask Aida on The Food Network. The recipe from Aida, basically has you first dunk some chicken skewers in a mixture of dijon mustard and olive oil and then roll them in the dukkah spice blend that has been mixed with shredded Parmesan cheese. Smitten found the dukkah crust recipe here at 101 Cookbooks, since Aida doesn't give you one.
Photobucket
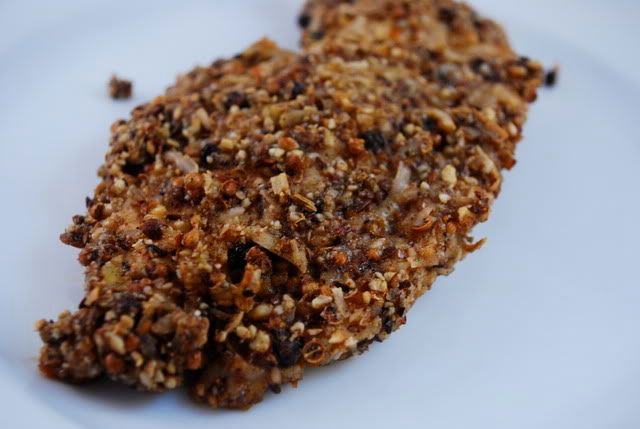
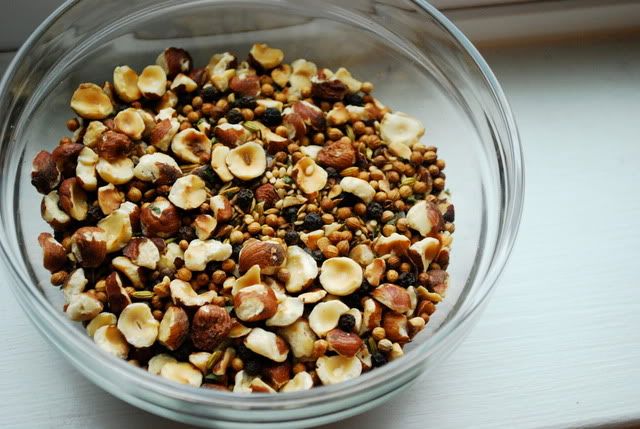
The whole idea intrigued me, the name made me laugh and overall it just sounded like something different. It combines a ton of fragrant spices with toasted hazelnuts to create a dry, thick spice rub for chicken. You encrust the chicken in this spice rub, bake and serve. I found it healthy, tasty and a nice twist on a traditional chicken dinner.
Photobucket
In fact, I even ended up making a batch of dukkah-crusted chicken breasts a few weeks later with the leftover dukkah and put them in paninis with artichoke hearts, spinach and provolone cheese. They were delicious and the combination of the dukkah with spinach, artichokes and cheese was great.
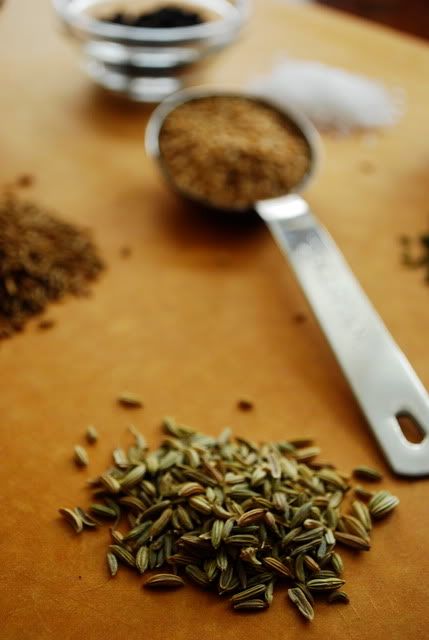
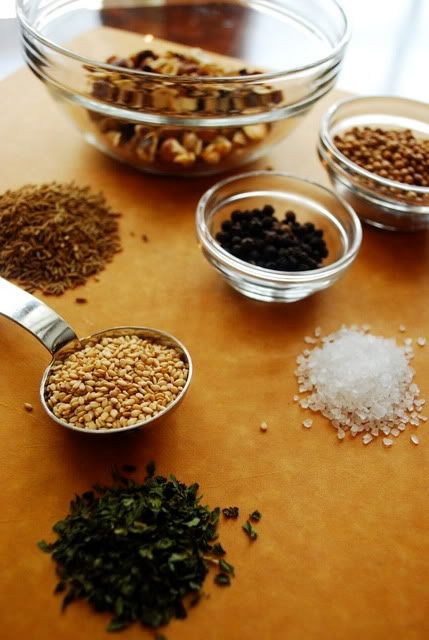
The crust has a decidedly Middle-eastern type of flavor - fennel seeds, coriander, mint and cumin combine with salt, pepper, and sesame seeds. On Smitten Kitchen she served it with a balsamic reduction sauce, but I found the chicken stayed quite juicy and the spicy crust provided more than enough flavor.
You can use the dukkah crust as an herb dip with bread as well. Just put a few tablespoons of the dukkah in a bowl and cover with olive oil for dipping pita or fresh baked bread. Enjoy!

Chicken with a Dukkah Crust
Photobucket
2 tablespoons Dijon mustard
1/4 cup olive oil
24 chicken tenders, also called chicken tenderloins
1 cup Dukkah (recipe below)
1/4 cup grated Parmigiano-Reggiano cheese (Deb note: I skipped this, as a dinner guest does not mix milk and meat)

For the chicken skewers:
1. 24 metal or bamboo skewers (if using bamboo skewers, soak them in water for 30 minutes before using)
2. Heat oven to 350°F.
3. In a shallow bowl, combine the mustard and olive oil, and season well with salt and freshly ground black pepper. Toss the chicken in the mustard mixture until well coated.
4. Combine the dukkah and Parmigiano-Reggiano in a wide, shallow dish and mix thoroughly. Roll each tender in the dukkah mix until well coated.
5. Thread a chicken tender on each skewer. Place the chicken skewers on wire cooling racks. Nest each wire rack in a baking sheet and place in the oven. Bake until the meat is firm and the dukkah crust is golden, about 25 to 30 minutes.


Dukkah Spice Blend
Photobucket
1/2 cup hazelnuts
1/4 cup coriander seeds
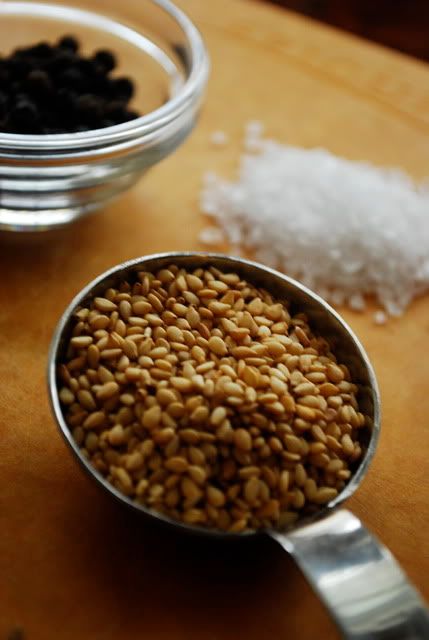
3 tablespoons sesame seeds
2 tablespoons cumin seeds
1 tablespoon black peppercorns
1 teaspoon fennel seeds
1 teaspoon dried mint leaves
1 teaspoon salt

Heat a heavy skillet over high heat, add the hazelnuts, and dry-toast until slightly browned and fragrant, being careful that they don't burn. Remove from the heat and cool completely. Repeat the procedure with each of the seeds and the peppercorns. Allow each of them to cool completely.

Place the nuts and seeds, along with the mint and salt, into a mortar and pound until the mixture is crushed. Or pulse in a food processor to a coarse consistency; do not allow the mixture to become a paste.

Store in an airtight container in a cool place for up to 1 month.

Yield: 1 cup.

Wednesday, November 4, 2009

Coconut Shrimp

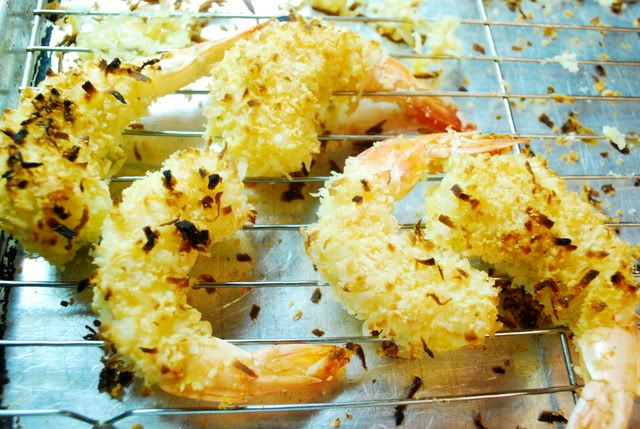
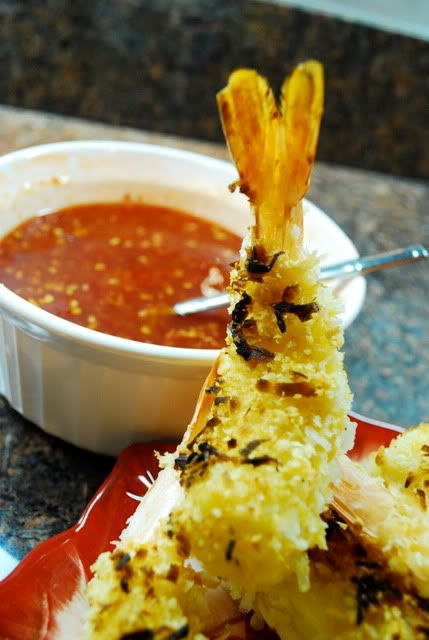
On Halloween night, my husband and I hid away at my mother's house. Mainly because she gets a limited number of trick-or-treaters (and when I say limited I mean she got about 50 kids), whereas in my neighborhood we get into the 100s. I live in a townhouse community, so it's insane the amount of kids that come knocking on the door. One year we stayed home to give out candy. I probably spent about $60 on candy and ran out in two hours. We then had to hid upstairs with the lights off in the hopes that they would stop ringing the doorbell! In addition to that, opening and closing the door to service these little costumed bands of children is made even that more difficult by the fact that I have three cats. Let me add to that, three cats who like to try to escape every time the front door lingers open. Not a good combination. So, we went to my mother's, handed out candy and cooked up some finger foods to munch on. Among those, was this Coconut Shrimp that I found at Food Network .
Photobucket
Instead of frying them like the recipe calls for, we baked them. It was less messy and better for you as well. The coconut flavor was perfect and we baked them on 400 degrees for about 20 minutes, until the coconut coating was crisp and beginning to brown.
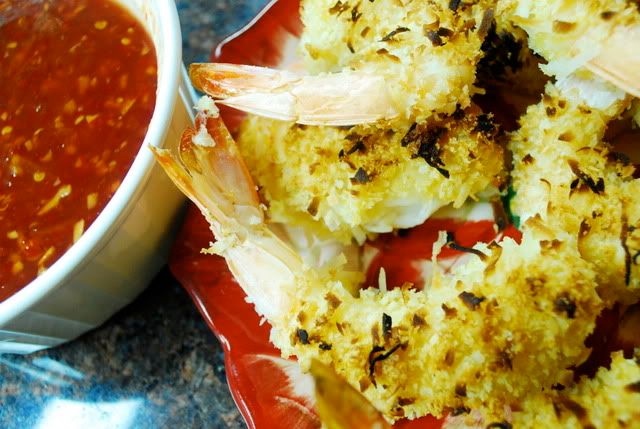
Photobucket
The only thing we really didn't like about this recipe was the accompanying dipping sauce. The orange marmalade was way too potent and just didn't go well with the shrimp. Next time, I may make some kind of pineapple or mango puree sauce instead. Other than that though, the shrimp were crispy and tasty. Enjoy!

Neely's Jumbo Coconut Shrimp
The Neelys, Food Network
Photobucket
Peanut oil, for frying
1 1/2 pounds jumbo shrimp, peeled and deveined
1 cup panko bread crumbs
1 cup shredded sweetened coconut
4 large eggs
Salt and freshly ground black pepper
1 cup all-purpose flour
1/2 tablespoon onion powder
1/2 tablespoon granulated garlic powder
Zesty Dipping Sauce, recipe follows
Directions
Preheat oil in a deep-fryer to 350 degrees F.

Butterfly shrimp and set aside.

In medium bowl mix together panko and coconut. In another medium bowl beat eggs and dash of salt and pepper. In a third bowl mix flour, onion and garlic powder together. Dredge shrimp in flour, then eggs, then the bread crumbs.

Place in preheated deep-fryer and fry, in batches, until crisp and golden brown; 2 to 3 minutes. Drain on a paper towel-lined sheet tray. Serve hot with Zesty Dipping Sauce on the side.

Zesty Dipping Sauce:

1 (6-ounce) jar orange marmalade
1/4 cup sweet Asian chili sauce
1 lime, juiced
Mix all ingredients in a small bowl.

Tuesday, November 3, 2009

Caramel Pumpkin Seeds with Macadamia Nuts

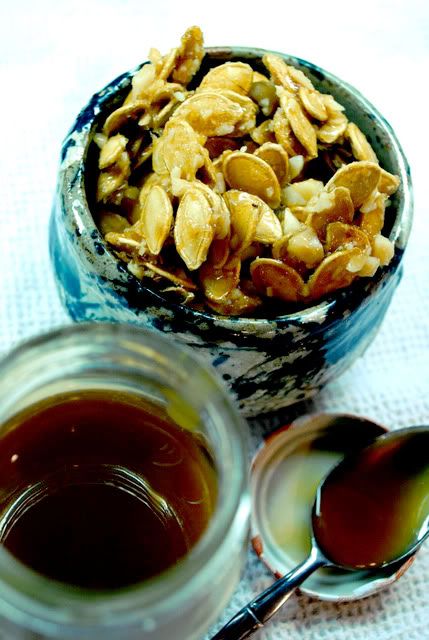
I know these are a bit late, since Halloween is now over, but I just had to share because they were so tasty. Be warned though, eating too many pumpkin seeds may do a number on your stomach.
Photobucket
I found the hulls a bit rough to digest even though they are edible - and these sticky little morsels are so easy to overindulge on that you may find your stomach seed-filled before you know it. I thought this was a great alternative to traditional roasted pumpkin seeds and I'll definitely be making this easy recipe again next year. And I have to say, I normally don't find many of Sandra Lee's Semi-Homemade recipes enticing, but once in a while she has a zinger that really intrigues me. This is one of those times and I'm glad I went with my instincts on this one. Sandra hit a semi-homemade home run here. Enjoy!

Caramelized Pumpkin Seeds
Sandra Lee, Semi-Homemade, www.foodnetwork.com
Photobucket
1/2 cup butterscotch caramel sauce

1 cup brown sugar

1 teaspoon cinnamon extract

1/2 teaspoon cayenne pepper

3 cups pumpkin seeds, roasted

1 cup almonds, crushed (I used macadamia nuts because it's all I had around)


Lightly coat baking sheet with cooking spray and set aside.


In a large skillet, slowly melt the caramel sauce and sugar. When melted stir in cinnamon extract and cayenne. Continue cooking until mixture reaches a temperature of 310 degrees F. Stir in pumpkin seeds until completely coated. Spread caramelized seeds onto the baking sheet and sprinkle with crushed almonds. Separate seeds with wooden spoon until cooled.


Cook's Notes:

Melted sugar is very hot. Please use extreme caution when handling and pouring. Pumpkin seeds may be purchased already roasted. If using the seeds from a jack-o-lantern, rinse and clean seeds. Place on a baking sheet, lightly coated with cooking spray, in a preheated 250 degree F oven. Roast seeds for about 1 hour stirring every 15 minutes. The actual seed of the pumpkin is inside the hull. The hull is edible.