Tuesday, March 30, 2010

Philly's Best Cheesesteak

Philly and I go way back. It's where I was born and lived for the first year of my life, it's where my parents grew up and it's where most of my relatives still live in or around today. My little brother attended Drexel University and then decided to stay in the city to live. So my husband and I go up for a visit every now and then to hang out with my brother in his stomping ground. Now despite my long history with Philadelphia and my countless visits and hours spent in the city, I've never ever had a real Philly cheesesteak. Shocking isn't it?? I've had most every other Philly food - great Italian, Philly pretzels, a hoagie, but never a real, honest to goodness cheesesteak. My husband, being a native Marylander, had never had a cheesesteak either and every time we go up to Philly to visit he gripes about why we never get cheesesteaks. So two weeks ago we went up on a beautiful weekend and took a trip to the famous "cheesesteak corner" in South Philly for one of Geno's gut-busters.
Photobucket
Photobucket
On this busy corner are two Philly landmarks - Pat's King of Steaks and Geno's .
Photobucket
My brother claimed Geno's was the better of the two, so we went with Geno's. Both cheesesteak joints had long lines, but they moved fairly quickly. Of the two places, Geno's definitely has much more curb appeal.
Photobucket
Bright, neon orange signs beckon hungry patrons. Vegas-style flourescent lighting draws your eye in while pictures of Geno's owners arm in arm with celebrities line the glossy orange-tiled walls. Big panel-size windows let you peek in on the quickly moving operation as four to five guys work feverishly to construct cheesesteak after cheesesteak.
Photobucket
The ordering can be a bit anxious, a la the soup nazi in Seinfeld , so we had my brother, a seasoned Philadelphia and cheesesteak afficionado, do the ordering for us.
Photobucket
The Rules? Here they are:
Don't linger at that window - know what you want, speak up, say it and move on. The line is long, people are hungry and Geno's cooks are busy. No time for a slow decision maker waxing poetic about the difference between a whiz wit and wit-out. Just do it man! Don't think about the calories, the cholesterol, the fat and the zero nutritional value of this meal.
Photobucket
That's something that should have struck you long before you waited in line. Once you commit to the cheesesteak, you need to go whole hog - cheese fries, whiz wit (translated to cheesesteak with cheese wiz and sauteed onions, the only way to eat it apparently) and a large soda to wash it all down.
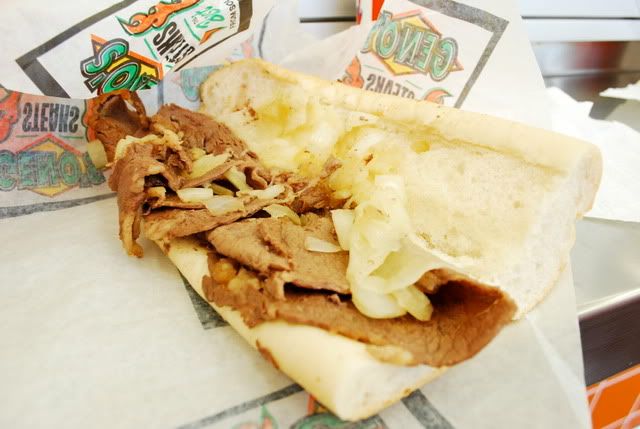
I was afraid of the possible extreme saltiness of the cheese wiz, so I opted for the cheesesteak with provolone.
Photobucket
It was good, but one bite of my brother's whiz wit and I was regretting my decision. Nobody beats the whiz, at least when it comes to cheesesteak. The oozing, goey cheese just makes the sandwich, hands down.
Photobucket
I did get the fries with cheese whiz and they were delicious. The cheese whiz isn't what you're thinking. It's not the salt-laden stuff you find in the grocery store. It's much creamier and much less salty and has actual cheese flavor.
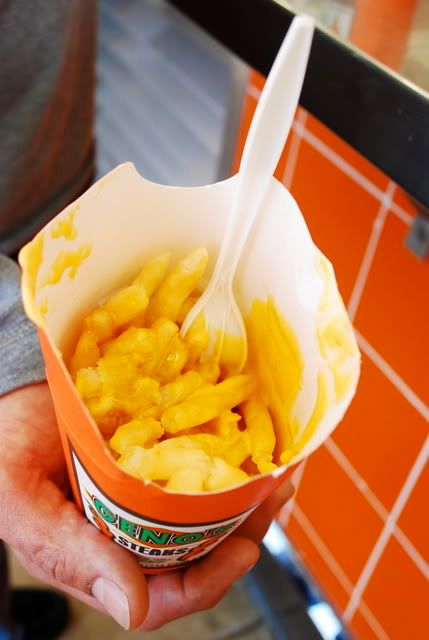
Photobucket
I knew my husband was enjoying his whiz wit meal because I don't think he said one single word once his cheesesteak was in hand. He wouldn't even stop to pose for a picutre! I made sure to document my first cheesesteak experience though, full, smiling mouth and everything!
Photobucket
Next time we're in Philly we'll conquer Pat's and see how it compares. According to my brother there is no comparison. Geno's is just better. We shall see...

Friday, March 26, 2010

Fresh Pineapple Salsa

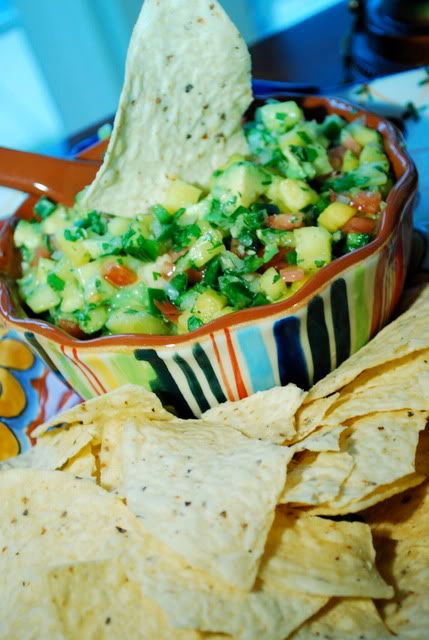
The weather is getting warmer in Maryland and that opens the door for lighter, fresher meals. I was making grilled salmon soft tacos and instead of topping them with jarred salsa I was inspired by the balmy weather to think of something a little more tropical. I surfed the grocery store for ingredients that would make the perfect fresh pineapple salsa and here is what I came up with. I have to say - this salsa was delicious! A bit spicy, a bit sweet, very juicy and flavorful and a great complement for any grilled fish or pork or chicken. Here's to hoping this nice spring weather sticks around a little longer before we get straight into the humid summer. Enjoy!

Fresh Pineapple Salsa
Photobucket

1 1/2 cup chopped pineapple
2 jalapenos, seeded and chopped
1/4 sweet onion, minced very finely
1 tomato, chopped
1 avocado, chopped
juice of half a lime
2 tablespoons chopped cilantro
1 teaspoon of minced garlic
salt to taste
pepper to taste

The preparation is simple. Chop all your vegetables and combine in a mixing bowl. Squeeze your lime juice over the chopped fruit and vegetables. Season with salt and pepper (taste for flavoring - I like to go easy on the salt since I usually eat it with either salted chips or food that has been salted) and toss in your chopped cilantro and mixed garlic. Let the salsa sit for about 20 minutes so the flavors can combine. Serve and enjoy with tortilla chips or on top of your grilled fish or poultry.

Wednesday, March 24, 2010

Barefoot Bloggers: Chicken Caesar Club

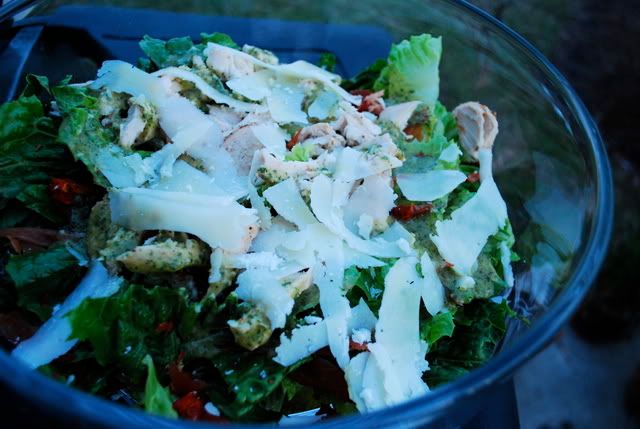
Well, I didn't really follow this recipe exactly. I used some of Ina's ideas, but made this into a Chicken Caesar salad, rather than a sandwich. I just wasn't in the mood for a chicken sandwich for dinner the night I made this, but a big salad sounded great. I did serve it with garlic bread though, so it had all the sandwich elements just deconstructed a bit.
I liked this dressing a lot - but I think that is mainly due to the fact that I substituted olive oil for the mayonnaise. I have come to the conclusion that I don't really like creamy Caesar dressings. I'm more of a traditionalist and go for the oil-based Caesars. I did add one tablespoon of mayo to help bind it a bit, but that was all. My dad makes a great Caesar dressing with similar components (oil-based of course) but he uses raw egg. Being pregnant, I have to forego the raw egg, and fortunately it doesn't really seem to make much of a difference in consistency. Overall this made a simple, delicious supper! I've included the original recipe below. My basic changes were olive oil for mayo, plus 1 tb of mayo and, to make it a salad, a head of romaine and only 1 chicken breast. The prosciutto and sundried tomatoes were a great flavor addition to this salad so I included them, along with shavings of parmesan cheese. Enjoy!

Chicken Caesar Club
www.foodnetwork.com, Barefoot Contessa, Ina Garten
Photobucket
•2 split (1 whole) chicken breasts, bone in, skin on
•Good olive oil
•Kosher salt
•Freshly ground black pepper
•4 ounces thinly sliced pancetta
•1 large garlic clove, chopped
•2 tablespoons chopped fresh flat-leaf parsley
•1 1/2 teaspoons anchovy paste
•1 teaspoons Dijon mustard
•1 1/2 tablespoons freshly squeezed lemon juice
•1/2 cup good mayonnaise
•1 large ciabatta bread
•2 ounces baby arugula, washed and spun dry
•12 sun-dried tomatoes, in oil
•2 to 3 ounces Parmesan, shaved
Directions
Preheat the oven to 350 degrees F.

Place the chicken breasts on a sheet pan skin side up. Rub the chicken with olive oil and sprinkle with salt and pepper. Roast for 35 to 40 minutes, until cooked through. Cool slightly, discard the skin and bones, and slice the meat thickly. Set aside.

Meanwhile, place the pancetta on another sheet pan in a single layer. Roast for 10 to 15 minutes, until crisp. Set aside to drain on paper towels.

Place the garlic and parsley in the bowl of a food processor fitted with a steel blade and process until minced. Add the anchovy paste, mustard, lemon juice, and mayonnaise and process again to make a smooth dressing. (Refrigerate the Caesar dressing if not using it immediately.)

Slice the ciabatta in half horizontally and separate the top from the bottom. Toast the bread in the oven, cut side up, for 5 to 7 minutes; cool slightly. Spread the cut sides of each piece with the Caesar dressing. Place half the arugula on the bottom piece of bread and then layer in order: the sun-dried tomatoes, shaved Parmesan, crispy pancetta, and sliced chicken. Sprinkle with salt and pepper and finish with another layer of arugula. Place the top slice of ciabatta on top and cut in thirds crosswise. Serve at room temperature.

Monday, March 15, 2010

Chunky Banana Bran Muffins

So like most pregnant women, I have become anemic. Apparently this is a common plight of pregnancy. My doctor told me to start taking iron pills, with a warning that they might cause a certain side effect - constipation. Now not to get too detailed on the subject, but with all the other possible discomforts of pregnancy, I have managed to side step this one problem along the way.
Photobucket
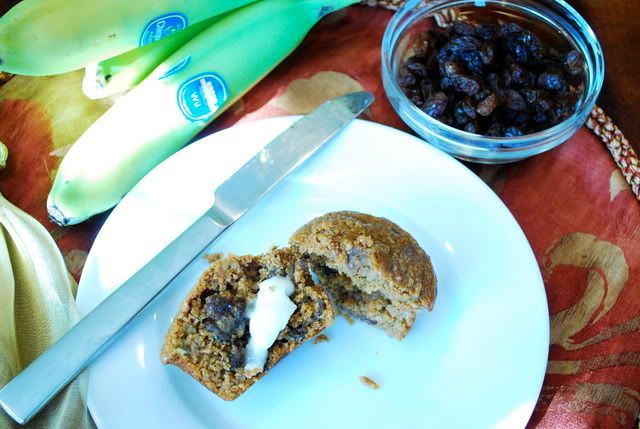
So I'll be damned if now toward the end I'm going to let iron pills stop things in their tracks, if you catch my drift. I figured, instead of chasing my iron pill with a 'softener' (again, if you catch my drift) I'd rather chase it with a yummy bran muffin. Ina Garten to the rescue!! I saw her making these on Food Network one afternoon and it was like fate. They showed up just in time to save me from myself.
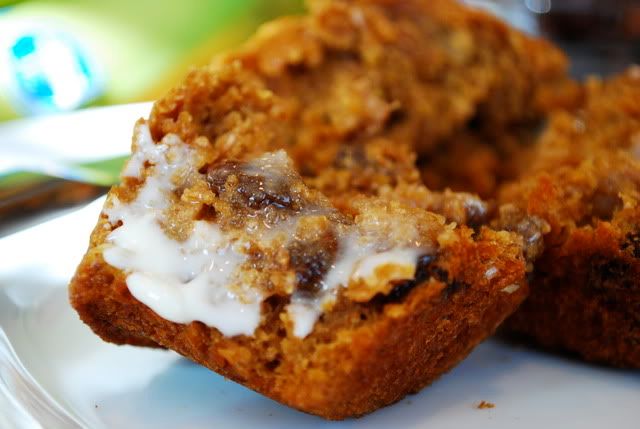
Now in addition to being practical little gems, they are quite tasty as well. A two-fer if you will - healthy bran and sweet, tasty banana and raisins.
Photobucket
So you don't have to be suffering from anything in particular (if you catch my drift yet again), to enjoy these muffins at your breakfast table. Butter them up and gobble them down! They freeze beautifully as well so you can enjoy them for many a day.

Chunky Banana Bran Muffins
Ina Garten, www.foodnetwork.com
Photobucket
•1 cup unprocessed wheat bran
•1 cup buttermilk (shaken)
•4 tablespoons unsalted butter, at room temperature
•1/4 cup light brown sugar, lightly packed
•2 extra-large eggs, at room temperature
•6 tablespoons unsulphured molasses
•1 teaspoon grated orange zest
•1/2 teaspoon pure vanilla extract
•1 1/2 cups all-purpose flour
•3/4 teaspoon baking powder
•1/4 teaspoon baking soda
•1/2 teaspoon kosher salt
•1 cup raisins
•1 cup large-diced bananas
•1/2 cup chopped walnuts
Directions
Preheat the oven to 350 degrees F. Place paper liners into 1 (10 or 12-cup) muffin tin.

Combine the bran and buttermilk and set aside. Cream the butter and sugar in the bowl of an electric mixer fitted with the paddle attachment for about 5 minutes, until light and fluffy. With the mixer on low, add the eggs, 1 at a time. Scrape the bowl and then add the molasses, orange zest, and vanilla. (The mixture will look curdled.) Add the bran/buttermilk mixture and combine.

In a separate bowl, sift together the flour, baking powder, baking soda, and salt. With the mixer on low speed, slowly add the flour mixture to the batter just until combined. Don't overmix it! Fold in the raisins, bananas and walnuts with a rubber spatula.

With an ice cream scoop or large spoon, fill the muffin cups to the top and bake for 25 to 30 minutes, until a cake tester comes out clean.

Friday, March 12, 2010

Barefoot Bloggers: Mini Meat Loaves

Ok so I've never really been a big meatloaf eater. My mom would make it once in a while when I was little, but it wasn't like we had some great family recipe to pass down, as many Americans seem to have. I've made meatloaf maybe twice since being married - once with ground turkey and the other time I can't even remember. It's not my favorite meal, but it's easy, classic and homey. I wasn't real excited about this Barefoot Bloggers choice, but I figured what they heck. I really wasn't excited about the ketchup topping. That just sounded so "tv dinnerish" to me - also, I kind of hate ketchup. Here's a little story about how much it grosses me out.
Photobucket
I used to be a camp counseler when I was in high school and this one little girl would bring ketchup and bologna sandwiches on white bread in her lunch bag every day (GAAAAAG!). Now as if that wasn't gross enough to me - cold ketchup on cold white bread and cold bologna, she would take out the piece of bologna in the middle of the two ketchup-stained pieces of white bread, and hold it up and lick the excess ketchup off the bologna. I could only witness this display of her love of ketchup once for fear that I would literally throw up my own lunch.
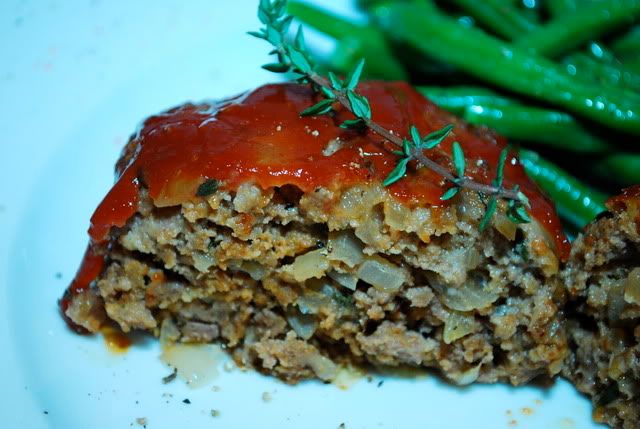
Ketchup is way too sweet in my opinion, the smell of it makes me kind of gag and the only thing I can really stomach it with is french fries. But even then I usually mix it with a little mustard. Or just hold the ketchup and dip my fries in mustard. My love of mustard could fill a whole blog entry, to be honest. And don't get me started about ketchup on hamburgers and hotdogs. Ugh. My husband likes ketchup however and wanted me to go with the ketchup topping on these mini-meat loaves, so I obliged. It wasn't too bad actually and gave the meat loaf a moistness. Overall, these were pretty tasty. I halfed the recipe to make 3 mini loaves. I also reduced the amount of onions Ina calls for, as I thought 1 and 1/2 onions would be WAY too much onion. I only used 1/2 of one onion and it was more than enough. I also added a lot more fresh thyme than she calls for. Go to the Barefoot Bloggers website to see how everyone else fared with these meat loaves. Enjoy!

Ina's Mini Meat Loaves
Barefoot Contessa, Ina Garten
Photobucket
1 tablespoon good olive oil
3 cups chopped yellow onions (3 onions)
1 teaspoon chopped fresh thyme leaves
2 teaspoons kosher salt
1 teaspoon freshly ground black pepper
3 tablespoons Worcestershire sauce
1/3 cup canned chicken stock or broth
1 tablespoon tomato paste
2 1/2 pounds ground chuck (81 percent lean)
1/2 cup plain dry bread crumbs (recommended: Progresso)
2 extra-large eggs, beaten
1/2 cup ketchup (recommended: Heinz)
Directions
Preheat the oven to 350 degrees F. Heat the olive oil in a medium saute pan. Add the onions, thyme, salt, and pepper and cook over medium-low heat, stirring occasionally, for 8 to 10 minutes, until the onions are translucent but not brown. Off the heat, add the Worcestershire sauce, chicken stock, and tomato paste. Allow to cool slightly. In a large bowl, combine the ground chuck, onion mixture, bread crumbs, and eggs, and mix lightly with a fork. Don't mash or the meatloaf will be dense. Divide the mixture into 6 (10 to 11-ounce) portions and shape each portion into a small loaf on a sheet pan. Spread about a tablespoon of ketchup on the top of each portion. Bake for 40 to 45 minutes, until the internal temperature is 155 to 160 degrees F and the meat loaves are cooked through. Serve hot.

Saturday, March 6, 2010

Chicken in a Love Nest

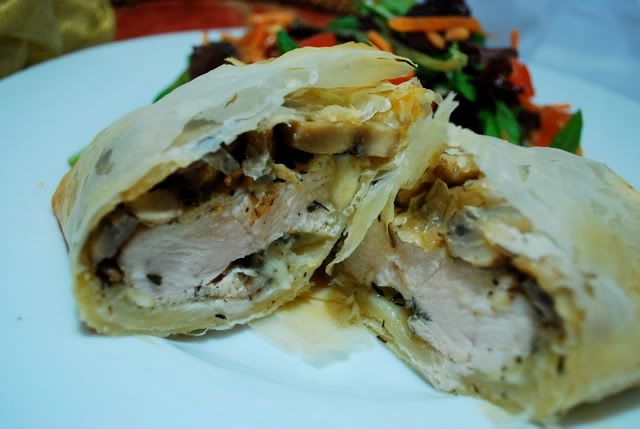
I love recipes like this. They really speak to what makes the food blogging community so great. I found this recipe on a random trip over to Gorgeous Gourmet blog . While perusing Lisa's blog I came across this recipe, which she had gotten from a roofer working on her house who shared her passion for cooking. So from one roofer to her to me comes this delicious, easy and elegant recipe idea for chicken! It's just kind of cool to me how food blogging can instantly connect people - people you may never even meet! So I guess I have to thank Lisa and John the roofer for this chicken recipe.
Photobucket
Each one of us can keep the basic recipe and make our own adaptations. For example, Lisa wrapped her chicken in puff pastry. I had some phyllo dough in my freezer so I wrapped my chicken in that. I also subbed lemon juice for the white wine since I don't have any wine on hand at the moment being 7 months pregnant.
It is so fun to share recipes and try out new ones and put your own twist on them all at the same time. Without a food blog, I would have never found this recipe! Now it will become one of our go-to meals. I even think it could be served to company or done as an appetizer version for a party. There are so many possibilities. But the best part is, I'm going to a bridal shower this weekend and they are asking for everyone to bring a recipe for the bride. I've decided this one will be my contribution. It's so easy to adjust for two or 20 people, not too expensive, and not too difficult but makes a beautiful presentation. I hope your blogging and blog-reading has lead you to some great recipes! Enjoy!

Chicken in a Love Nest
adapted from Gorgeous Gourmet
Photobucket
2 chicken breasts (cut in half if you decide to make 4 portions)
Salt and freshly ground black pepper
1 tablespoon fresh thyme, chopped
2 tablespoons olive oil
2 tablespoons butter
4 tablespoons butter, melted (keep separate from other butter as this will be used for the phyllo dough)
1/2 pound mushrooms, sliced (use any kind you like, I used baby portabellas)
1 teaspoon Dijon mustard
A splash of white wine or a squeeze of fresh lemon juice
10 sheets of phyllo dough
4 thin slices of provolone cheese or any cheese you prefer or have on hand (Lisa used brie originally)

Pre-heat oven to 375°F with the oven rack in the middle.
Pre-heat a large skillet over medium-high heat with 2 tablespoons olive oil. Season the chicken breasts with salt, freshly ground black pepper, thyme. Add the seasoned chicken breasts to the hot skillet to brown, about 2 minutes each side, until nice and golden brown. Remove to a paper towel-lined platter and reserve.
To the same skillet, add the 2 tablespoons butter and the mushrooms. Cook until slightly brown and tender, then season with salt and freshly ground black pepper. Add the Dijon mustard and wine, and cook until there is almost no liquid left in the pan. Remove the mushrooms from heat and reserve.
While the mushrooms are cooking, place the phyllo on a clean and flat work surface area. Using your melted butter and a pastry brush, brush five sheets of phyllo each with butter and stack. Then do the same for five more.
Place 2-3 slices of cheese in the middle of each sheet of puff pastry and top with a chicken breast.
Spoon some mushrooms over the chicken, then fold it up into a neatly formed package: Fold two opposite points of the phyllo in towards one another over the chicken breast, pinching lightly to secure. Repeat with the other two points of the diamond, pinching gently to make all that all the seams are sealed shut.
Brush the oustide of each packet with butter or olive oil and place them on a parchment-lined baking sheet, seam side down. Transfer to the oven on the middle rack for 12-15 minutes, until the dough is a beautiful golden brown. Serve warm.

Friday, March 5, 2010

Blueberry-Cornmeal Muffins

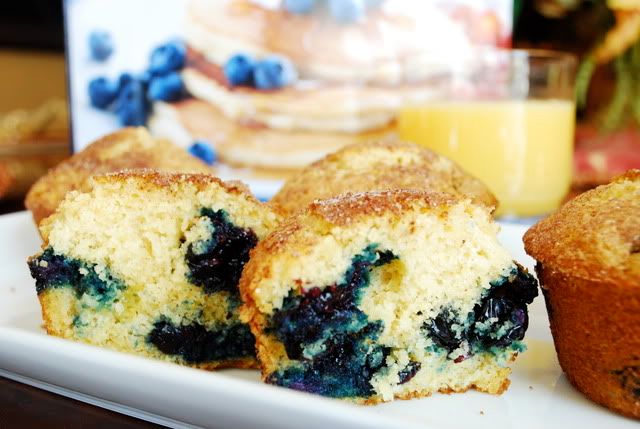
When I was younger, my mom and I used to make the boxed blueberry muffins often on Sunday mornings. I always thought they were pretty decent, especially coated with a pat of butter or two. In recent years though, I've really tried to make baked goods from scratch only. It cuts down on the amount of baked goods I eat since it takes much more effort but it also ups the quality of course. Nothing beats homemade baked goods.
Photobucket
I saw these Blueberry Cornmeal Muffins in my Essentials of Breakfast and Brunch Cookbook from Williams-Sonoma . This was a Christmas present from my husband and since he loves big breakfasts on the weekend I can't help but think it was kind of present for both of us. It really has some wonderful recipes inside and beautiful pictures to boot. Anyway, I had bought a pint of blueberries at the grocery store with the intention of just adding them to my daily yogurt, but then I had a craving for hot, sweet blueberry muffins.
Photobucket
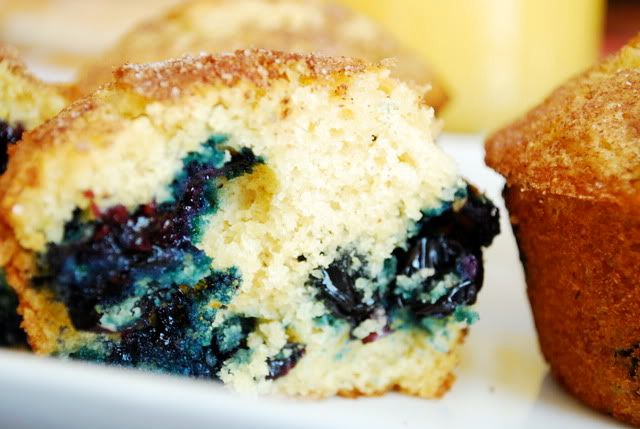
These were a slight twist on the traditional muffin because they had the added texture of cornmeal. So it was kind of two muffins in one! Blueberry and corn muffins. A cinnamon-sugar topping adds a spicy sweetness to these muffin tops as well so don't skip that step! They were easy to mix up and even easier to eat. I froze the batch so I could enjoy them all week. If you have a little extra time this Sunday, be sure to make these yummy treats. Enjoy!

Blueberry-Cornmeal Muffins
Photobucket

6 tablespoons unsalted butter
1 1/2 cups all purpose flour
1/2 cup fine ground cornmeal
2 teaspoons baking powder
1/2 teaspoon baking soda
1/4 teaspoon salt
1/4 teaspoon nutmeg
2/3 cup firmly packed light brown sugar
2 large eggs
1 cup milk
1 cup fresh or frozen blueberries
2 tablespoons granulated sugar mixed with 1 teaspoon ground cinnamon

Position a rack in the middle of the oven and preheat to 400 degrees. Butter 12-standard muffin pan cups or line with paper liners
In a bowl stir together the flour, cornmeal, baking powder, baking soda, salt, nutmeg and brown sugar. Set aside.
By hand: In a large bowl whisk the eggs until blended. Whisk in the milk and butter. Add the dry ingredients and stir with a rubber spatula just until moistened. Do not overmix. Fold in the berries.
By Mixer: In a large bowl, combine the eggs, milk and butter and beat on low speed just until blended, Add the dry ingredients and mix on low speed just until moistened. Do not overmix. Fold in the berries with a rubber spatula.
Spoon the batter into the prepared muffin cups, filling each about three-fourths full. Sprinkle the cinnamon sugar evenly over the tops. Bake until a toothpick inserted into the center of a muffin comes out clean, 15-18 minutes. Transfer to a wire rack and let cool in the pan for two minutes, then turn out onto the rack. Serve warm or at room temperature. Store in an airtight container at room temperature for up to 2 days. (My note: Or freeze in an airtight bag once the muffins have cooled to enjoy longer. Just thaw in microwave for 45 seconds each.)

Thursday, March 4, 2010

Pork Belly here, Pork Belly there, Pork Belly EVERYWHERE!

I may be a little behind the curve on this one, but I'm starting to notice a trend at many local restaurants. Pork belly dishes are showing up left and right on menus around town! Being someone who loves most every pork product derivative, this has intrigued me. Especially because, I'd never really heard of pork bellies outside of the old movie Trading Places . Have you seen this? Eddie Murphy and Dan Akroyd involuntarily trade social status, but unite in the end to combat two scheming old financial cronies who trade frozen orange juice and you guessed it, pork bellies, on the stock market.

Now prosciutto, bacon, pancetta, lardons, bacon, pork loin, pork chops, sausage, bacon, and in case I didn't mention it bacon, are all part of my regular culinary vocabulary. But pork belly was a new term to me.

First there was the question of what is it? I mean it seems self-explanatory, the belly of the pig. However, there's really more to it than that.

Fortunately, my adventurous husband decided to take this new menu item on head first while we were dining at Baltimore's Cinghiale a few months ago. He did ask the waiter for a quick description of pork belly first of course - you don't go blindly into an entree that costs $30! The waiter described it as one of his favorite things on the menu, cracklin' crispy slab of pork. In my opinion though, he left out some very important details.

A quick google search brought up this very informative article that describes the much-traded stock market commodity as "Bacon in its raw, uncured state, pork belly is the fattiest part of the mature hog, thick stripes of pure white fat and rosy meat." So basically, it's fat. A thick slab of it to be precise. In fact, it's the fattiest cut of the pig you can find. And the fanciest of restaurants in New York has embraced this cut, which was apparently already well known amongst southern cooks, according to the article! It's not surprising though that southern cooks knew what to do with a slab of pure white creamy pig fat before the rest of the country.

Despite it's revival and adoption by mainstream restaurant culture, after my husband's chewy slimy experience with pork belly I think it's one part of the pig I'll be perpetually passing on. I mean honestly, to us it was like being served the part of the meat that one usually cuts off! It was greasy, very rich and just had the chewy consistency of eating, well, fat. Even the so-called crispy parts were too rubbery for my tastes!

Our experience aside, diners must be lovin' the lard because good ole' pork belly has been creeping into local restaurant fare quite a lot recently. From ethnic to American-style restaurants, pork belly has crossed all borders.

For example, Victoria Gastro Pub in Columbia features an Espresso Rubbed Pork Belly served with cheese grits and an au jus sauce. They've obviously kept the southern-style to this dish.

In Baltimore, the popular new B&O American Brasserie serves a crispy pork belly cassoulet style, flavored with sage. New Baltimore hot spot Blue Hill Tavern features a pork belly appetizer with red cabbage, apple compote and calvados syrup - it sounds like a gourmet version of Peter Brady's "Pork chops and applesauce". And an old Baltimore favorite, The Brewer's Art offers a Roasted Berkshire Pork Belly appetizer that is accompanied by a sweet potato biscuit, chestnut puree, port-soaked dried cherries and natural jus.

With all this exposure lately of pork's soft underbelly, I tried to encourage my husband to maybe give it another try - even though I myself will stay far away from it. But he said it's hard to go back to a food that never sat right the first time - and wasn't cheap to boot. So while the popularity of this pig fat is a slight mystery to us, obviously others are enjoying it. Have you tried pork belly? What is your take on this fatted pig product? Or have you ever fried up pork belly in your own kitchen? I'd love to hear your experiences.