Tuesday, September 29, 2009

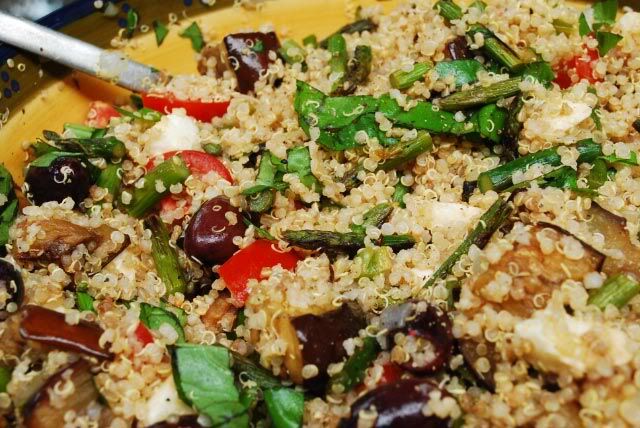
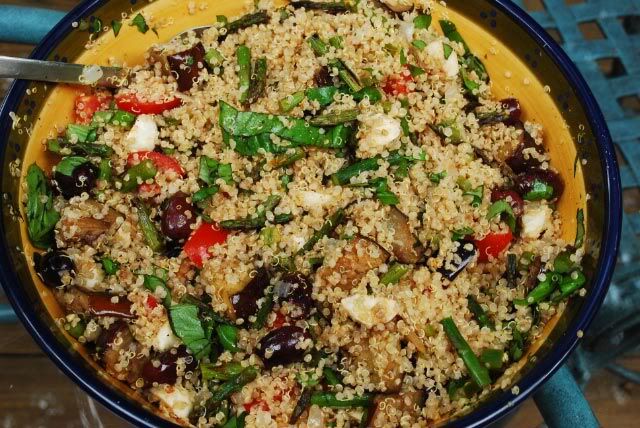
Warm Quinoa Salad with Grilled Vegetables

I feel like this dish was one last hooray for summer foods. It was light, fragrant and full of fresh vegetables and basil. This salad makes a great side dish and the leftovers were perfect for lunch.
Photobucket
This is also one of the first times I've cooked with quinoa. I learned a few things. One - it's pronounced KEEN-WAH not KWEE-NOAH.
Photobucket
Yes I was that girl in the grocery store. Second, it's not like cooking up couscous. It's a little more complicated. First there's all the washing off, even though I wasn't really sure what the heck I was washing off? Then you boil it and then you steam it and then you fluff it. I think the same steps were involved in doing my hair for my wedding! Huh? No just kidding but you get the picture. A bit time intensive, but worth it as this keen-wah holds tons of nutritious value. So if you're looking for an alternative to orzo or couscous, give this ancient grain a try. You'll be glad you did. Enjoy!

Quinoa with Grilled Vegetables
source: Gourmet Magazine for instructions on how to cook quinoa and me
Photobucket
1 1/2 cups quinoa
1 small eggplant, cubed
10-15 stalks of asparagus, trimmed
1 pint of grape tomatoes, halved
8 oz pitted kalamata olives
1 container of mini fresh mozzarella balls, cut in half
a handful of fresh basil, chiffonaded
salt and pepper
Italian Vinaigrette (I used Good Seasons Italian dressing packet and mixed with balsamic vinegar and olive oil)

Wash quinoa in several changes of cold water in a bowl, draining in a large fine-mesh sieve.
Cook quinoa in a medium saucepan of well-salted boiling water, uncovered, until almost tender, about 10 minutes. Drain in sieve. Add 1 inch water to saucepan and set sieve in pan (make sure bottom of sieve is not touching water) and bring water to a boil. Cover quinoa with a folded kitchen towel (not terry cloth), then cover with a lid (don’t worry if lid doesn’t fit tightly) and steam until tender, fluffy, and dry, 10 to 12 minutes. Let stand off heat, without lid but still covered with towel, 5 minutes.
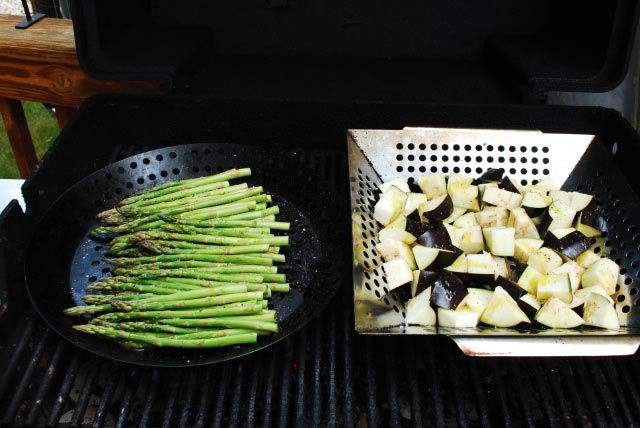
Meanwhile, preheat your grill. Place your asparagus and cubed eggplant in a grill pan and toss with olive oil, salt and pepper. Grill until tender. Remove and let cool. Chop your asparagus when cool.
Mix the chopped grilled veggies with the quinoa, cheese, olives, tomatoes and basil. Then toss with your favorite dressing and serve.
Photobucket

Thursday, September 24, 2009

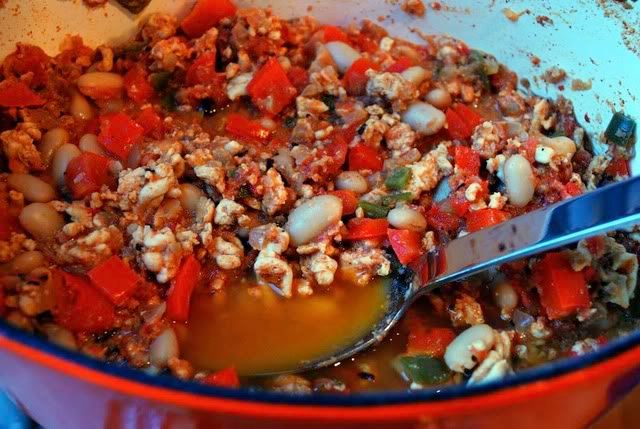
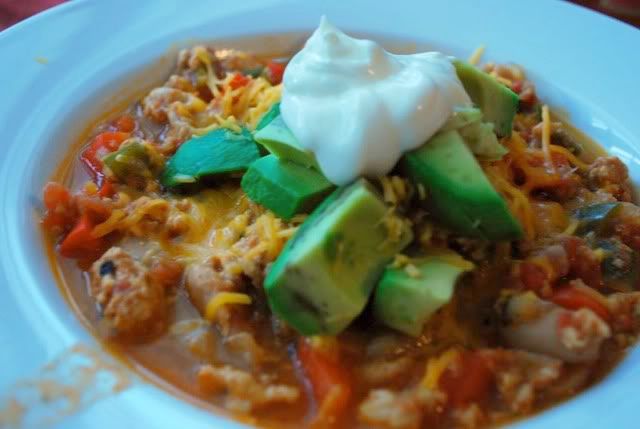
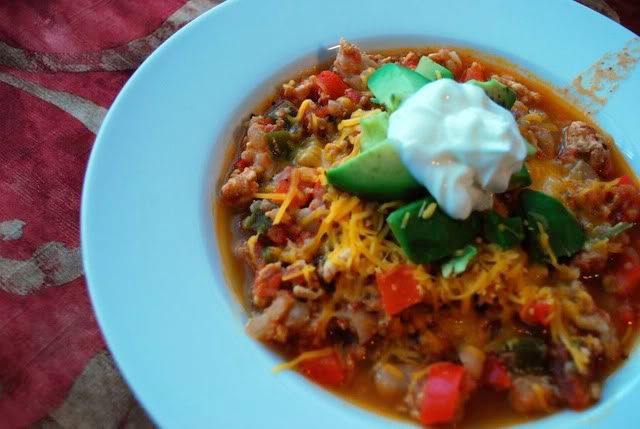
White Bean Chicken Chili

Well, as much as I've been hoping for cool fall weather, it's been hotter lately than most of the summer was here in Maryland. But last Friday morning, it started out rainy and chilly. So I went to the grocery store and bought all the ingredients for White Bean Chicken Chili.
Photobucket
I pictured a cozy evening with the hubs, parked in front of the tube, chowing down bowls of warm chilly while the cool rain fell outside. Well, wouldn't you know that at 2 p.m. the sun came out and the temps skyrocketed to about 83 degrees. It turned into a beautiful day! And one that wasn't exactly perfect for chili. Nonetheless, I had bought all the ingredients so what was a girl to do but just make the chili?? So that's what I did. It was tasty, but one bowl was more than enough since it was too hot to fill up on anything except ice water. Enjoy!

White Bean Chicken Chili
Photobucket
1 small onion, diced
1 green pepper, diced
1 red pepper, diced
3 cloves garlic, minced
1 tablespoon chili powder
1 teaspoon cumin
pinch of cardamom
pinch of allspice
2 tablespoons olive oil
1 lb ground chicken meat
1 can white cannelini beans, drained
1 can of fire roasted diced tomatoes
1/2 bottle of beer (I used Corona)
salt and pepper

Garnish:
chopped avocado
sour cream
shredded cheddar

In a soup pot or dutch oven, pour in your olive oil along with your diced veggies and garlic. Saute until tender. Add your spices and chicken meat. Cook until meat is well browned.
Add in your beans, tomatoes and beer. Season with salt and pepper and bring to a boil. Turn down to a simmer and let it stew for 30 minutes on low heat. If it's too runny you can add a little cornstarch or tomato paste to thicken it up. Once ready, serve in bowls and top with garnish.
Photobucket

Wednesday, September 23, 2009

Osso Buco and Homemade Ricotta Gnocchi

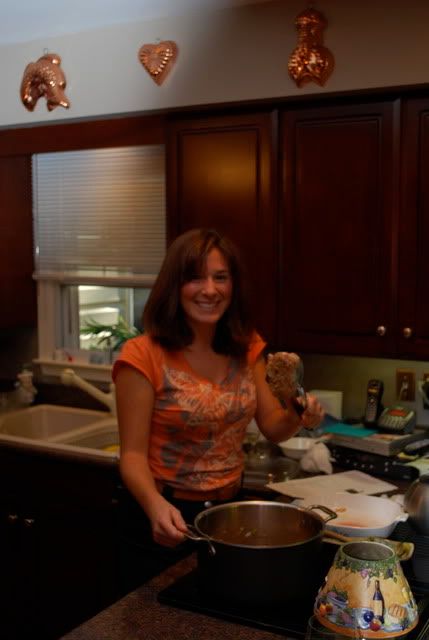
So for my birthday this year, I wanted to cook. I've been so busy during the week and even on the weekends lately that I haven't gotten many chances to just spend the day cooking! For that reason, I created a labor-intense menu for my birthday dinner and had my family enjoy the fruits of my work!
Photobucket

The menu consisted of:
Homemade Ricotta Gnocchi with Pesto Sauce
Osso Buco
Grilled Asparagus
Green Salad
Homemade Apple Pie with Homemade Cinnamon Ice cream

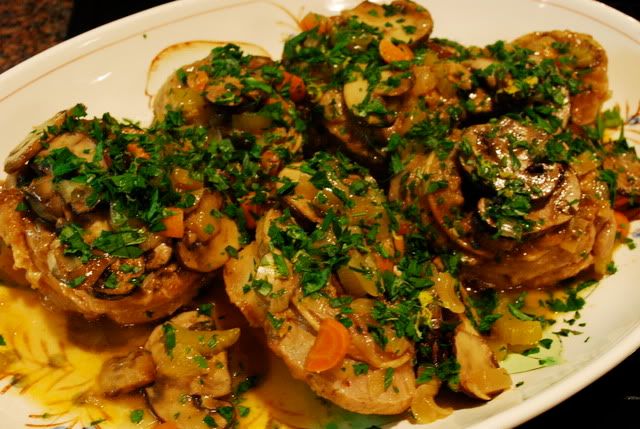
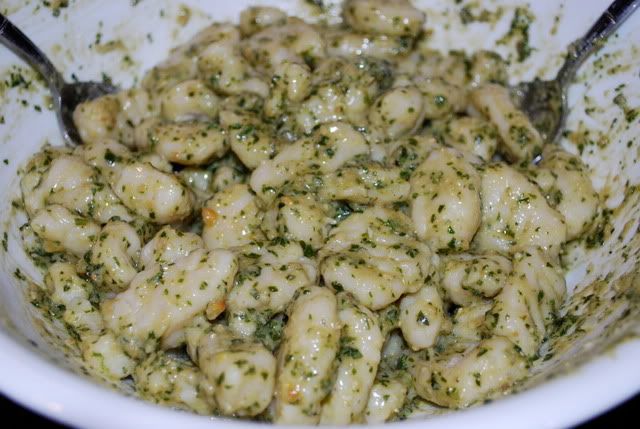
It was decadent and delicious! Everything turned out perfectly and I got to spend the day doing what I love. Unfortunately, my photos aren't that great since I was working by myself to finish everything. It's hard to get pictures of gnocchi during the creation stage when your hands are covered with flour. But these shots give you an idea. This was the first time I worked with veal shanks and I was kind of intimidated by Osso Buco. It was fairly easy to make however! And almost impossible to screw up. You're kind of braising the meat so no matter what it's tender and juicy. And the ricotta gnocchi were a great compliment to the meal. Light and fluffy and the pesto added a nice bite. Hope these dishes find their way to your birthday celebration table! Enjoy!

Osso Buco
source: Food Network, Giada
Photobucket
1 sprig fresh rosemary
1 sprig fresh thyme
1 dry bay leaf
2 whole cloves
Cheesecloth
Kitchen twine, for bouquet garni and tying the veal shanks
3 whole veal shanks (about 1 pound per shank), trimmed
Sea salt and freshly ground black pepper
All purpose flour, for dredging
1/2 cup vegetable oil
1 small onion, diced into 1/2-inch cubes
1 small carrot, diced into 1/2-inch cubes
1 stalk celery, diced into 1/2 inch cubes
1 container of baby bella mushrooms, sliced (my addition)
1 tablespoon tomato paste
1 cup dry white wine
3 cups chicken stock
3 tablespoons fresh flat-leaf Italian parsley, chopped
1 tablespoon lemon zest
Directions
Place the rosemary, thyme, bay leaf and cloves into cheesecloth and secure with twine. This will be your bouquet garni.

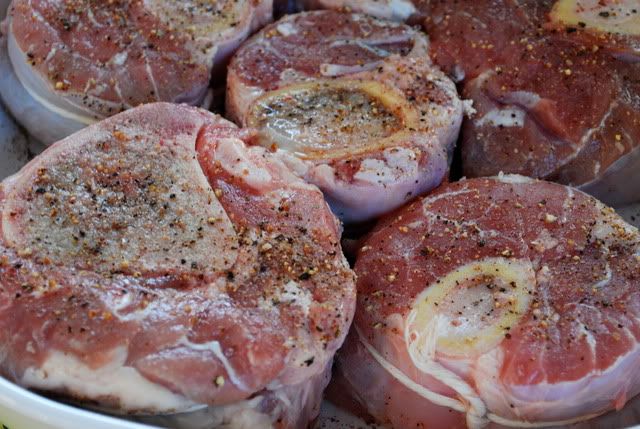
For the veal shanks, pat dry with paper towels to remove any excess moisture. Veal shanks will brown better when they are dry. Secure the meat to the bone with the kitchen twine. Season each shank with salt and freshly ground pepper. Dredge the shanks in flour, shaking off excess.
Photobucket
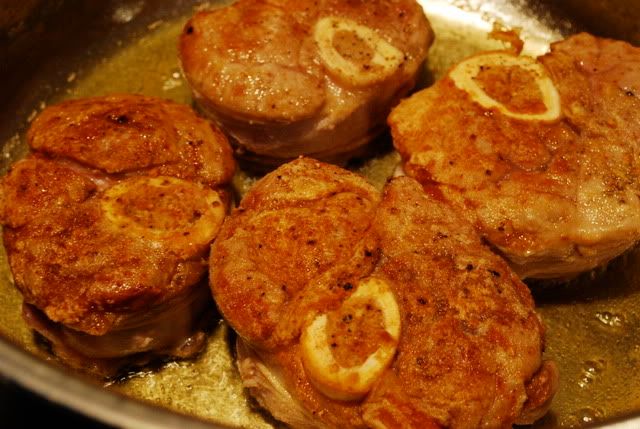
In a large Dutch oven pot, heat vegetable oil until smoking. Add tied veal shanks to the hot pan and brown all sides, about 3 minutes per side. Remove browned shanks and reserve.
Photobucket
In the same pot, add the onion, carrot and celery. Season with salt at this point to help draw out the moisture from the vegetables. Saute until soft and translucent, about 8 minutes. Add the tomato paste and mix well. Return browned shanks to the pan and add the white wine and reduce liquid by half, about 5 minutes. Add the bouquet garni and 2 cups of the chicken stock and bring to a boil. Reduce heat to low, cover pan and simmer for about 1 1/2 hours or until the meat is falling off the bone. Check every 15 minutes, turning shanks and adding more chicken stock as necessary. The level of cooking liquid should always be about 3/4 the way up the shank.

Carefully remove the cooked shanks from the pot and place in decorative serving platter. Cut off the kitchen twine and discard.

Remove and discard bouquet garni from the pot.

Pour all the juices and sauce from the pot over the shanks. Garnish with chopped parsley and lemon zest.


Ricotta Gnocchi
Source: Elodia Rigante's Italian American Cookbook
Photobucket
2 cups ricotta
2 eggs, beaten
4 cups flour
salt and pepper
more flour for rolling

Combine the ricotta with the beaten eggs. Season with salt and pepper. Gradually mix in the flour until it forms a thick dough.
Flour your working surface and roll the dough out to about 1 in thick. Then with a knife or a pizza cutter cut the flattened dough into 1 in wide strips.
Then cut 1 inch cubes out of the strips. The cubes will be your gnocchi.
You can either thumbprint them or you can roll an indentation on them using the back of a fork. Place the base of the tonged part of the fork on top of a gnocchi cube, then pull it toward you to roll it and create lines.
Place the gnocchi on a baking sheet in a single layer - if you pile them in a bowl or on top of each other they will stick together. Refrigerate covered until you're ready to boil them. At this point you can also freeze them, while flat on the pan, and then when they are frozen put them in a plastic ziploc bag for storage.
If you are going to cook them though, prepare a pot of salted water to boil. Once boiling throwin your gnocchi. They will cook for 8 to 10 minutes, until all the little pillows have floated to the top of your boiling water. Remove and serve with your favorite sauce.
Sunday, September 20, 2009

Happy Birthday To Me!

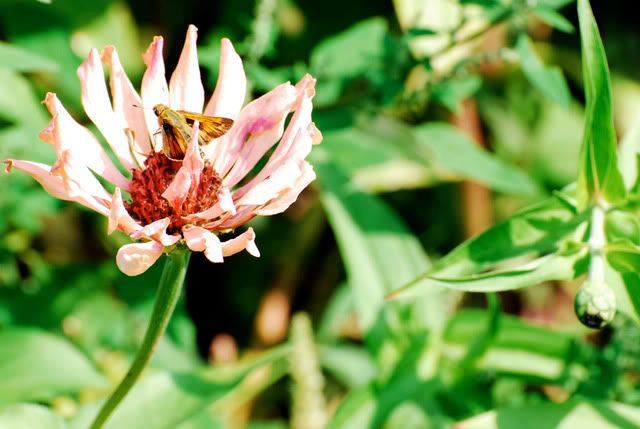
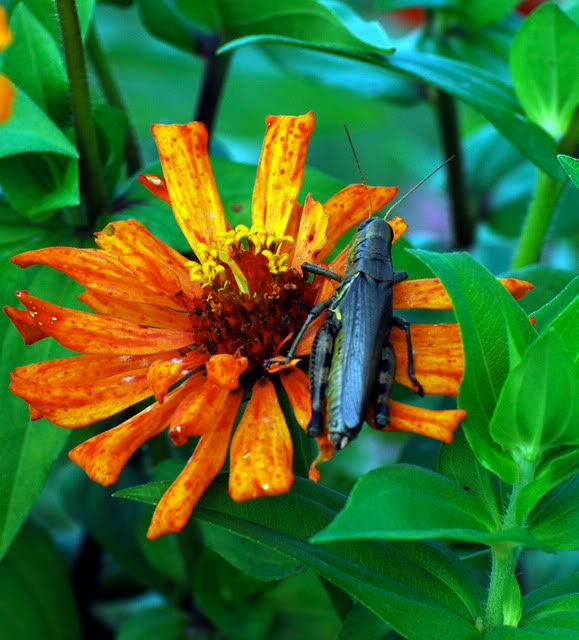
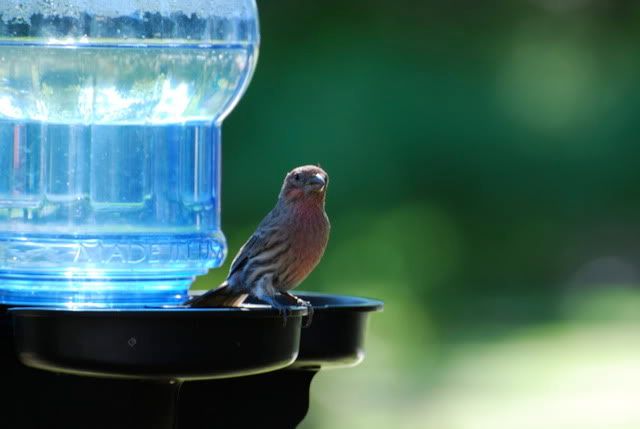
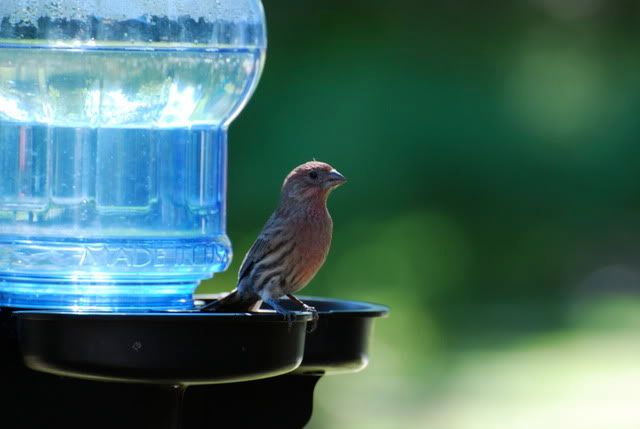
Yesterday was my birthday and I prepared an Italian-American feast for my family! But more on that later :) Right now I want to share the product of a fabulous birthday gift from my husband - a new zoom lens for my Nikon D60. Check out these awesome photos shot at a local farm! Love this new lens.

Photobucket

Photobucket

Photobucket

Little birdie stops for a bath! He was so cute I had to take two pics.
Photobucket

Photobucket

Wednesday, September 16, 2009

Memphis-Style Baby Back Ribs

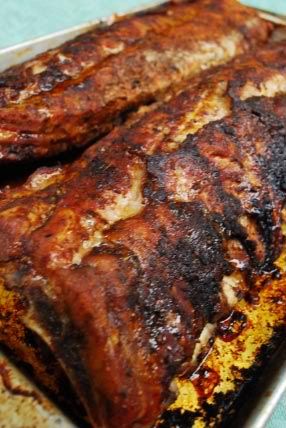
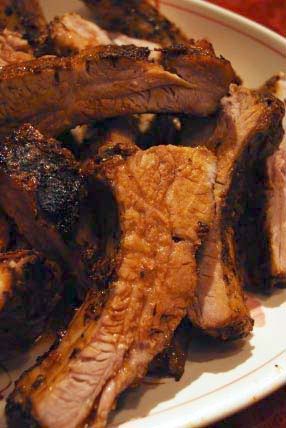
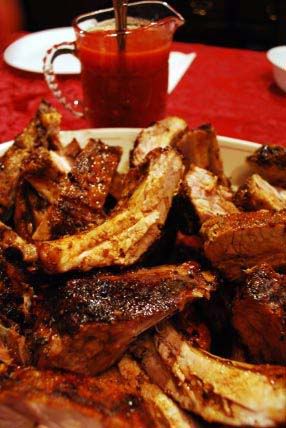
I want my baby back, baby back, baby back, I want my baby back, baby back, baby back, I want my baby back, baby back, baby back...BAY-BEEEEEE BABY BACK RIBS!!! Don't you just picture fat bastard from Austin Powers singing this little diddy as he eyed up mini-me?? That is the image that comes into my head when I think of baby back ribs. That and the old Chili's commercial, if anyone remembers that. I found this rib recipe in an old issue of Rachael Ray's magazine. I liked that these were dry ribs - still messy, but not as messy as wet ribs. Plus, I'm not a huge fan of barbeque sauce so dry ribs are much more my speed.
Photobucket
This was the first time I have ever made ribs and I think they turned out pretty well! I even used the leftover meat to make a Mexican-style macaroni and cheese. Delish! Unfortunately, I didn't have my camera around to photograph that. But here's the link to the recipe if you're interested Austin Mac n' Cheese Suiza - I followed it to the letter, just added shredded rib meat.
Photobucket
But back to the meat. The spice rub forms a flavorful crust on these juicy ribs. The cooking time might be a bit steep - I found some of them a little dry. I think you could safely cut the cooking time short by a half hour since they continue to carryover cook after leaving the oven. The sauce is quite sweet and almost ketchupy - I didn't really care for it but it wasn't too bad. In my opinion though, the ribs don't need any sauce. The spices add enough flavor. Enjoy!

Memphis-Style Baby Back Ribs
source: Rachael Ray Magazine
Photobucket
2 teaspoons sweet paprika
2 teaspoons chili powder
1 teaspoon garlic powder
1/2 teaspoon dried oregano
Salt and pepper
2 racks pork baby back ribs (about 5 pounds total)
Two 8-ounce cans tomato sauce
1/2 onion, finely chopped
6 tablespoons apple cider vinegar
3 tablespoons brown sugar
1/2 teaspoon hot pepper sauce

Preheat the oven to 275°. In a small bowl, whisk together the paprika, chili powder, garlic powder, oregano, 1 tablespoon salt and 1 teaspoon pepper. Run a paring knife down the length of the bone side of each rack to split the skin, then season all over with the rub.

Arrange the ribs, meaty side down, in a single layer on a baking sheet. Roast, turning halfway through, until very tender, about 3 hours.

Meanwhile, in a small saucepan, bring the tomato sauce, onion, vinegar, brown sugar and hot sauce to a boil. Lower the heat and simmer until thickened, about 10 minutes. Season with salt and pepper. Cut the racks into individual ribs and serve with the sauce on the side.
Photobucket

Thursday, September 10, 2009

Grand Marias, MN: Dinner at Gunflint Tavern

For our one and only dinner in town, we decided to take in some local flavor. We had originally planned to go to The Crooked Spoon, whose eclectic menu choices were a surprise for this small town, but unfortunately they were packed! We were too hungry to wait so we wandered down the street and strolled into the Gunflint Tavern. This wasn't your typical tavern food!
While they offered your usual burgers and sandwiches, they also presented some gourmet items like pesto mussels, brie en croute and barbacoa pork flautas. Despite the obvious flare on the menu, this place was au-natural and as down-home as taverns come.
Photobucket
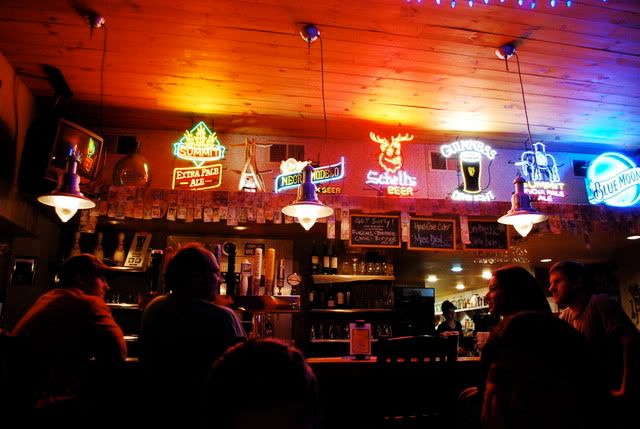
We sat at a communal wood table for dinner. The dining room was no frills - dark wood, assorted chairs and simple table settings. The bar was aglow with neon beer label signs and dimly lit hanging tin lights.
Photobucket
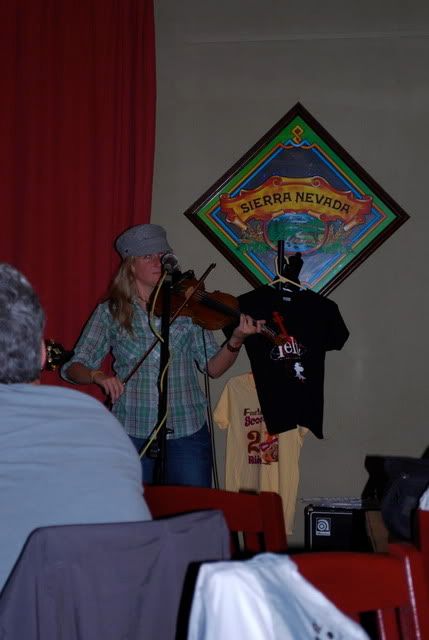
To top off our experience, there was live music at the tavern. Two fiddlers, dressed in the proverbial jeans and flannel, sang bluegrass and folk songs. They even had one member who played a whole back beat for a song on his thighs! It was almost hard to watch his thighs get redder and redder throughout the whole performance.
Photobucket
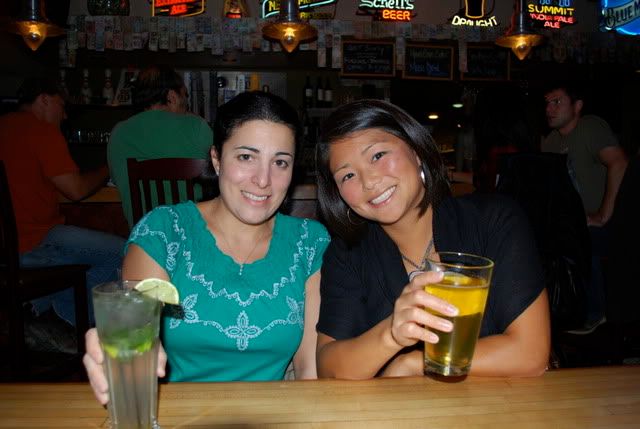
We ordered a round of drinks and two of us, myself included, made a cardinal no-no when ordering drinks at a bar. Never order a specialty fru-fru mixed drink.
Photobucket
I got the Roja Margarita and one of my friends ordered the Mojito. Both tasted like watered down juice. Oh well - live and learn. Or well, let's hope I've learned this lesson by now. We moved on to beers and two of us split a bottle of wine. Hey, it's vacation!
Photobucket
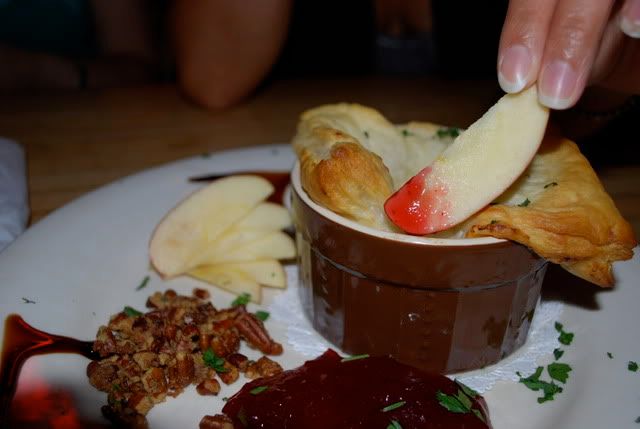
For dinner, we ordered up the brie en croute for an appetizer. A small wheel of brie hides inside a ramenkin topped with phyllo dough. The plate is decorated with assorted nuts, some preserves (raspberry I think) and apple slices. It was a good start to take the edge off our hunger.
Photobucket
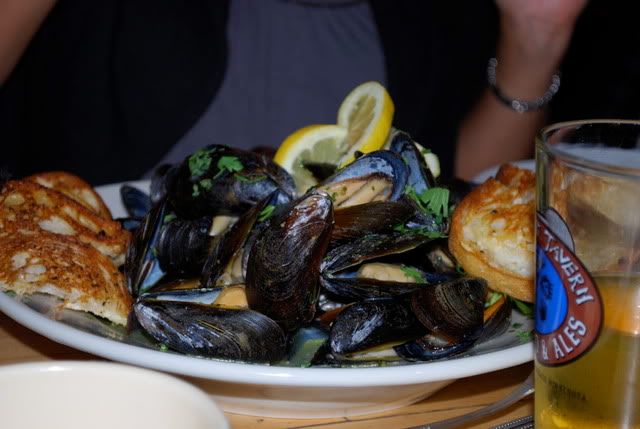
My friends ordered the pesto mussels with toasted ciabatta, the chicken gyro and the fried tilapia sandwich. I opted for the jalapeno bacon burger. The mussels came in a generous portion and swimming in a green pesto broth.
Photobucket
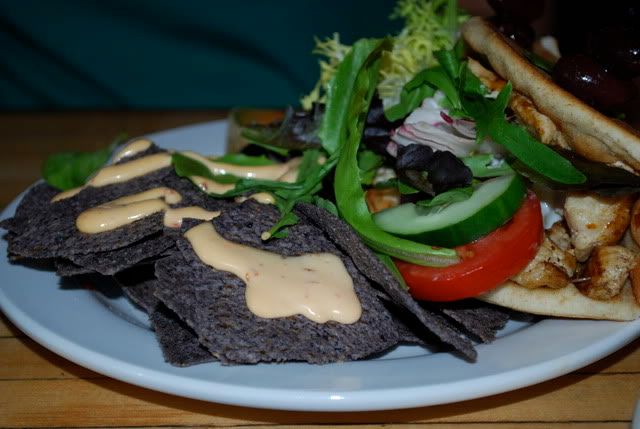
The chicken gyro was pretty standard. Chicken chunks in a soft pita with cucumber, tomato, onions and a sour cream sauce. They served the sandwiches with a choice of potato chips or tortilla chips drizzled with southwestern sauce.
Photobucket
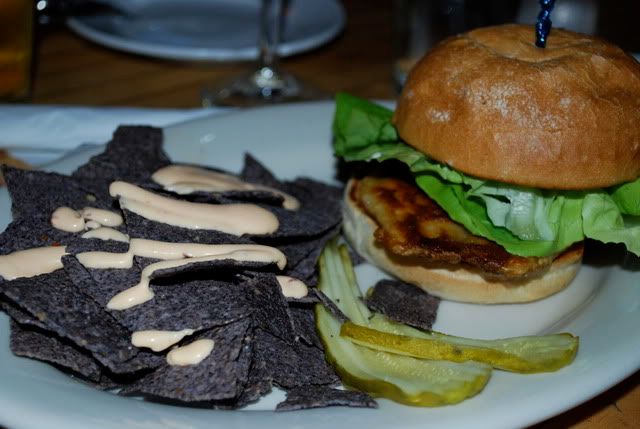
The fried tilapia was cooked well - crispy yet juicy - and a nice sized piece for the sandwich.
Photobucket
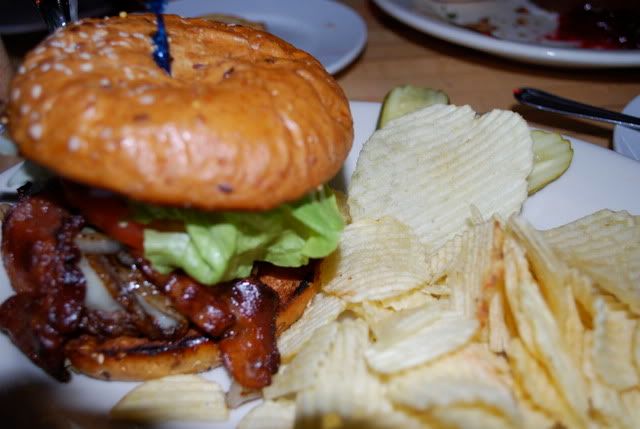
The jalapeno bacon burger was very good. They must marinate the bacon in jalapeno juice because the bacon is what imparted that hot and vinegary jalapeno flavor. This burger was spicy, so probably not the best thing to eat at 9:30 at night, but hey, it's vacation!! And I did enjoy it. I did suffer for it all night long and into the morning however. Oh well.
Photobucket
Overall, a great experience taking in the local nightlife and food in Grand Marais. Next time I visit Lake Superior though, which hopefully happens, I'll try out The Crooked Spoon.

Tuesday, September 8, 2009

The Pie Place on Lake Superior

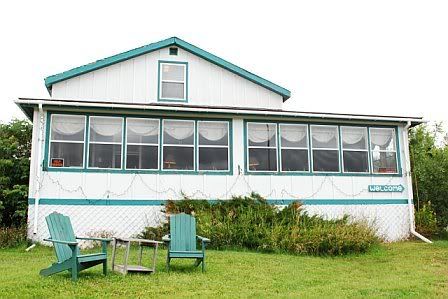
After a long, invigorating hike along the Kadunce River, we all figured we earned ourselves a nice, hearty lunch. The Pie Place fit the bill.
Photobucket
Modest, homemade food and a delicious assortment of fresh baked pies for dessert. From fruit pies - cherry, berry, apple, peach and rhubarb to cream pies filled with banana, coconut, rum raisin and lemon meringue. And even that southern favorite maple pecan pie found it's way onto their menu. But we had to eat some real food before we could pick out our pie.
Photobucket
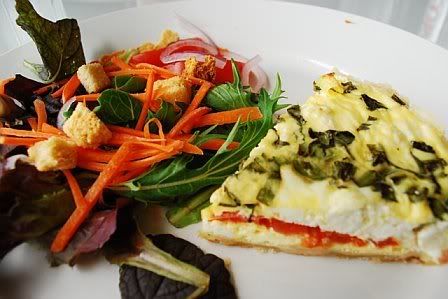
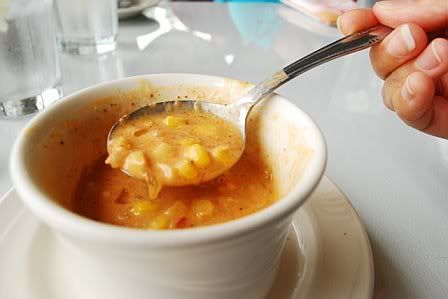
For me I ordered the Mexican corn soup and the Landslide Special - which consisted of a small salad and a tomato and goat cheese quiche with fresh basil. The soup was spicy and chock full of juicy, sweet corn kernels. A great way to warm up after hiking on that damp morning.
Photobucket
The quiche was light and fluffy with just the right amount of tomato and goat cheese. It also gave me a sneak peek at the flaky, buttery pie crust that is used for the dessert pies as well as the savory pie.
Photobucket
Then came the fun part. We each ordered a different type of pie and then went round with all our forks. And we had to order everything a la mode because you need vanilla ice cream with warm fruit pie.
Photobucket
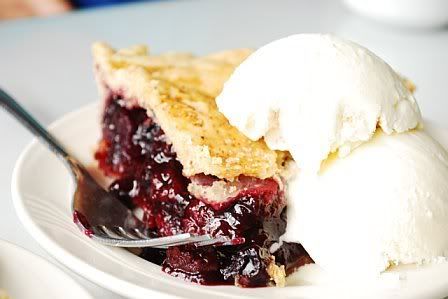
I ordered the cherry praline pie - bright red cherries sat underneath a crunchy sweet praline crumb topping. I finished every bite.
Photobucket
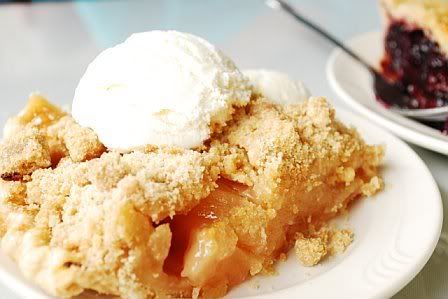
The dutch apple crumb pie was just like grandmom used to make. Sweet apples, lots of crumbly topping and a nice scoop of ice cream melting down on top.
Photobucket
The mixed berry pie sported blueberries, blackberries and raspberries if I remember correctly. It actually ended up being my favorite because it was sweet and tart - a great combination. The three berries blended nicely and left you with a party of flavors.
Photobucket
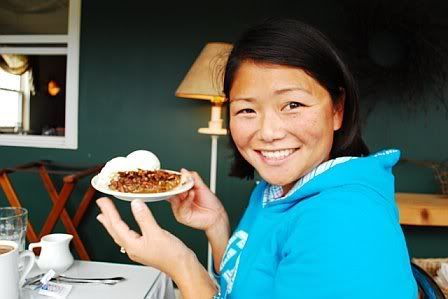
Finally, my friend Kathie ordered the Maple Pecan Pie. She had been thinking about it all morning long on the hike. Then when we got to the Pie Place, it was the first question she asked our server, who told her that unfortunately they didn't have the maple pecan pie ready for lunch that day. She was crushed! Then he returned saying they had just taken it out of the oven so perhaps they would be ready for serving once lunch was finished. Fortunately for Kathie, the pie had cooled enough for them to serve her a much anticipated piece.
Photobucket
It was quite sweet and buttery, but had a nice layer of crunchy pecans. I'm not a huge pecan pie fan, but as far as pecan pies go it was pretty good. And Kathie was very happy she got the pie she hiked so long for.
Here's a pic of Kathie with her piece - look at that grin:
Photobucket

Sunday, September 6, 2009

Trip To Minnesota's North Shore

I haven't been able to cook much lately - it's been a busy summer of traveling. Two weeks ago I went to Lake Superior on Minnesota's north shore for a girls weekend with my college friends. Here are some photos of our beautiful trip! Photobucket
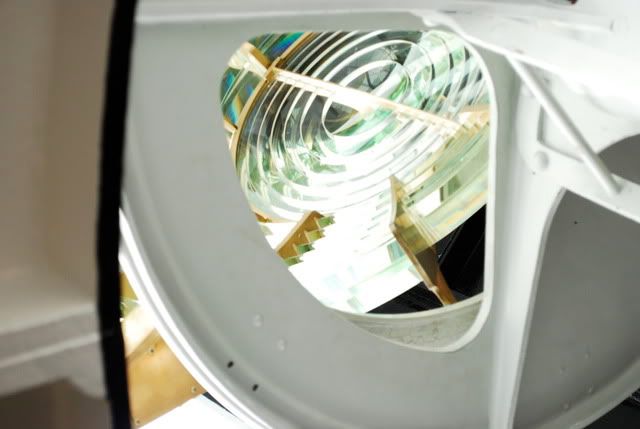
Our first stop - Split Rock Lighthouse on Lake Superior's shore.
Photobucket
Photobucket
Photobucket
The Lighthouse keeper's desk.
Scenes from our Hike Along the Kadunce River
Photobucket
Photobucket
Photobucket
Photobucket
These stones make up the bed of the lake and the shore - how pretty!
Photobucket
Photobucket

The Harbor at Grand Marais
Photobucket
Photobucket
Photobucket
Photobucket

Coming up next - a feature on the Pie Place restaurant at the North Shore!