Wednesday, July 30, 2008

I <3 Restaurant Week!

This week is restaurant week in both Howard County and Baltimore City. Basically, an excuse to order more drinks at dinner, since a three-course meal is offered at a reduced rate of $30.08. Why the .08 cents? I can't even begin to imagine. I'm sure there is an explanation out there somewhere. So if you want to eat, make sure you bring your pennies, in addition to your $30.
Anyway, the great thing about restaurant week is you can dine at an expensive restaurant and enjoy a gourmet meal, complete with appetizer and dessert. Every other Tuesday, my husband and I have a dance lesson. That's partly my decision (we took dance lessons for our 6/7/08 wedding and I just didn't want all the wedding fun to be completely over so I said, Hey, let's continue taking dance lessons). Fortunately, my dear, sweet husband accommodates me - and has fun in the process I swear! In truth, it's great fun and a good excuse to have a date night. Thankfully, our every other Tuesday, landed during restaurant week. So instead of going home and eating leftovers after class, which would have been perfectly fine, we opted to go to Ruth's Chris Steakhouse at Pier 6. Now normally we wouldn't opt to go to Ruth's Chris on a whim, but since it was restaurant week we could afford to be spontaneous. However, the catch-22 to the spontaneity restaurant week presents, is the problem of not having a reservation. We lucked out though - there were plenty of seats available in the bar area, which for us is always more fun than sitting at a table. So we sat down and prepared ourselves for the feast! To me, the steakhouses and fancy seafood restuarants are your best value for restaurant week. These sort of items are normally going to run you $30 on their own, let alone with a starter, side and dessert!
There's really no need to review Ruth's Chris per say. I personally have never had a bad meal there and they are one of the most consistent gourmet chains around when it comes to quality. They serve a meal though in every sense of the word. Even during restaurant week you leave feeling like you just ate Thanksgiving Dinner. We had a choice of Steakhouse salad, Lobster Bisque or Seafood Gumbo as a starter. Then for entree you could choose from Petite Filet, Ribeye, Salmon or Grilled Chicken (sorry but why would you get chicken at Ruth's Chris during restaurant week? The best value is not in the chicken - no offense to you chicken eaters.) Plus you got a choice of a side, mashed potatoes, steamed broccoli or sauteed mushrooms. And then dessert - chocolate sin cake or bread pudding. This is all quite a load on a hot summer evening in muggy Baltimore, but we managed to get past that and shove it all down. And it was all delicious. Even the dessert.
Tonight we're venturing out to Iron Bridge Wine Company for Howard County's restuarant week. Hopefully we'll have the same success regarding availability - they don't take reservations and their bar area is on the small side so it presents more of a challenge.
And if you miss these two restaurant weeks, take heart! In nearby DC and Northern Virginia, they will be offering restaurant week from Aug. 11-17, during which time I'll be dining at Teatro Goldoni and Tosca Ristorante. And yes, I have reservations.
Baltimore Restaurant Week
Howard County Restaurant Week
DC Restaurant Week

Lasagna - An Italian's casserole

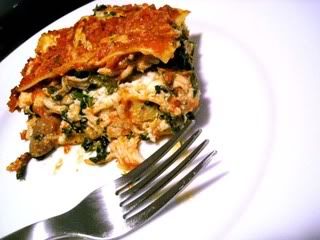
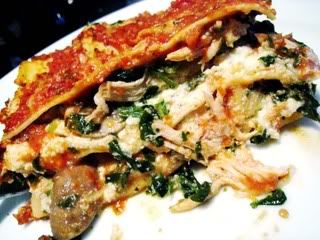
Ahhh lasagna. It's practically a perfect food. It can contain most of the five food groups - meat, dairy, carb, and vegetable. You can make it literally a thousand different ways from traditional to gourmet. I've had awful lasagna and I've had fabulous lasagna. Awful lasagna is when the noodles are overcooked, or the whole thing is watery or it's too dry. Fabulous lasagna is all about creating that perfect balance. Just enough sauce, fillings and cheese to send you into a carbohydrate coma. It's the ultimate comfort food, especially for me since I'm Italian-American. As a child, I would request Lasagna every year for my birthday dinner. It took so long to make, boil the noodles, simmer the homemade sauce, make the beef. It was practically an all-day experience for my mother. Then when my brother came along and we got older, she simplified it and made a much more healthier version. Jarred sauce replaced homemade sauce, no-bake noodles saved time, cottage cheese stood in for the heavy ricotta and spinach replaced the ground beef mixture. It was still delicious, and even better we could have it more often because it was easy.
When my husband and I were dating and eventually moved in together, lasagna was my go-to meal. And I always made the quick version my mother did. Until recently, I've started experimenting with other possible fillings. This is one such experiment. And I've also found a quick and simple way to avoid using jarred sauce. So get your sweatpants out with that elastic waistband and pull up a chair. It's time for some gut-busting lasagna.

Shredded Chicken, Spinach and Portobello Mushroom Lasagna with Roasted Tomato Marinara
Photobucket
Photobucket
1 chicken breast
2 cups water
1 bay leaf
1 sprig of fresh rosemary
1 container of baby portobello mushrooms or 3 large portobello mushroom caps, sliced
10 oz. container chopped frozen spinach (defrosted and water squeezed out)
15 oz. container of Whole-Milk Ricotta
2 eggs
1 1/2 cups shredded mozzarella
1/2 cup grated pecorino romano (or parmesan, but make sure it's fresh cheese, not the stuff from the unrefrigerated aisle like Kraft Parmesan - yuck!)
1 teaspoon of dried oregano
1 teaspoon of minced garlic
2 tablespoons olive oil
6 Barilla no-bake lasagna noodles (I like these the best because the pasta is thin and delicate, not gummy or heavy)
3 cups Roasted Tomato Marinara (recipe below)
salt and pepper

Season your chicken breast on both sides with salt and pepper. In a small saucepan, add your water, bay leaf, rosemary and 1 tablespoon of your olive oil. Add your chicken breast and bring the mixture to a boil. Once it is boiling turn your water down to a simmer and allow your chicken to poach for about 5 to 10 minutes or until done. Don't overcook because it will dry out in the oven. Remove your chicken from the water and set aside to cool. Once cool, take a fork and shred the chicken by pulling the fork across the top of the breast.
Heat a skillet over medium heat, add your remaining tablespoon of olive oil and your sliced mushrooms. Once the mushrooms begin to soften, throw in your spinach and cook for an additional 2 to 3 minutes. Take the pan off the heat and mix in your shredded chicken. Season the mixture with salt and pepper and set aside.
In a separate bowl, mix together your ricotta cheese and two eggs, along with your shredded mozzarella, grated romano cheese, oregano and garlic and season with salt and pepper.
Spray the bottom of your lasagna pan with cooking spray. My lasagna pan is an odd size, 8x6. This size works perfectly for two noodle stacks. If your pan is bigger, just be prepared to layer with three noodle stacks. After you've sprayed the bottom of your pan, ladle in about 1/2 cup of your tomato sauce. Place two lasagna noodles on top of the sauce. Spoon half of your cheese mixture on top of the noodles and spread it out evenly. On top of that spoon half of your chicken and vegetable mixture and spread evenly. Top with another 1/2 cup or more, whatever it takes, of sauce. Top with two more noodles and repeat. After you've used up your fillings, top with two additional noodles. Ladle another 1/2 cup of sauce on top of those noodles and then sprinkle a generous amount of grated romano down on the top. You can also sprinkle more shredded mozzarella if you'd like.
Cover with foil and bake for 35 minutes. Remove foil and bake for an additional 10 minutes, until sauce is bubbly. Remove and allow the lasagna to cool slightly before serving. Serve with additional marinara if desired.


Roasted Tomato Marinara

2 pints of grape tomatoes
4 sprigs of fresh oregano, chopped
1 tablespoon of garlic (or more if you're like me and love garlicky tomato sauce)
2 tablespoons of olive oil
1 8 oz. can of tomato sauce
Fresh basil
Salt and pepper

Preheat the oven to 375. In a foil pan or baking dish, mix your tomatoes, oregano, garlic and olive oil. Toss to coat the tomatoes and season with salt and pepper.
Put them in the oven and allow them to roast until they are soft and the juices have become bubbly and slightly thick, about 30 minutes. Remove from the oven and place your tomatoes in a food processor. Add your can of tomato sauce and process until all ingredients are blended. Season to taste with salt and pepper. If your sauce is a bit tart, add a 1/2 teaspoon of sugar or more if needed to sweeten it up. Shred up some fresh basil and toss it in your sauce. You can simmer it on the stove if you have time, but if not it's ready to use in your lasagna! Enjoy!

(Sorry I don't have more pics. My camera battery was charging while I was making dinner so I only have pics of my results this time around.)

Monday, July 28, 2008

You like me, you really like me!

I feel just like Sally Field! I mean starting a blog is fun, but you do feel like sometimes you're writing and posting to a massive void. There's the eternal doubter in me that says, no one is reading this but you - you might as well be keeping a diary with one of those lock and keys on it for as much publicity as this thing will see. But this was some proof that not all my ramblings and hot evenings in front of the stove are all for naught! I won the Grillin' contest on Joelen's Culinary Adventures blog. This is so exciting because not only does it just feel good to be acknowledged, but I get a whole mess of grilling spices and a great grilling cookbook to boot! For anyone who is looking for a great way to test your culinary creativity and get your blog out there for others to see, definitely check out Joelen's blog for some fabulous contests. My winning recipe is below, Cilantro Lime Halibut with Mexican Squash and Beans. Thanks again Joelen!

Wednesday, July 23, 2008

Butter Makes Everything Better

Or at least that's my husband's health-conscious motto. I swear, this boy goes through sticks. One day I watched him make a grilled cheese sandwich and I literally felt my arteries seize up. So when Jill at Cheesetique talked about making your burgers better with butter, I knew I had to give it a try. The basic concept is pretty simple, make your burgers however you normally do and slap a pat of butter in the middle of your raw burger ball, like so. Photobucket
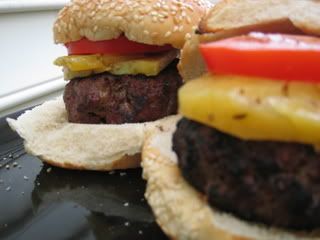
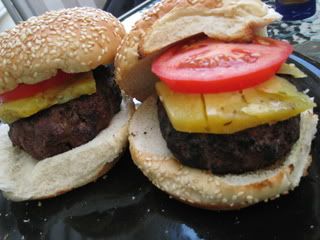
Fold the meat over the butter pat, flatten into a patty and throw it on the grill. The idea is that the butter melts and gets distributed evenly through the meat keeping it juicy and making it, well, buttery. In addition to this tip, Jill recommended a unique cheese for topping your burgers rather than the usual suspects of cheddar, American and Swiss. I introduce to you, Leiden.
Photobucket
It is similar to Gouda, but is specked with none other than one of my favorite spices, cumin seeds. What's this? A Mexican style cheese for my burgers?? Did I mention I love Mexican flavors? Between the butter and cumin seeds this burger would most definitely satisfy me and the hubs. So I went to work.
Because my cheese was cumin studded, I decided to flavor my burgers with chili powder and garlic powder to enhance that southwest theme. I also added about a tablespoon of Worcestershire sauce, and then seasoned the meat with salt and pepper. I will admit, I overcooked the burgers a bit, or rather should I say they were medium well, because I took too much time prepping for the salad (which was delicious, see below) and forgot about them. I know, bad cook and even worse, bad wife because he's a medium rare burger man. But oh well. They still tasted very good and I will definitely be using this butter trick - and Leiden cheese - again.
Photobucket
Photobucket

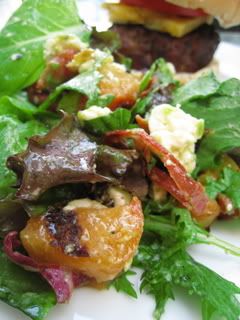
With the burgers we enjoyed a Grilled Peach and Prosciutto Salad.
It was SO good, it's definitely going into my salad repertoire. The sweetness of the grilled peaches plays well with the salty prosciutto. For crunch I added toasted pecans and to add a bit of tang some Gorgonzola cheese. It's finished off with a basil lemon dressing and some creamy slices of avocado.
I actually created this from a combo of different grilled fruit salads I saw online and in various magazines. I picked from flavors I thought would work and voila, success! This recipe makes enough for two people.
Photobucket
1 peach
3 slices of thinly sliced prosciutto
1/4 cup of whole pecans
3-4 oz of Gorgonzola cheese, crumbled or broken into small chunks
1 avocado
1 bag of triple-washed,field greens lettuce
small handful of shredded fresh basil
juice of half a lemon
1/4 to 1/2 cup olive oil (depending on how lemony you like it)
salt and pepper

Cut your peach in half and remove the pit. The slice each half into two 1-inch thick slices, brush with a little olive oil and place them on a hot grill. After about 3 minutes flip the peaches, they should have golden brown grill marks as the sugars begin to caramelize.Photobucket
Let them cook on the other side for the same amount of time and remove the from the grill and allow them to cool.
Chop up your prosciutto and place in a small saute pan with a 1/2 teaspoon of olive oil. Over medium heat crisp up your prosciutto in the pan, tossing constantly with a wooden spoon to prevent burning.
Photobucket
Once it has crisped up, remove the prosciutto from the pan and set aside to cool.
Place your whole pecans in a saute pan over medium heat to toast your nuts. Keep an eye on them and toss them frequently to avoid burning. Once toasted, about 3 minutes, remove from the heat and place aside to cool.
While your peach, prosciutto and pecans cool, chop your Gorgonzola and your avocado however you prefer.
In a small bowl, juice your lemon, whisk in your olive oil and season with salt and pepper to your taste. Add the shredded basil and stir together.
Finally, arrange your lettuce in a bowl, top with the cooled peaches, prosciutto, pecans, chopped avocado and Gorgonzola and toss with your lemon vinaigrette and enjoy!

Tuesday, July 22, 2008

Cheese, glorious cheese!!

WARNING: If you're lactose intolerant you might want to skip this post because even reading about the rich, luscious cheeses might send your stomach into sympathy cramps!
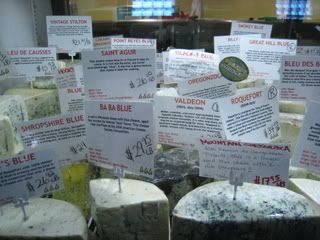
Last night I attended a cheese and wine tasting class at Cheesetique in Alexandria, VA. The theme was Summertime Cheeses and Rose Wines, hosted by the shop's owner Jill Erber. First of all, I have to say, this was my first visit to the shop and it was definitely worth the trip from Columbia, MD. To start, it's beautifully laid out and designed. The decor is Parisian cafe meets cheesemonger. Obviously, it's filled with cheese - as if that needed to be said - but is also stocked with wines, imported olive oils and vinegars as well as other gourmet snacks. Here are a few photos of the abundant cheese case and it's surroundings.
PhotobucketPhotobucketPhotobucketPhotobucketPhotobucketPhotobucket
I don't think I've yet touched on my passion for cheese. I have been known to eat nothing but cheese for all three meals. Many times, I will plan dinner around cheese. I sleep with a wheel of cheese under my pillow and dream about moving to Wisconsin and buying one of those ridiculous cheese hats. Ok not really. But honestly, I love cheese - stinky, creamy, melty, gooey, moldy, hard, rindy, - whatever the qualities, I rarely meet a cheese I don't like. It is one of those magnificent creations, like wine, that is always presenting itself in a new light. There are countless versions of cheese and the stories behind them are as intriguing as many of their unusual flavors and characteristics.
This night at Cheesetique was certainly no exception when it came to enjoying and exploring the world of cheese. We tasted about 10 different cheeses from all over the globe, mainly US and France, including buffalo mozzarella, real Greek feta made from sheep's milk not cow, baked lemon ricotta, honey goat cheese which would be heaven spread on a hot bagel, Purple Haze goat cheese that was flavored with lavender and fennel pollen of all things, and even a creamy gorgonzola. Photobucket
Despite the fact that I left with a literal brick of cheese in my stomach that probably won't see the light of day for longer than what is natural, if you catch my drift, I enjoyed every single creamy bite. The Purple Haze was my favorite - I even left with a small wheel of it. It's a soft goat cheese with such a unique and savory flavor - I imagine spreading it on a grilled portabello mushroom sandwich or even just devouring the little wheel with some tasty crackers, thus recreating the cheese brick I'm currently housing. Why let a good thing pass? Ok enough!! Back to the point. Here are some pics of our cheese:
PhotobucketPhotobucket
And a pic of my cheese-loving companions, Kinnery and Frank.
Photobucket
With this myriad of cheeses, we were served two roses, which Jill called the underdog of the wine world. Interestingly, she explained that roses got a bad name in the 70's and 80's when they started to be confused with blush wines. The fact of the matter is they are two different things. And one way to tell the difference is price. Roses (pronounced rose-ays but I can't get that little thing over the e), are going to be around the $20 and higher mark, while blushes can go for $10 and less. We tried a dry rose and a sparkling, slightly sweet rose. Both went well with different cheeses, however the sweet wine tended to intensify an ammonia taste in some of the stronger cheeses. Overall though, very nice pairings.
One of the best things about the class is truly how much you learn. Jill is a veritable cheese expert! She not only gives tips for creating the perfect cheese plate, but provides a lot of information regarding the making of cheese and it's innate properties. A few tips I'll remember - hard cheeses and sheep's milk cheeses are not good for summer soirees. "Go goat" was her motto for summer cheese plates. She also shared a fabulous tip for making "butter" burgers on the grill - along with a cheese recommendation for spicing up the usual cheddar cheeseburger. Stay tuned! I plan on trying this out for dinner tonight with an update tomorrow.
Overall, a fun, educational evening. If you're in the Alexandria area don't miss an opportunity to join Jill for one of her cheese appreciation tastings - but act quickly because they fill up fast. If you're lactose intolerant and read this whole thing, then you're glutton for punishment. Hate me, not the cheese though. It's too delicate for that.

Monday, July 21, 2008

A few words from my executive chef

Photobucket
From where I sit, I get a full view of this entire kitchen. While it's much smaller than what I'm used to working with, I mean let's face it I started out in restaurant kitchens in Baltimore City, it will have to do. See, these people that live in my house, think they rescued me from the "mean streets" of Baltimore. Little do they know before I was mercilessly plucked off the streets and titled a "stray", I was simply roaming town popping in and out of kitchens and dumpsters looking for my next culinary inspiration. You'd be surprised what kinds of food combinations you'll find in your traditional city trash heap. Half-eaten hotdogs with smashed jelly donut glaze, perfectly good beef burritos with old yogurt dressing, and partially grilled chicken cutlets soaked in flat Colt 45 - yes, that's right, you won't see THAT on Bobby Flay. So here I am, bringing my culinary expertise and know-how to the likes of this woman living in my house.
Photobucket
I'm a subtle influence, in fact the more subtle the better. For example, when the lady turns her back, I lick the chicken cutlets. Hey! Quality control people! I'm willing to take the risks. My favorite is when they are having shrimp. In this case, I'm able to steal, I mean test, an entire shrimp for flavor. Hey, you don't develop my level of standards by pussy-footing around, no pun intended.
Once in a while my intensity and passion for cooking intimidates the lady. For instance, the times when I insist on jumping on the counter to show her exactly how to stir the ground beef. Or when I just have to get in there and make sure that piece of juicy fish is searing just right. She doesn't get it. She's all, "Sawyer get down! Bad kitty. We'll have hair in our food." I say, "What's a little fur compared to burnt or overseasoned food?" She doesn't understand the kind of dedication it takes to make good food. I mean I didn't get to be 18 pounds for nothing! If only she'd listen to me once in a while.
Photobucket
All I can say is thank goodness that Morris fellow at 9 Lives knows what he's talking about - that stuff is goooo-od. Did I ever mention that people say I look just like him? I personally think I'm a bit handsomer but enough about me. I know in retrospect she will appreciate my presence on the counter instead of shooing me away like a common beggar. It's not begging, it's all part of the discipline needed to be one with food, which is my goal. And that includes pressing on after she has doused me with her horrid spray bottle. Ugh - I hate a wet coat! So unprofessional in the kitchen. Meanwhile, I'll thanklessly hold my position as executive chef of my kitchen and let this lady use it for her pleasure. Hopefully some of you can get something out of it.

Friday, July 18, 2008

Grillin' Mexican style

I love Mexican food. In fact, there is a family-owned Mexican restaurant within walking distance of our townhouse and I literally drag my husband there every Monday night for dinner. There's just something about the salty, sweet margaritas, crunchy chips and queso dip and sizzling fajitas that has made me an addict. One would think that eating Mexican once a week would satisfy my craving, but usually it doesn't. Especially in the summertime. Summer just screams Mexican food to me because it's made with so many fresh veggies and has such bright flavors like lime, cilantro, spicy peppers, tomatoes. I'm not talking ChiChis variety Mexican where anything with ground beef or covered in grotesque amounts of shredded cheddar cheese is considered Mexican. I'm talking real Mexican cooking with fresh ingredients and Mexican style spices, like cumin, chili powder, and coriander.
So usually once or twice I week I subject my husband to Mexican again. Sometimes in the form of something simple, like quesadillas, but sometimes I go a little more gourmet. The following dish is a modification of two Rachael Ray recipes, Citrus Marinated Fish and Mexican Squash. And, thanks to Joelen, I have been encouraged to submit my recipe for her grilling challenge. Check it out on her blog, Joelen's Culinary Adventures .
I had to modify the Citrus fish (see below post) because it included enough zest to choke a horse - sorry Rach. I decided to combine fresh chilies with lime and fresh cilantro as well as some dry spices to create a zesty marinade, ahem, without the zest that is. For the Mexican Squash I kept Racheal's basic flavors the same, but added tons more vegetables and black beans as well (because, much to my husband's dismay, I heart beans!!)
So I present to you Cilantro Lime Fish with Mexican Squash and Beans.

Photobucket Photobucket


Cilantro Lime Grilled Halibut
4 filets of fish (Halibut, Mahi Mahi or Swordfish work best here)
4 tablespoons extra virgin olive oil (As a side note, I refuse REFUSE to write EVOO, no matter how lazy I'm feeling. Ok 'nuff said.)
1/3 cup chopped fresh Italian parsley
1/2 cup chopped fresh cilantro
Juice of 1 lemon
Juice of 1 lime
1 tablespoon of Tabasco sauce
2 chili peppers, chopped finely
1 teaspoon cumin (eyeball it, add more for taste if you like)
1 teaspoon chili powder (same here)
Salt and pepper to taste

Rinse you fish filets in cold water, pat them dry and season with salt and pepper. Set them aside on a platter while you combine all the remaining ingredients. You can use a food processor if you like, but I found it just as easy to chop everything up.
Photobucket
Once your marinade is ready, plunk your fish down in the sauce, cover with plastic wrap and let sit for 15 to 20 minutes. Try not to let it sit for too long because the citrus will begin to "cook" the fish. Preheat your outdoor grill or grill pan and spray with cooking spray or brush with olive oil. Place your well marinaded fish filets on the grill. Pour a little marinade over the filets and close the grill cover. After about 3-4 minutes, depending on thickness, flip your filets. Pour some marinade down on the other side and allow them to finish cooking for 2 to 3 minutes. Remove from grill and serve over Mexican Squash and Beans.

Mexican Squash and Beans
2 small zucchini, cut into discs
2 small yellow squash, cut into discs
1 green pepper, cut into slices
1 vidalia onion, cut into slices
1 large tomato, cut in large chunks
2 ears of corn (or you can use frozen corn kernels if you want)
5 tablespoons olive oil
2 teaspoons cumin
2 teaspoons chili powder
1 can of black beans, drained
2 jalapeno peppers, chopped
3 cloves of garlic, chopped
salt and pepper

After you've chopped up the zucchini, squash, pepper, onion and tomato place in a large mixing bowl. Cover with three tablespoons of the oil and a teaspoon each of the cumin and chili powder. Season generously with salt and pepper and stir to coat all the vegetables with the spices and oil. Peel the ears of corn, rub with olive oil and sprinkle lightly with salt and pepper. Preheat your grill.
Photobucket
Dump your vegetables into a grill pan on the grill. If you don't have a grill pan you can use a foil pan. Place your ears of corn directly on the grill. Close the lid and allow the vegetables and corn to cook for about 5 minutes. Keep an eye on them, lift the lid to stir the vegetables and turn the corn. The corn will start to yellow, as it softens and browns up slightly you can remove your ears. Once they cool you can cut the kernels off and mix with your finished vegetables. Once your vegetables are cooking to desired doneness, remove them from the grill.
On the stovetop, put your remaining 2 tablespoons of olive oil in a medium sized skillet. Add your chopped garlic and jalapenos and place on medium heat. Allow the peppers and garlic to soften, about 4 minutes. Add your drained black beans. Toss to coat with the olive oil and to distribute the garlic and peppers. Add a teaspoon of cumin and chili powder and continue to toss. After about two minutes in the pan, turn off the heat and mix the beans in with the other vegetables. Serve immediately.
Photobucket

Side Note: You can use any leftover vegetables the next day and make a grilled vegetable quesadilla. Simply pile the vegetables up on a flour tortilla, cover with your favorite shredded cheese. Top with another tortilla and place in the oven at 350 degrees for about 15 minutes. Top with salsa, guacamole and sour cream and enjoy!

Thursday, July 17, 2008

What is the deal with zest?

I see it in nearly every recipe. Rachael Ray talks about it like it's the second coming! I mean really, it's peel people. Something that, until recently, was relegated to the garbage can in most kitchens. I feel like I'm going against major food-lovers code here by saying this, but I am just not a big fan.
I get that all the so-called essential oils are contained there. I get that the peel is where all the flavor is, but sometimes it's just so perfumey it really turns me off. The one "zest" that I do sometimes give in to using is lemon zest. In small amounts, and I'm talking 1/2 teaspoon or less here, it's tolerable. Mostly I will breakdown if a dessert recipe calls for zest. Otherwise, just the juice for me please!
Orange zest has got to be the worse. One time I ruined a perfectly good piece of grilled tuna by marinating it in orange zest, oil, chopped rosemary and salt and pepper. Again, I blame the zest queen Rachael Ray - her idea. The orange peel flavor TOOK OVER the fish like a culinary coup d'etat! I might as well have grated orange Starbursts over my food and tried to eat it. Not good.
I think the worst experience I ever had with orange peel was in elementary school on the school bus (where else do you have some of your worst experiences? Or maybe that was just me). Anyway, one of my fellow classmates, who was of Chinese background, was having an afternoon snack and myself being a relentless food moocher on the afternoon school bus home, inquired about what she was eating. It was wrapped in cellophane with red Chinese writing on it and looked like burnt potato chips. Instead of telling me what it was, she just handed me a shriveled slab and said here try it. I did and nearly lost my lunch. It was dried orange peel pieces. They were so bitter and had such a strong sulfur flavor I couldn't believe she was eating these things voluntarily.
Maybe that's why I have such an aversion to zest. It brings back memories of my long, ardous school bus ride home. But either way, I will most likely be omitting it. Meanwhile, I may have to find a new use for my microplane. Pedicure, anyone?

Wednesday, July 16, 2008

Restaurant Review: Peter's Inn, Baltimore, MD

For years I had seen this place listed as one of the 50 best restaurants in Baltimore by Baltimore Magazine. Then a friend of mine dined here one night and raved it about. It's constantly described as a hole in the wall, with exceptional food. I always find this sort of dichotomy in a restaurant very compelling. I love a place that keeps that neighborhood feel and unpretentious attitude, but still understands the importance of serving interesting, good quality grub. So after my husband and I had our weekly date night dance lesson, we set out to find this proverbial hole in the wall. Peter's Inn is located on Ann Street in the Fells Point area. If you blink, you'll miss it. A small doorway beckons customers inside. There is a painted red sign outside with large white block letters that reads Peter's. Not to be a snob, but it's not a place that I would normally pick out of a lineup. It just looks like a dingy, dark bar with a few tables.
The minute you walk in, especially if it's between 6 and 8 in the evening, you notice its cramped quarters. THere is a small aisle between the bar stools and tables - most of which are packed or occupied. The menu is one of the first things that will catch your eye. It's at the end of the first room on a large chalkboard on the wall. Written in green, pink, blue, white and yellow chalk are the day's selections. There are usually two to three appetizers, four entrees, a few sides (cheese and garlic grits - yum!), and a couple desserts. Peter's definitely goes by the motto - do a few things and do them well.
We sidled up to the bar and were able to grab two stools. There is an eclectic mix of paraphenalia decorating the dark wooden bar. A dingy Batlimore Colts penant, old brass door knockers, a Spanish-style guitar, an airplane mobile, a huge whisk, bull horns, a cowbell and even a beer bottle line-up. A huge marlin decorated with Christmas lights shares the back wall with a mishmash of local artwork. And, as a woman, it can't go without saying, the bathroom is stocked with feminine products if ya know what I mean. Which is always a nice bonus just in case you find yourself without something when in need. On the downside, there is a scale in the bathroom - which seems counterintuitive in a place where you're selling corn and shrimp bisque and rack of lamb with Yukon gold mashed potatoes. Hopefully you ordered before you went into the bathroom.
Which leads me to the food, which is no less colorful than the decor. For starters, you can choose from grilled scallops "BLT" with garlic aioli, steamed clams and mussels with kale, chorizo and chopped tomatoes or the corn and shrimp bisque. Tonight, we opted for the clams and mussels along with the salad of local Maryland tomatoes topped with roaring 40s blue cheese and a basil-balsamic glaze. The yellow and red tomatoes are arranged beautifully on the platter - their bright colors complemented well with the green basil. The tomatoes were juicy and sweet and there was just enough blue cheese to have a crumble with every bite. I could have used a bit more balsamic, but really no complaints.
The clams and mussels were some of the best I've ever had. They paired beautifully with the spicy, salty chorizo. In addition, the dish was served with a huge hunk of chewy, airy bread to dip in the buttery, winey broth below the mullosks. Sheer briny heaven. And it's also worth a mention that each mussel was plump and cooked perfectly - and for $14.50 there were enough there to feed four people as an appetizer.
Finally, we ended the meal with their veal scallopine. Tender filets of veal were lightly breaded and topped with crisp prosciutto, melted mozzarella and a lemon buerre blanc sauce. Each piece of veal, three to be exact, were placed on top of a small pile of sauteed spinach. It was the perfect amount of food to fill you up but not make you overly full.
On a second visit to Peter's, we enjoyed the ahi tuna with seaweed and the grilled steak salad. Both were equally as impressive and stunningly fresh. For a casual, neighborhood meal with a bit of panache, Peter's is definitely the place to be. Just go early if you don't want to wait, and go on a weeknight if you know what's good for you. Otherwise, get your waiting shoes on because it'll be a long one. But I promise, it'll be well worth it.
RATING: Food - A, Service - B+, Atmosphere - B+

Tuesday, July 15, 2008

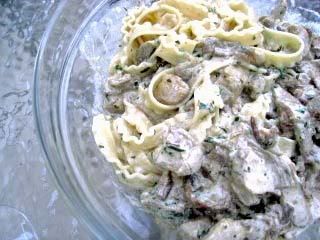
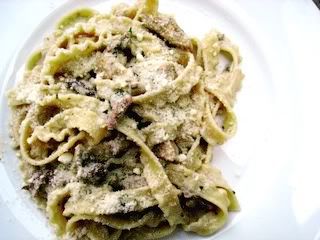
Rosemary Pork and Pasta in a Porcini Mushroom Cream Sauce

Last night I was too tired to go to the grocery store, so I rummaged through my fridge, freezer and cabinets and came up with this pasta dish. I used fresh rosemary from my garden and dried porcini mushrooms to come up with a fragrant cream sauce for my pork and pasta. If I had two pork medallions in my freezer I would have done this meal a bit differently - perhaps searing the pork medallions whole, or even grilling them, and then serving them over a bed of pasta and covered with the Porcini mushroom sauce. I think that would be a nicer presentation so that's how I am writing the recipe. However, I had only one piece of pork so I chopped it up and cooked it in pieces and just tossed it with the pasta. Either way, it made for a very taste, last minute supper for us.

Rosemary Pork and Pasta with a Porcini Mushroom Cream Sauce
Photobucket
Photobucket
2 pork medallions
4 tablespoons olive oil
1 tablespoon of chopped fresh rosemary
3 cloves of garlic chopped
3/4 cup of chopped porcini mushrooms (soak dried mushrooms in hot water for about 15-20 minutes until they are soft. Drain them, reserving the soaking water, rinse them to remove any grit, and chop. Take the reserved soaking water and pour through a sieve coated with a cheese cloth or heavy paper towel to remove grit from the water. Reserve 1/4 cup of the soaking water for your cream sauce.)
Splash of dry white wine
1 cup of chicken broth
3/4 cup of half and half
1 tablespoon of butter
1/4 cup parmesan cheese, grated
pasta of your choosing, enough for two people (fettucine works best I think)

Season the pork with salt and pepper on both sides. If you're grilling the pork, rub both medallions with olive oil and place on the grill. If you're searing the pork, then pour two tablespoons of the oil into a heavy bottom skillet and place on medium heat. Once the oil is hot, place your pork medallions in and let cook for about 3-4 minutes on each side, depending on thickness. Once they are done, remove them from the pan and set aside. Cover with foil to keep warm.

In that same pan, pour the remaining two tablespoons of olive oil. Once it is hot, throw in your chopped garlic cloves. Allow to cook for about a minute or two, then deglaze the pan with a splash of white wine (about 1/8 to a 1/4 cup), scraping up all the browned bits from the pork and garlic. Then add your chopped rosemary, chopped mushrooms and season with salt and pepper. Stir these around until the wine has evaporated and the mushrooms are cooked. Turn the heat off and let sit while you prepare your cream sauce.

In a saucepan, bring your chicken stock and half and half to a boil. Once they come to a boil, reduce the heat to medium low so it can simmer. Whisk in the butter and parmesan cheese along with your reserved mushroom soaking liquid. Allow the mixture to come to a simmer and let thicken slightly. Keep a watchful eye on the sauce and stir with a whisk to prevent burning on the bottom. You can add a squeeze of fresh lemon juice if you want. Once it has reached a saucy consistency add your porcini mushroom mixture and keep warm.

Finally, prepare your pasta pot with salted water and bring to a boil. Add your pasta and cook for the required time, according to package directions. Once you've drained your pasta, place a pile of noodles on each plate, top with your pork medallion and then pour your porcini mushroom cream sauce over the top. Garnish with a sprig of fresh rosemary and some chopped fresh parsley. Serve with a green salad.

Fig Balsamic Glazed Steaks with Grilled Onions and Japanese Spiced Eggplant

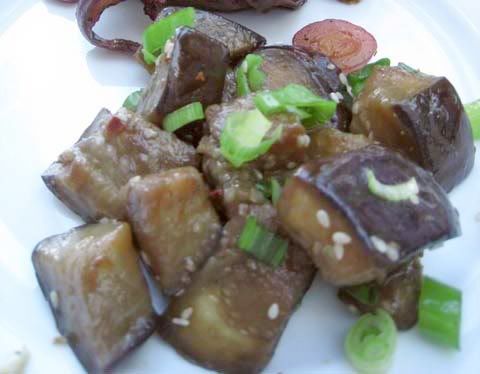
While flipping through some of my food magazines, I came across these two gems. I have to say, my husband and I are total carnivores and I'm always looking for new ways to grill a steak. In the summer, we live at the grill. Chicken, steaks, sausages, pork, fish fillets, shrimp, vegetables, even fruits (grilled pineapple and peaches with vanilla ice cream - sends shivers down my spine just thinking about it!!). Anyway, enough diversion. I found these two recipes to be quite good, especially the fig balsamic glaze used to baste the steaks and grilled onions. My husband isn't such a fan of eggplant, but he indulged me nonetheless. I on the other hand, love eggplant and I thought the spicy flavor of this dish balanced well with the nutty sesame oil. I'd never used Mirin before, but it gave a very nice, bright flavor to the eggplant.

Japanese Spiced Eggplant (recipe from Food & Wine Magazine, Aug. 2008)
Photobucket
1.5 pounds Japanese eggplants, cut crosswise 1 inch thick
Togarashi, for sprinkling (this is a spice blend of sesame seeds, chiles and dried seaweed that can be found at Asian markets)
1/4 cup canola oil
1/4 cup sesame oil
2 tablespoons mirin (rice wine vinegar)
2 tablespoons low-sodium soy sauce
chopped scallions
Lightly sprinkle the eggplants with the Togarashi. In a large skillet, heat 2 tablespoons of the canola oil and 2 of the sesame oil. Once heated, add the eggplant and cook over moderately high heat until browned on the bottom, about 4 minutes. Brush the eggplant with the remaining oil and continue to cook until deeply browned on the bottom and tender. Add the mirin and soy sauce to the pan. Turn the eggplant until glazed and transfer to a platter. Sprinkle with more togarashi and the chopped scallions and serve.

Fig-Balsamic Glazed Grilled Steak and Red Onions (recipe from www.beefitswhatsfordinner.com)
Photobucket
4 New York strip steaks (or any cut of your choosing)
1 medium red onion, cut into moderately thick slices, about a 1/2 inch
1/2 cup of fig preserves, chopped
2 tablespoons of balsamic vinegar
1 tablespoon of oil
1 teaspoon of minced garlic
1/2 teaspoon salt
1/2 teaspoon pepper
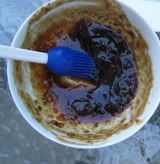
Generously season your steaks with salt and pepper on both sides, as well as your onion slices. Set them aside. Combine the fig preserves, vinegar, oil, garlic, salt and pepper in a bowl. Reserve 1/4 cup for dipping.
Photobucket
Spray your grill with cooking spray and place your steak and onion slices on the hot surface. Brush the steaks and onions with the saucce and grill covered for about 3 to 4 minutes. Open the grill, flip your steaks and onions and baste again. You can also baste intermittently as well to make sure the steaks and onions are well coated. Once they have finished grilling, remove them, sprinkle with salt and pepper to taste and serve with the remaining sauce.

Monday, July 14, 2008

Parsley, Sage, Rosemary and Thyme...


With the price of produce rising at an alarming pace, along with most other items in the grocery store these days, I decided to take matters into my own hands this summer. Back in May, I ventured out to Home Depot and purchased a few herb plants. I just hate when you need a few sprigs of fresh rosemary for a recipe and you have to pay $3.99 a packet for more than you need. I love cooking with fresh herbs, they just add so much vibrant flavor to any dish. And lucky for me, growing fresh herbs really couldn't be easier. You can start them from seeds, but I took the sure-fire success route and just bought already started plants. I potted them in bigger pots with potting soil, placed them in a spot that gets good sunlight, and keep them watered daily. And voila!! Fresh herbs at my disposal. I planted rosemary, oregano, Italian parsley and basil. All four have grown quite lush and give off the nicest aroma on my small little plot of concrete. I have had the pleasure of adding them to fresh vegetables, grilled meats and vegetables, dips, marinades, salad dressings - and the list goes on. I have even taken some rosemary and oregano and placed them in some olive oil to create an infusion. The possibilities are endless! And much less expensive than buying them from the store. The unused portions don't go to waste - they keep on growing! Next year, I think I'll add thyme, sage and cilantro to my collection. It's going to be an absolute herb bonanza :) So don't be afraid to grow your own herbs, even if you don't cook with fresh herbs! They grow easily and quickly and smell heavenly.

Friday, July 11, 2008

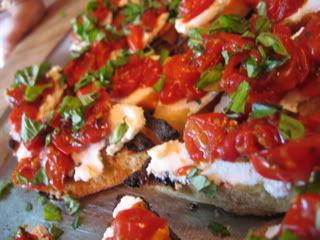
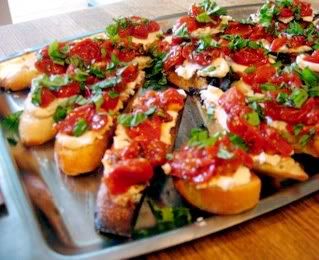
Honey-Tomato Bruschetta with Ricotta

I found this recipe in Food & Wine Magazine and thought it would be the perfect summery appetizer for our family's July 4th picnic. So I whipped this up in no time, and they were gone in a flash! Not one bruschetta was left - even my cousin who can definitely be considered a picky eater, devoured three of them. I did a few things differently than the recipe dictates. First, instead of roasting the tomatoes in the oven, once I tossed them with the oil, honey and herbs, I placed them in a foil pan over the outdoor grill. They cooked up much quicker than in the oven and the smoky grill flavor only added to the rich, tomatoey sauce. Secondly, since I already had the grill hot, I grilled my baguette slices. Again, you can't beat that grill flavor! Just keep a close eye on your breads so they don't burn. Brushing them with olive oil before putting them on the grill will also help. Finally, I omitted the buckwheat honey for two reasons: I didn't have any and I'm not a huge fan of it's strong taste. It reminds me of Guiness a bit. So do what your tastebuds demand. Believe me, no one missed the omission. Enjoy!


Ingredients
2 pints cherry or grape tomatoes, halved lengthwise
1 1/2 tablespoons extra-virgin olive oil
2 tablespoons clover honey
2 teaspoons thyme leaves
1 teaspoon kosher salt
1/8 teaspoon freshly ground pepper
12 baguette slices, cut 1/2 inch thick on the bias
1 cup fresh ricotta (8 ounces)
1 tablespoon buckwheat or chestnut honey
6 basil leaves, thinly sliced or torn
Directions:
Preheat the oven to 300°. Line a large rimmed baking sheet with parchment paper. In a large bowl, toss the tomatoes with the olive oil, honey, thyme leaves, salt and pepper. Scrape the tomatoes onto the prepared baking sheet and turn them cut side up. Bake the tomatoes for about 1 hour and 25 minutes, until they begin to shrivel and brown. Let cool.
Preheat the broiler. Spread out the baguette slices on a baking sheet. Broil for about 30 seconds on each side, until the edges are golden brown.
Spread the ricotta over the baguette slices and top with the slow-roasted tomatoes. Lightly drizzle the tomatoes with the buckwheat honey, sprinkle with the sliced basil and serve with additional buckwheat honey on the side.
MAKE AHEAD The roasted tomatoes can be refrigerated for up to 2 days. Bring to room temperature before serving.

Thursday, July 10, 2008

Lime In The Coconut - well, sort of...

Authentic Brazilian caipirinhas are plentiful in Buzios, where the sun slowly sets on the town's beautiful boat-filled harbor.

So the catalyst for this blog was all the great food and drink we had on our recent honeymoon to beautiful Brazil. For years, my husband, whose mother was Brazilian, had raved to me about authentic feijoada and refreshing caipirinhas. Finally I got to experience it for myself - and people, I'm hooked!
We spent three days in Rio De Janiero, amid Ipanema and Copacabana Beach. From there we went to Buzios, a small, beach town, known as the Hamptons of Brazil. It was gorgeous! A quaint fishing harbor, cobblestone streets, fabulous seafood restaurants, 10 different and magnificent beaches, great scenery and friendly people. Our final stop was Trancoso, in the state of Bahia. We stayed at Villas De Trancoso, http://www.mybrazilianbeach.com/. It was sheer paradise! We had our own private villa and shared the whole property with only one other couple. The staff, food, accomodations, beach and activities were some of the finest in Brazil. And so were the caipirinhas! And boy did we have our fill. 33 to be exact! They handed us our itemized bill after our 5 day stay and I think we had more caipirinhas than anything else - although we did find time for mountain biking, kayaking, horseback riding and tons of swimming. Needless to say, caipirinhas were the biggest seller among the two of us. So it's fitting that I name this blog, Lime In The Coconut, since we spent many an afternoon under the palm trees sipping these limey concoctions. It's also fitting that I bought a wooden muddler and have finally perfected a caipirnha recipe at home.
First though, a little info about the caipirinha (pronounced kai-per-een-ya). It is the national drink of Brazil that is made with cachaca (pronounced ca-sha-sa), fresh lime juice and granulated sugar (and lots of ice). Cachaca is a liqour derived from sugar cane. It is not rum though! However, you can make a caipirinha with other liquors, like rum, but they go by different names. For example, a caipirissima is what it is called when you use rum. A caipiroska is what the drink is called when made with vodka. Another variety is a caipifruta, which is made with cachaca and any type of crushed fruit you want, strawberries, mango, passion fruit etc. Our favorite though, is the traditional caipirinha, which I think you'll also enjoy. Let's get muddlin'!


Traditional Caipirinha
1 whole lime, cut into about 12 small pieces
2 heaping tablespoons of extra fine granulated sugar (it dissolves the best)
6 oz of Cachaca (51 Brand is pretty easy to find and works well in caipirinhas)
1 wooden muddler, or the blunt end of a wooden spoon or cooking utensil
1 tumbler glass
1 cup of ice
Once you have cut up the lime, place it in the tumbler and top with the two tablespoons of sugar. Take your muddler and begin crushing the juice out of the limes and mashing them with the sugar. The acid in the lime juice will begin to breakdown the sugar and form a syrupy consistency in your glass.
Next fill the glass with ice (you can use crushed or cubes, whichever you prefer). Once you've done that pour in your cachaca to fill the glass. Grab a cocktail shaker or larger glass so that you can mix up the ice, cachaca and sugary lime syrup. Once the concoction is thoroughly mixed, garnish the glass with a lime wedge, throw in a straw and start drinking. You can add more sugar if it's not sweet enough for you. Enjoy!


Wednesday, July 9, 2008

Inspiration Pizza


I call this Inspiration Pizza because it was inspired by some leftovers and odds and ends we had in the fridge - a piece of grilled chicken, some roasted garlic, half of a vidalia onion and a package of mozzarella slices. Then I went to the store and picked up some pizza dough (which was a gamble because I'd never tried this particular brand before) as well as an eggplant, some portobello mushroom caps and a package of thinly-sliced procuitto and went to work! I grilled prosciutto as well as the vegetables beforehand, then grilled the fresh pizza dough as well, then topped it with a roasted garlic cream sauce, the cheese, the veggies, the chicken and the crumbled prosciutto. It was one hearty slice of pie!
1 piece of grilled chicken, shredded, sliced or cut into cubes
1 bulb of roasted garlic, removed from the skins and mashed into a paste seasoned with salt, pepper and olive oil
1/2 cup half and half
Small handful of Parmesan cheese
1 tb butter
1 vidalia onion (if you want less onion use half), sliced thin
1 small Japanese eggplant, sliced into medallions or half-moon pieces
2 Portobello mushroom caps, sliced
1 tb fresh rosemary, chopped
1 tb fresh oregano, chopped
1 package of Prosciutto, sliced thinly
1 package of shredded Mozzarella or Mozzarella slices
1 fresh pizza dough
Set the chicken aside for now. Meanwhile, pour the half and half into a small saucepan along with the tablespoon of butter and put over medium heat. Whisk in the roasted garlic paste and Parmesan cheese. When the mixture comes to a boil turn the heat down to low and let it simmer and thicken into a cream sauce on the stove top. Keep whisking to avoid burning and once it thickens take it off the heat and cover.
Preheat your outdoor grill or a grill pan. Toss the sliced vegetables (onion, eggplant and mushrooms) with three tablespoons of olive oil and the chopped herbs. Season with salt and pepper and place on the grill. You may want to use a vegetable basket on the outdoor grill. Grill the vegetables until tender and remove from the grill. Set aside.
Spray your grill or grill pan with cooking spray and place the Prosciutto slices down. They are thin and will cook quickly so watch them or they will burn. After about a minute or two on each side, remove the crisped Prosciutto slices. Once they have cooled you can crumble them into large pieces.
Finally, take your pizza dough and form it out to a rectangular shape on a baking sheet. Rub olive oil on the formed dough and place it onto a hot, oiled grill. Once the dough begins to puff, flip it to cook the other side. Once you have flipped the dough, while still on the grill, add your Mozzarella cheese slices. Top the cheese with your garlic cream sauce. Then layer on the grilled vegetables, chicken and crumbled Prosciutto. Close the grill cover. Let the dough continue to cook until done, probably only 3-4 minutes, meanwhile the cheese will melt. Open the lid, remove the pizza and serve. It's best sprinkled with Parmesan cheese and red pepper flakes. Enjoy with a nice Pinot Noir or Chianti.

Hello!!

Welcome to my recipe/restaurant review and general food blog! I'm a newlywed and figured since I now have this nice, new set of All-Clad pots and pans, along with a ton of other brand new kitchen gadgets and accessories, that I would finally start chronicling my times in the kitchen. I've always loved to cook and experiment with new foods. I wouldn't say I'm a gourmet by any means, but I do try and fortunately my husband is willing to eat most anything I attempt to make. So through this blog I'll share recipes, creations and even the occassional restaurant review or kitchen gadget review.
The best thing about it is I'll finally be cooking with professional-style cookware. Before the wedding, our kitchen was made up of hand-me down ceramics, Ikea utensils that you could probably bend with enough mind concentration, Teflon-coated pots and pans (hmm I don't remember putting pepper in my scrambled eggs, what are those black dots??), and a butcher block of complimentary knives - five of which the blade broke right off mid-cut. I can finally go from stovetop to oven, finally make a quiche in a real tart pan, finally grate lemon zest on a microplane and finally bid adieu to my broken chopper.
So let the games begin!!! Watch out Giada and Rachael Ray, this Italian girl is getting her turn at the flames.