Tuesday, March 31, 2009

Pork-and-Beans Stuffed Peppers

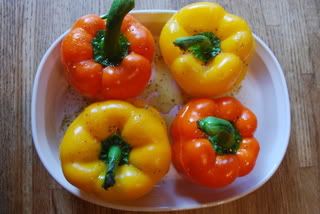
I saw this recipe in my latest issue of Rachael Ray magazine and it looked so delicious. I love traditional stuffed peppers and this was a twist on that. This could easily be made vegetarian if you prefer too. I love the combination of the beans, salty prosciutto (I used that instead of Canadian bacon), and creamy mozzarella cheese. This was easy to prepare and makes either a great side dish or a main course, depending on how hungry you are! Enjoy!

Pork-and-Beans Stuffed Peppers
Source: Rachael Ray Magazine
Photobucket
4 bell peppers, tops sliced off and reserved, ribs and seeds discarded (This would have easily filled 5 peppers if you add the extra cheese, the onion and use canned tomatoes instead)
3 tablespoons extra-virgin olive oil
Salt and pepper
1/4 pound Canadian bacon, chopped (I crisped up a package of prosciutto instead)
3 cloves garlic, chopped
1 small sweet onion, diced
1 teaspoon dried oregano (I had fresh basil and oregano on hand, so I used about a handful of a combo of both)
One 15-ounce can cannellini beans, rinsed
2 tomatoes, chopped (I used a standard can of Fire Roasted Diced Tomatoes)
4 ounces mozzarella cheese, cut into cubes (about 1 cup) (I used 8 oz)
1/2 cup breadcrumbs
1. Preheat the oven to 350°. Rub the peppers with 2 tablespoons olive oil; season with salt and pepper. Stand in a baking dish, cover with the tops and roast for 30 minutes.
Photobucket
2. Meanwhile, in a medium skillet, heat 1/2 tablespoon olive oil over medium heat. Add the bacon and cook until browned, about 4 minutes; transfer to a medium bowl. In the same skillet, heat the remaining 1/2 tablespoon olive oil. Cook the garlic and oregano until fragrant, about 2 minutes; stir into the bacon along with the beans, tomatoes, mozzarella and breadcrumbs. Season with salt and pepper.
3. Fill the peppers with the bean mixture; return to the oven and heat through, about 15 minutes. Set the tops into place.

Thursday, March 26, 2009

Barefoot Bloggers: Tomato and Feta Cheese Tarts

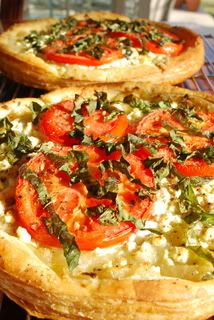
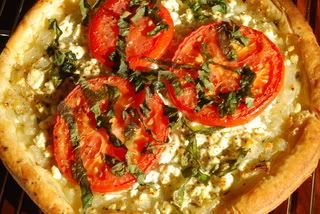
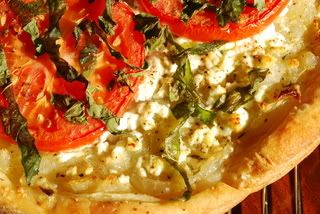
Ok so that wasn't the original recipe. The original was tomato and goat cheese tarts. However, I'm the only one in my family who likes goat cheese so I had to substitute feta. No problem! These were a hit nonetheless. I made them as an appetizer before dinner. Instead of making 4 individual tarts, I made two larger ones and cut it into wedges.
Photobucket
I loved the flavor and the light, flaky puff pastry crust. I would definitely make these again, but I would probably cover the top with more tomato slices. I found it pretty onion heavy for being called a "Tomato" and Goat Cheese tart. Still good, just needed more tomato.
Here's the recipe if you want to give them a try too! And check out Barefoot Bloggers Blogroll to see how everyone else did with this week's challenge. Enjoy!

Tomato and Goat Cheese Tarts
source: Ina Garten
Photobucket
1 package (17.3 ounces/2 sheets) puff pastry, defrosted
Good olive oil
4 cups thinly sliced yellow onions (2 large onions)
3 large garlic cloves, cut into thin slivers
Kosher salt and freshly ground black pepper
3 tablespoons dry white wine
2 teaspoons minced fresh thyme leaves
4 tablespoons freshly grated Parmesan, plus 2 ounces shaved with a vegetable peeler
4 ounces garlic-and-herb goat cheese (recommended: Montrachet)
1 large tomato, cut into 4 (1/4-inch-thick) slices
3 tablespoons julienned basil leaves
Directions
Unfold a sheet of puff pastry on a lightly floured surface and roll it lightly to an 11 by 11-inch square. Using a 6-inch wide saucer or other round object as a guide, cut 2 circles from the sheet of puff pastry, discarding the scraps. Repeat with the second pastry sheet to make 4 circles in all. Place the pastry circles on 2 sheet pans lined with parchment paper and refrigerate until ready to use.

Preheat the oven to 425 degrees F.

Heat 3 tablespoons of olive oil in a large skillet over medium to low heat and add the onions and garlic. Saute for 15 to 20 minutes, stirring frequently, until the onions are limp and there is almost no moisture remaining in the skillet. Add 1/2 teaspoon salt, 1/4 teaspoon pepper, the wine, and thyme and continue to cook for another 10 minutes, until the onions are lightly browned. Remove from the heat.

Using a sharp paring knife, score a 1/4-inch-wide border around each pastry circle. Prick the pastry inside the score lines with the tines of a fork and sprinkle a tablespoon of grated Parmesan on each round, staying inside the scored border.

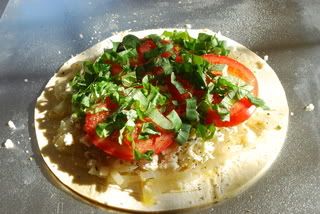
Place 1/4 of the onion mixture on each circle, again staying within the scored edge. Crumble 1 ounce of goat cheese on top of the onions. Place a slice of tomato in the center of each tart. Brush the tomato lightly with olive oil and sprinkle with basil, salt, and pepper. Finally, scatter 4 or 5 shards of Parmesan on each tart.
Photobucket
Bake for 20 to 25 minutes, until the pastry is golden brown. The bottom sheet pan may need an extra few minutes in the oven. Serve hot or warm.
Photobucket

Monday, March 23, 2009

Poblano Potato Gratin

I saw this recipe in an issue of Gourmet Magazine and it sounded delicious. However, it also sounded like it was lacking something - cheese. Don't au gratins mean cheese??? I thought scalloped potatoes were the ones without cheese and au gratin were the ones with cheese? Can anyone shed some light on this culinary dilemma? Either way, no matter what the rules, I'd probably add cheese. Which is what I did here.
The original recipe doesn't call for any cheese but I added about a cup of grated sharp cheddar cheese and then sprinkled the top of the gratin with a generous handful of grated romano cheese. So if you're a cheese ADDICT like myself, then do what I did. But if not and you're one of those fools trying to watch your calories and fat intake blah blah blah...then follow the regular recipe. (wink wink). I'm just kidding! I'm just jealous that people actually have that much self-control because I am thankful every day that I'm not lactose intolerant. So bring on the cheese and potatoes! This Mexican-style au gratin is the perfect accompaniment to fish, chicken or beef. Enjoy!

Poblano Potato Gratin
source: Gourmet Magazine
Photobucket
1.5 lbs fresh poblano chiles (about 5)
1 lb onions
1 tbsp vegetable oil
3 lbs large Yukon Gold potatoes
1.5 cups heavy cream
3/4 cup whole milk

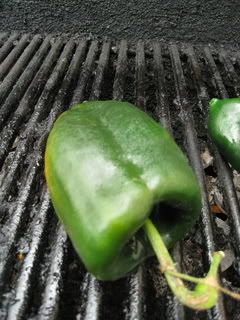
Roast chiles and make rajas. Roast chiles on their sides on racks of gas burners (or on the grill. Grill on high and turn with tongs until skins are blackened all over.)
Photobucket
Photobucket
About 10 minutes. Immediately transfer to a bowl, cover with plastic wrap and let sit for 10 minutes. When chiles are cool enough to handle, peel or rub the skin off. Slit the chiles lengthwise, stem, seed and devein them, then cut into strips.
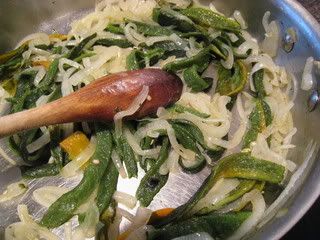
Cook onions in 1 tsp salt and your vegetable oil over medium-low heat until golden, about 8 minutes. Stir in your strips of poblano peppers and remove from the heat.
Photobucket
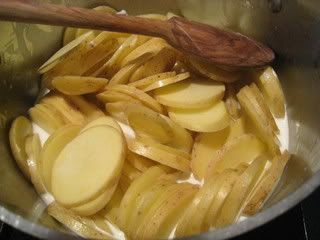
Make gratin. Preheat the oven to 400 degrees with the rack in middle. Generously butter a 3-qt shallow baking dish. Peel the potatoes and cut them into 1/16 inch thick slices with a slicer. Transfer to a small heavy pot. Add cream, milk and 1 tsp salt and bring just to a boil over medium heat, stirring occasionally.
Photobucket
If you're using a cup of shredded cheddar, stir it in at this point along with your "rajas mixture" (poblano and onions), then pour evenly into your baking dish. Sprinkle the top with grated romano cheese, if using, and bake until potatoes are tender, 45 minutes to 1 hour.
Photobucket
Let stand 15 minutes before serving.
Photobucket

Saturday, March 21, 2009

Cherry Blossom Inspired Cocktails

Check out the article and photo gallery I did for DC Metromix on Cherry Blossom Inspired Cocktails!
Cherry Blossom Inspired Cocktails .
Anyone out there come up with their own cherry cocktail for the famed DC Cherry Blossom Festival?? If so share away!!

Monday, March 16, 2009

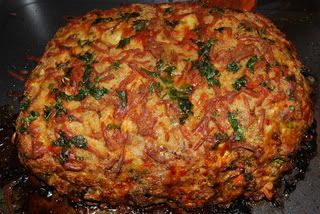
Williams-Sonoma Cheesy Meatloaf

I love Williams-Sonoma. I love their store. I love their products. I love their catalog. I love their recipes. For my wedding, it was the first place I registered, and if it was up to me it would have been the only place. My love of this store has been a long time in the making too. I was probably the only middle-schooler who enjoyed trips to Williams-Sonoma with their mother. Ever since my first visit, it's been like a gleaming palace of all things wonderful about the kitchen and cooking. Beautiful cookware, tons of gadgets and recently I'm realizing, great recipes. This meatloaf recipe was featured in one of the recent catalogs and I instantly ripped it out and put it up on the fridge in the hopes of making it sometime soon.
Photobucket
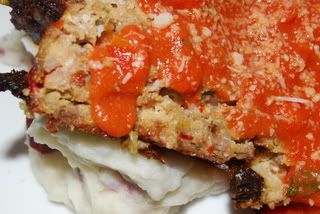
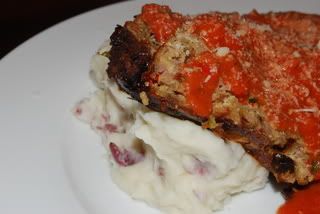
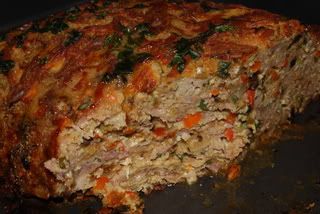
I finally got around to it last week. What a perfect meatloaf recipe! Moist, flavorful and a little more exciting than your traditional beef brick. So...don't let your meat loaf - get up and make this delicious meal soon! I served it with garlic mashed potatoes and topped it with a creamy tomato vodka sauce. It was quite good.
Photobucket
Enjoy!


Cheesy Meatloaf
Williams-Sonoma Magazine
Photobucket
4 Tbs. extra-virgin olive oil
2 carrots, cut into 1/4-inch dice
2 celery stalks, cut into 1/4-inch dice
1 red pepper, diced
1 onion, cut into 1/4-inch dice
1/2 oz. dried wild mushrooms, soaked in 1 cup hot water,
chopped, soaking liquid reserved (I used Porcini)
3 garlic cloves, minced
2 1/4 cups fresh bread crumbs
1 Tbs. plus 1/4 cup minced fresh flat-leaf parsley
2 oz. mozzarella cheese, shredded, plus 6 oz., cut into 1/2-inch cubes
(I used 8 oz of cubed fresh mozzarella instead of 6 oz)
Salt and freshly ground pepper, to taste
2 lb. ground beef (80% lean) (I used 1 lb of ground turkey and 1 lb of hot Italian sausage links - I highly recommend it!)
2 eggs, lightly beaten
1/2 tsp. minced fresh thyme
Mashed potatoes for serving (see related recipe at left)
Directions:
Position a rack in the lower third of an oven and preheat to 350°F. Coat the bottom of a roasting pan with 1 Tbs. of the oil.

In a deep sauté pan over medium-high heat, warm 2 Tbs. of the olive oil. Add the carrots, celery and onion and sauté until tender and starting to caramelize, 8 to 10 minutes. Add the mushrooms and garlic and sauté for 1 minute. Let cool for 10 minutes.

In a bowl, combine 1 1/2 cups of the bread crumbs and 1/3 cup of the mushroom soaking liquid and soak for 5 minutes. In another bowl, combine the remaining 3/4 cup bread crumbs, the 1 Tbs. parsley, the remaining 1 Tbs. olive oil, shredded cheese, salt and pepper.

In a large bowl, using your hands, gently mix together the ground beef, soaked bread crumbs, vegetable mixture, eggs, the 1/4 cup parsley, thyme, cubed cheese, salt and pepper. Transfer the mixture to the prepared pan and shape into a 10-by-5-inch loaf. Cover the top and sides of the meat loaf with the cheese-bread crumb mixture.

Bake until an instant-read thermometer inserted into the center of the meat loaf registers 165°F, about 1 hour and 10 minutes. Let the meat loaf rest for 5 minutes before slicing. Serve with mashed potatoes. Serves 8.
Photobucket

Saturday, March 14, 2009

Barefoot Bloggers: Chicken Piccata and Sauteed Broccolini

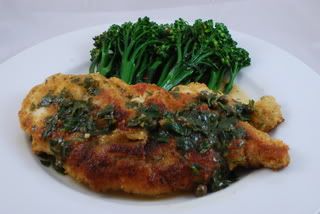
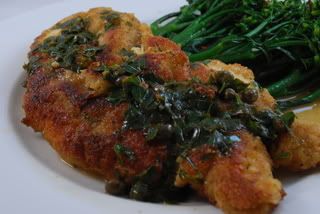
This week's Barefoot Blogger challenge was Chicken Piccata. I just made Chicken Piccata by Giada from Everyday Italian a few posts ago, so I was intrigued to try another Food Network Chef's recipe. They were both very similar, except that Ina's includes breading the chicken with breadcrumbs - which I really liked. It helped keep the chicken moist and crispy. I followed this recipe to the letter but did add about a handful of capers because I like them in Chicken Piccata. In fact, that's probably the only dish I like them in. This was a fabulous, easy, go-to weeknight meal. Ina hits it out of the park again!
Photobucket
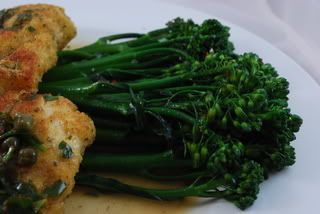
The sauteed broccolini was one of the bonus recipes for the month, but I thought it was a perfect thing to serve with this light and lemony chicken. It was the perfect compliment. I followed her recipe but did add a few shakes of red hot pepper flakes to kick it up a notch. It added a nice spicy bite to the broccolini. Enjoy!

Chicken Piccata
Source: Ina Garten, The Food Network
Photobucket
2 Servings (This is one of Ina's only recipes where the serving size was actually correct! Usually her recipes make enough of to feed an army but they say 4 servings. Anyway, on to the recipe.)
* 2 split (1 whole) boneless, skinless chicken breasts
* Kosher salt and freshly ground black pepper
* 1/2 cup all-purpose flour
* 1 extra-large egg
* 1/2 tablespoon water
* 3/4 cup seasoned dry bread crumbs
* Good olive oil
* 3 tablespoons unsalted butter, room temperature, divided
* 1/3 cup freshly squeezed lemon juice (2 lemons), lemon halves reserved
* 1/2 cup dry white wine
* Sliced lemon, for serving
* Chopped fresh parsley leaves, for serving

Directions

Preheat the oven to 400 degrees F. Line a sheet pan with parchment paper.

Place each chicken breast between 2 sheets of parchment paper or plastic wrap and pound out to 1/4-inch thick. Sprinkle both sides with salt and pepper.

Mix the flour, 1/2 teaspoon salt, and 1/4 teaspoon of pepper in a shallow plate. In a second plate, beat the egg and 1/2 tablespoon of water together. Place the bread crumbs on a third plate. Dip each chicken breast first in the flour, shake off the excess, and then dip in the egg and bread crumb mixtures.

Heat 1 tablespoon of olive oil in a large saute pan over medium to medium-low heat. Add the chicken breasts and cook for 2 minutes on each side, until browned. Place them on the sheet pan and allow them to bake for 5 to 10 minutes while you make the sauce.

For the sauce, wipe out the saute pan with a dry paper towel. Over medium heat, melt 1 tablespoon of the butter and then add the lemon juice, wine, the reserved lemon halves, 1/2 teaspoon salt, and 1/4 teaspoon pepper. Boil over high heat until reduced in half, about 2 minutes. Off the heat, add the remaining 2 tablespoons of butter and swirl to combine. Discard the lemon halves and serve 1 chicken breast on each plate. Spoon on the sauce and serve with a slice of lemon and a sprinkling of fresh parsley.

Sauteed Broccolini
Photobucket
1 bunch broccolini
Kosher salt
2 tablespoons unsalted butter
1/2 lemon, zested (I left this out - I'm not a fan of zest)
1 teaspoon minced garlic
1 tablespoon lemon juice
1/4 teaspoon freshly ground black pepper

Blanch the broccolini in a large pot of boiling salted water for 2 minutes. Drain immediately and immerse in a bowl of ice water.

Melt the butter in a large saute pan. Add the lemon zest and garlic and stir. Drain the broccolini and add it to the garlic mixture and heat for 2 minutes. Add the lemon juice, 1/2 teaspoon salt and the pepper, and toss well before serving.

Tuesday, March 10, 2009

Lent Food: Baked Grouper with Wild Mushrooms

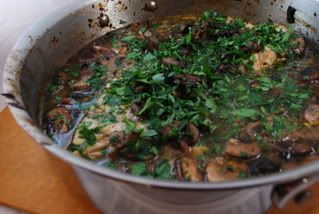
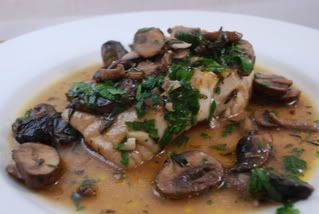
It's Lent. So for millions of Catholics that means no meat on Friday. And that includes me. The good thing about this is, I love fish. Any and all kinds of fish. I have never made grouper before so Lent seemed like the perfect time to give it a try.
Photobucket
I found this recipe on The Food Network , from Mario Batali. I love his show and his real down-home, in the country, my grandmother-did-it-this-way approach to Italian cooking. And his orange clogs are hot. Meaning Paris Hilton, "hot", not "sexy" hot. Anyway, on to the recipe.

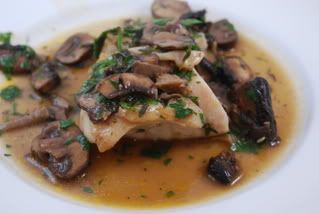
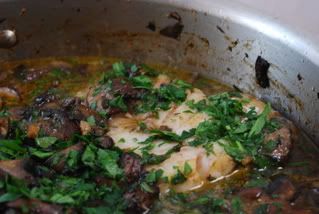
Overall, I really liked this dish. It's very mushroom heavy and woodsy, so be prepared for that if you aren't a big mushroom fan. I absolutely adore any mushroom that comes my way so this obviously wasn't a problem for me.
Photobucket
I did find though that the sauce was a bit too winey (and I'm a no-holds barred, I'm not embarrassed to admit it WINO - and it was still too winey for me). On top of that, I think the sauce was too watery. If I was to make this again, which I will, then I would cook the fish in the saute pan and then remove it. Then I would start the sauce, bring it to a boil to cook the winey taste out a bit, and then thicken it up by reducing it and possibly adding some extra butter and maybe a little cornstarch (don't hate me Mario!!!). Otherwise, deeeeelish. Enjoy!

Baked Grouper with Wild Mushrooms
Mario Batali
Photobucket
4 tablespoons plus 4 tablespoons extra-virgin olive oil
1/2 pound each chanterelle, portobello and oyster mushrooms, each in 1/4-inch slices
4 cloves garlic, thinly sliced
2 tablespoons tomato paste
1 tablespoon thyme leaves
4 (5-ounce) pieces grouper fillet
Salt and pepper
1 1/2 cups dry white wine
1 bunch Italian parsley, coarsely chopped to yield 1/4 cup
Directions
Preheat the oven to 400 degrees F.

In a 12 to 14-inch ovenproof saute pan, heat 4 tablespoons of oil until smoking. Add the mushrooms and garlic and saute 3 minutes. Add the tomato paste and thyme, and continue to cook 5 minutes. Remove the mixture to a bowl and set aside.

Season the fish well with salt and pepper. Heat the remaining oil in the same pan and add the fish. Saute until deep golden brown on the first side. Carefully turn the fish, add the wine, and return the mushroom mixture to the pan. Put the pan into the oven and cook for 4 minutes, until fish is cooked through. Remove from oven, sprinkle with parsley and serve.
Photobucket

Tuesday, March 3, 2009

Tropical Carrot Cake with Coconut Cream Cheese Frosting

That's a beautiful title for a post isn't it? It needs no sprucing up. Just the facts right there. Love it!
I love carrot cake. It's a vegetable in a cake so by girl math, I can eat this and not feel super guilty. It is chock full of beta carotene! Who cares what it's doing to my thighs when it's improving my eyes? Right? Just say right and no one gets hurt.
Photobucket
I made this Tropical Carrot Cake for Valentine's Day, hence the heart shape. I saw the recipe over at Dinner and Dessert, a lovely blog full of yummy baked goodies. This was hands-down one of the most delicious cakes I've ever had in my life. It's Moist (yes, with a capital M), filled with sweet carrot and tangy pineapple flavor, nutty, coconutty and topped off with literally THE BEST TASTING CREAM CHEESE ICING EVER! I'm not ashamed to admit that I gleefully licked both beaters after whipping that icing up.
The one thing I would add next time I make this is raisins. I love raisins in my carrot cake. I think I'd add golden raisins because they are so plump and juicy. It would add to the bumpy landscape of a slice of this enormous cake. And enormous it is. It's a 3-layer cake! But it makes such a beautiful presentation. You'll love it. And you'll love eating it all week long.
I can't take credit for the beautifully smooth icing job on this. My mom took over for me on the decorating part because I can not decorate a cake. Why? First of all, I think it's because I'm left-handed. Second of all, I don't have the patience. So thanks mom!
Excuse the dark pics - my mom's house come evening, is not the best place for photo taking. But you get the idea...

Tropical Carrot Cake with Coconut Cream Cheese Frosting
source: The Pastry Queen, by Rebecca Rather
Photobucket
1 cup macadamia nuts (I recommend chopping these up or crushing them)
3 cups all purpose flour
3 cups sugar
1 tbsp baking soda
1 tsp salt
1 tbsp ground cinnamon
1/2 tsp ground nutmeg
1-1/2 cups sweetened flaked coconut
4 large eggs
2 tbsp vanilla
1-1/2 cups vegetable oil, such as canola or safflower
1-1/2 cups shredded peeled carrots
1-1/2 cups diced fresh pineapple or drained crush canned pineapple (this is one 20 oz. can)
1/2 cup sweetened cream of coconut, such as Coco Lopez

Coconut-Cream Cheese Frosting
3 (8 oz) packages cream cheese, at room temperate (I used 4 packages)
1-1/2 cups powdered sugar (I used 2 cups)
1/4 cup heaving whipping cream (I used 1/4 cup + 4 tsp)
1/4 cup sweetened cream of coconut, such as Coco Lopez (I used 1/4 cup + 4 tsp)
1/2 tsp salt (I used 1/2 tsp + 1/8 tsp)

To Make the Cake:
Preheat the oven to 350F. Arrange the nuts on a baking sheet in a single layer and toast them for 7 to 9 minutes, until golden and aromatic. Set aside to cool.

Place one oven rack one-third from the bottom of the oven and the second two-thirds from the bottom. Preheat the oven to 350F. Line three 9-inch cake pans with parchment paper rounds, grease with butter, and dust with flour (or spray with Baker’s Joy).

Stir together the flour, sugar, baking soda, salt, cinnamon, nutmeg, coconut, and nuts in a large bowl. In another large bowl, whisk together the eggs, vanilla, oil, carrots, pineapple, and cream of coconut. Pour the egg mixture into the flour mixture and stir until combined.

Pour the batter into the prepared cake pans. Stagger the cake layers on the oven racks so that no layer is directly over another. Set 2 layers on one rack and the third on the other. Bake for 30 to 35 minutes. The cakes are done when they are golden brown on top and a toothpick inserted into the center comes out clean. Cool the cakes in their pans on racks for 5 minutes, then invert them onto the racks and cool completely, about 15 to 20 minutes.

To Make the Frosting:
Using a mixer fitted with a paddle attachment, beat the cream cheese and powdered sugar in a large bowl on medium-high speed about 1 minute. Add the whipping cream, cream of coconut, and salt; beat until combined.

Place 1 cake layer on a serving plate and spread a thick blanket of frosting on top. Add the second layer, spread thickly with frosting, and top with the third layer. Cover the top and sides of the cake with an even layer of frosting. If you’re feeling energetic and there is frosting left over, use a pastry bag fitted with a decorative tip to pipe a decoration around the top rim of the cake.

The cake can be covered with plastic wrap and refrigerated up to 4 days. Let it cool in the refrigerator about 1 hour before covering, to ensure the frosting has hardened and will not stick to the plastic wrap.

Yield: 12-14 Servings.

Monday, March 2, 2009

Week 3: It's gonna hurt!

I started week 3 today and I already know it's going to be a tough one. Running 2 miles after doing level 2 of the 30-day Shred is very tiring. On top of that, it's snowing like a mother on the east coast today. So after getting up early, working out (or rather, having my ass kicked by cardio), I then had to go outside and shovel my car out of the snow. Needless to say, I'll probably be in bed by 8 p.m. tonight. I'm dreading Wednesday this week. I'm supposed to run 4 miles after doing Jillian's masocistic workout (when she says, "Just give me five more" I seriously want to punch the television set. Fortunately it's suspended on a shelf from the ceiling and I can't reach it or I think Jillian would have been a goner by now!). I already know how hard those 4 miles are going to be and am already not looking forward to it. But I will do it!! I may have to back off on the mileage a bit though, but I'm going to go into it with 4 miles on the brain. If I feel like I'm going to die though, I will cut it back to 3 and a half, or maybe just 3. We'll see.
Hope you're enjoying your winter workout as much as I am! Ha.